Page 1 2
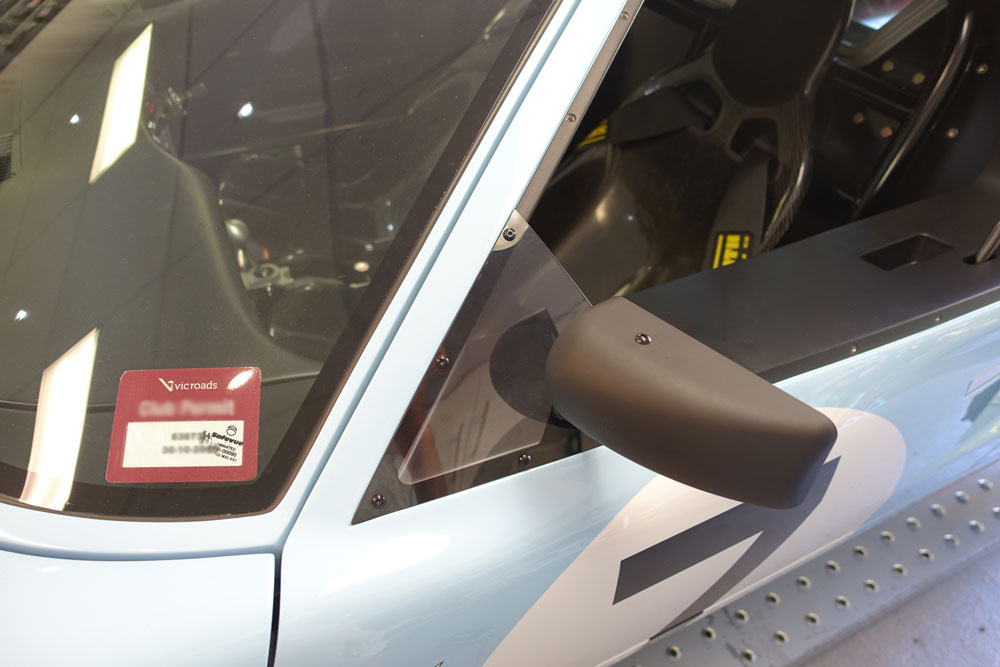
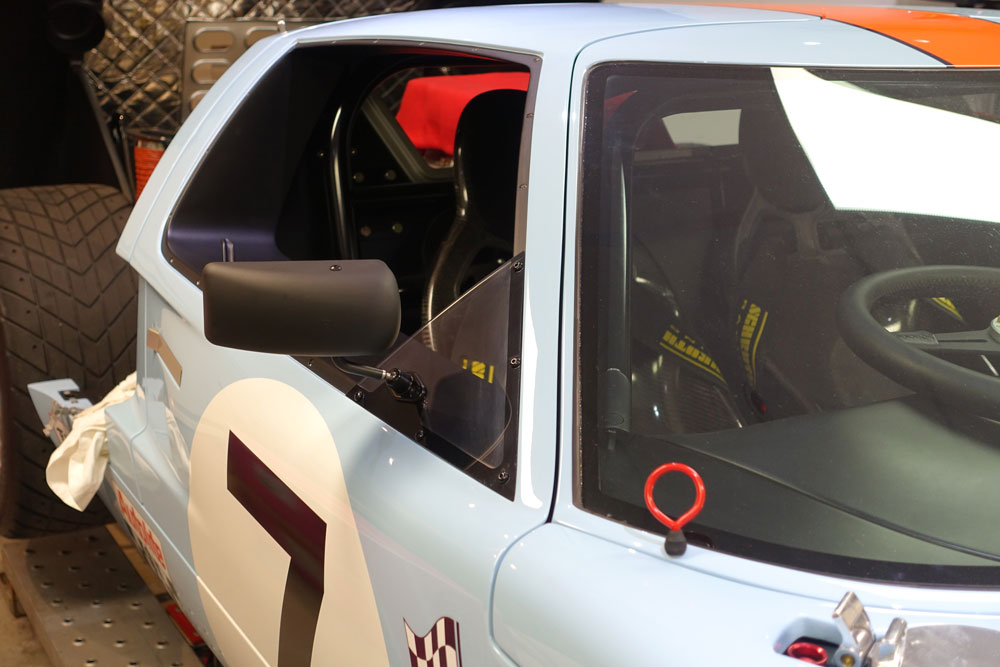
Side Mirrors
The mounts for the side mirrors when the windows are fitted were made out of Lexan. Even with A/C driving the car without side windows is great.
After masking I painted the supports with polycarbonate paint used for polycarbonate R/C car bodies.
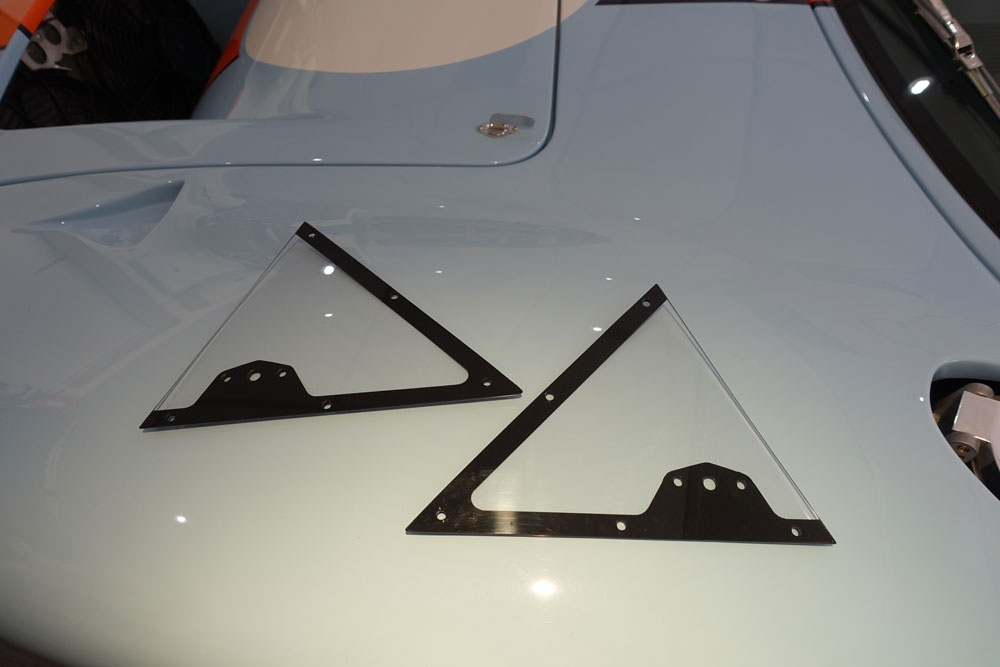
After fixing to the car they offer great visability for such small mirrors.
Update : 19th December, 2015
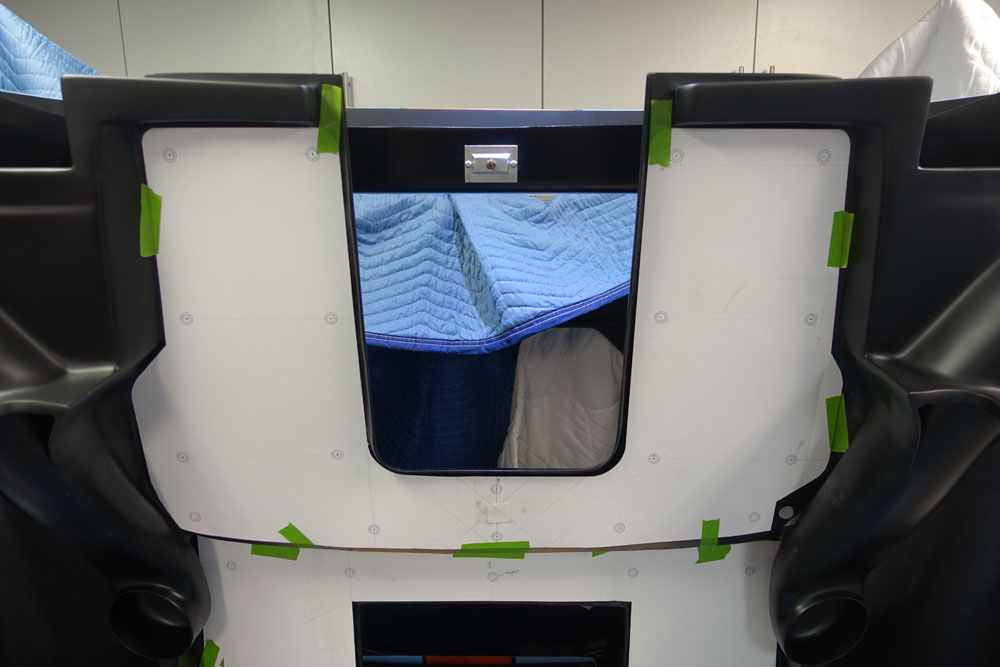
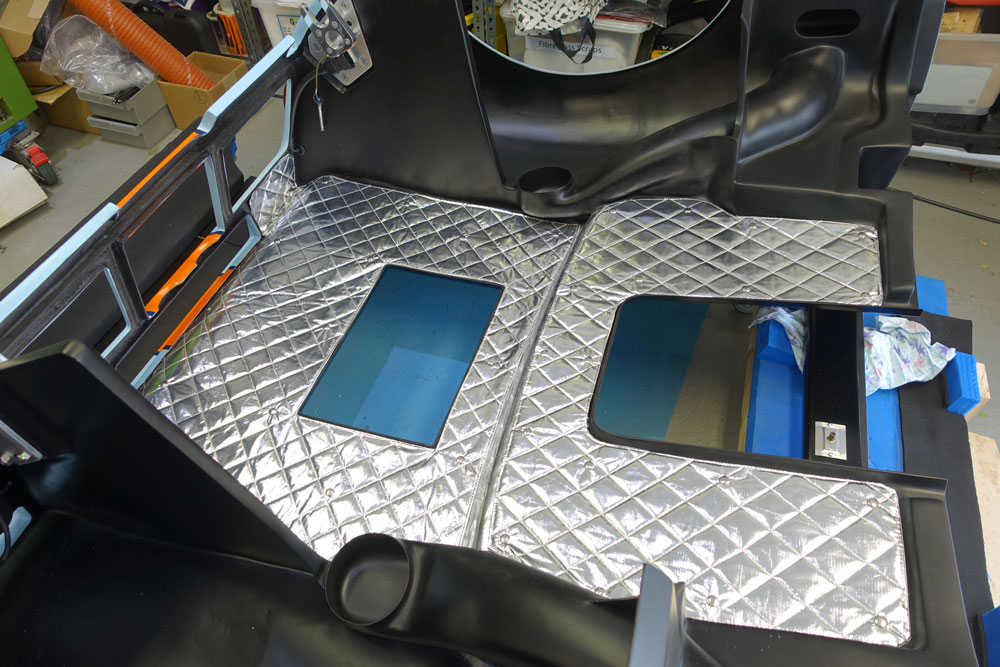
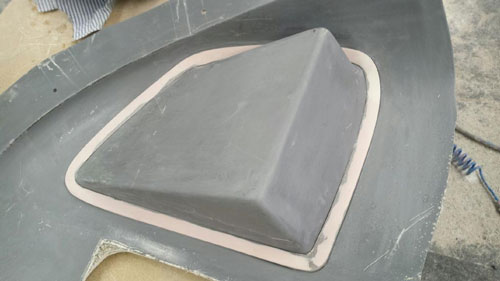
Rear Clip Heat Shields
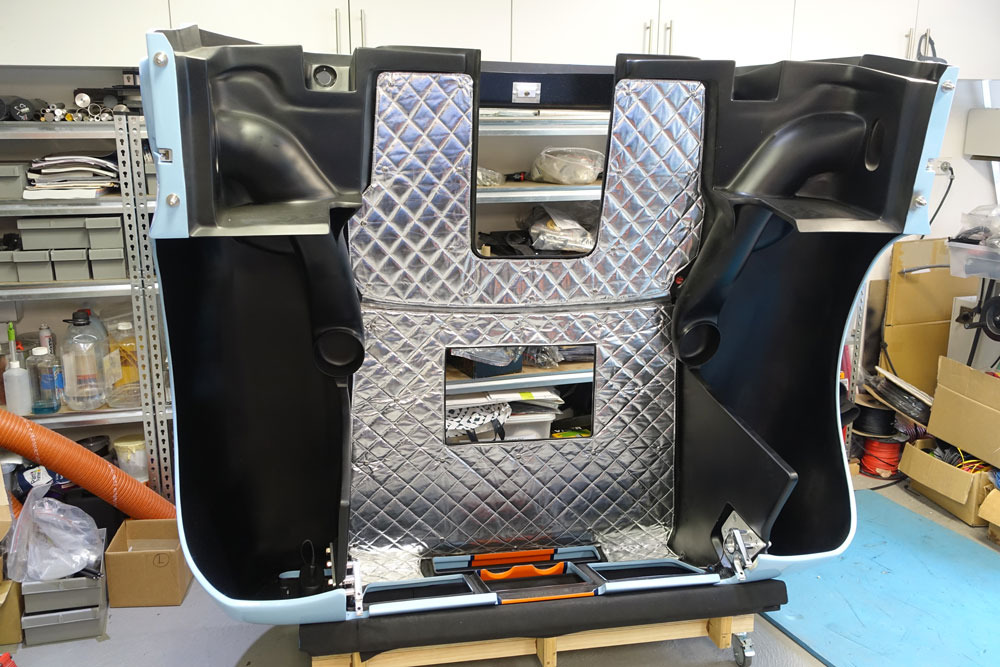
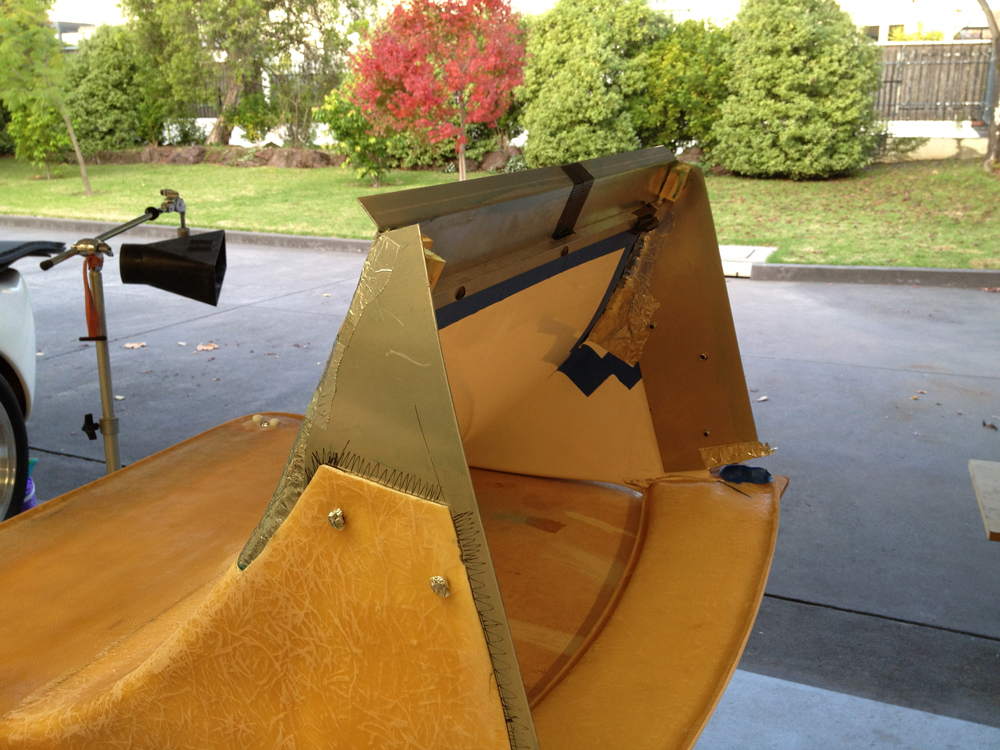
The protection of the rear clip has been something I wanted to tackle in a different way to many other builds. I really wanted a black material but for obvious heat reflections reasons it was not available. I decided to use a very high temperature resistant fiberglass cloth sewn to a high temp metalised cloth. Its used in high temperature applications (turbo wrapping etc.) and is very light. I always wanted a quilted pattern also so I made some templates of what I wanted as per below.
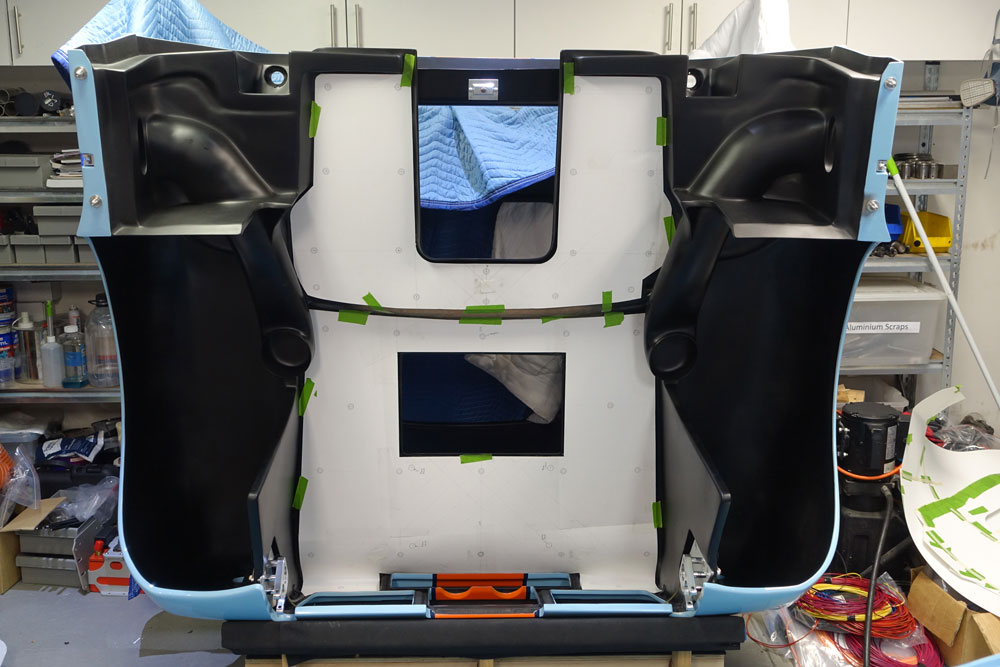
I also did not want to glue the material to the car. I am worried it will fail and drop on the engine so I decided to fasten it at the points below.
This was done with stainless steel press studs. They were attached to an aluminium disc.
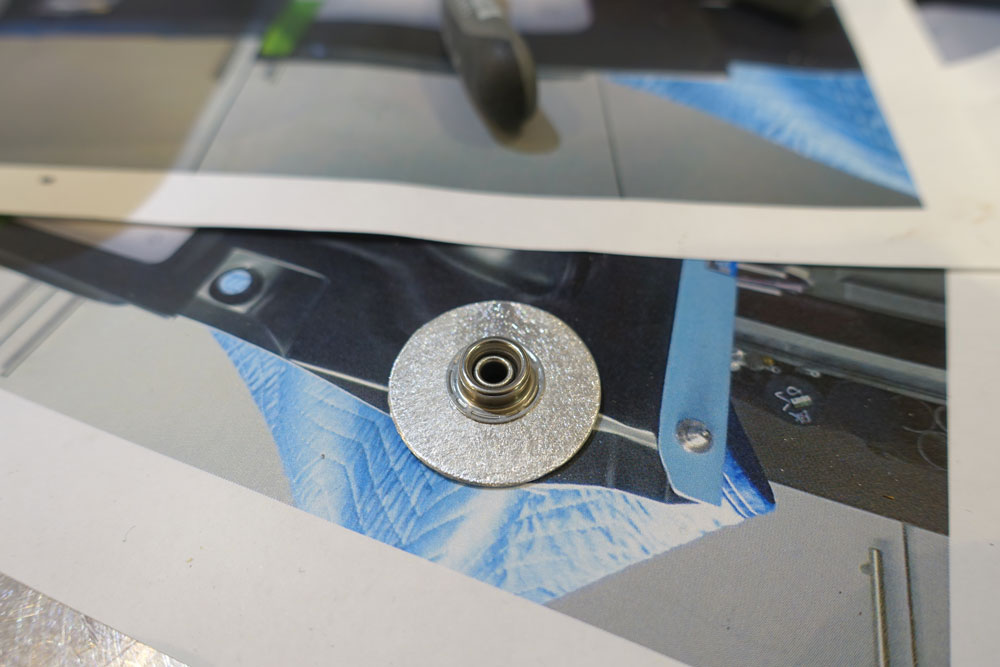
These were positioned under the clip and bonded using Plexus adhesive. Under the painted surface the rear clip had core fill added to increase the stability of the rear clip, this also ensures that there is no show through to the top blue painted surface after gluing on the snap clips.
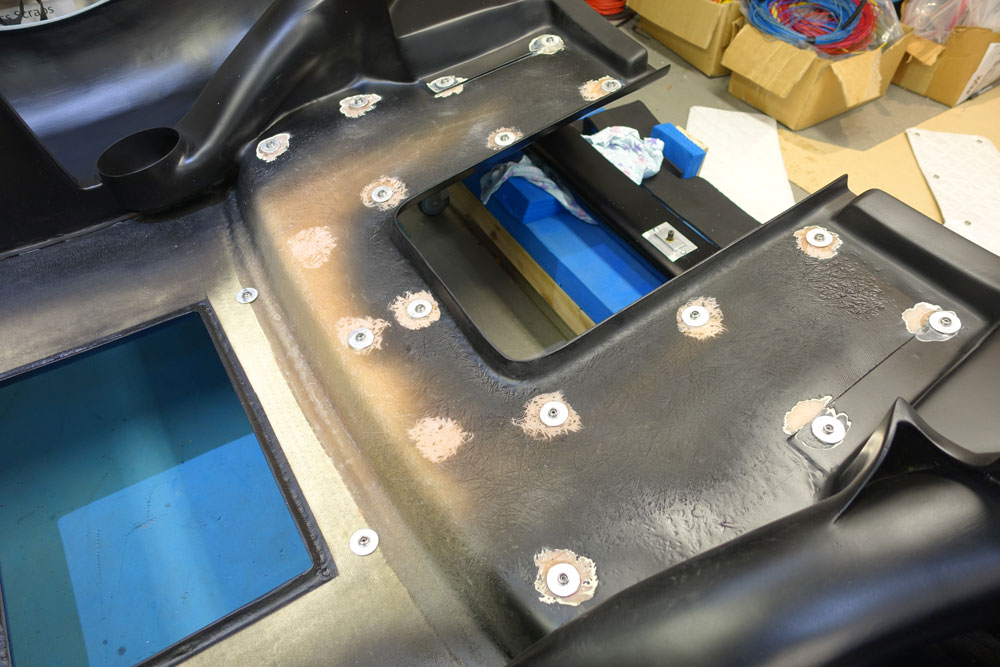
I am happy with the result.
If the heat shield does droop in places I can add some more snap clips.
Update : 26th April, 2015
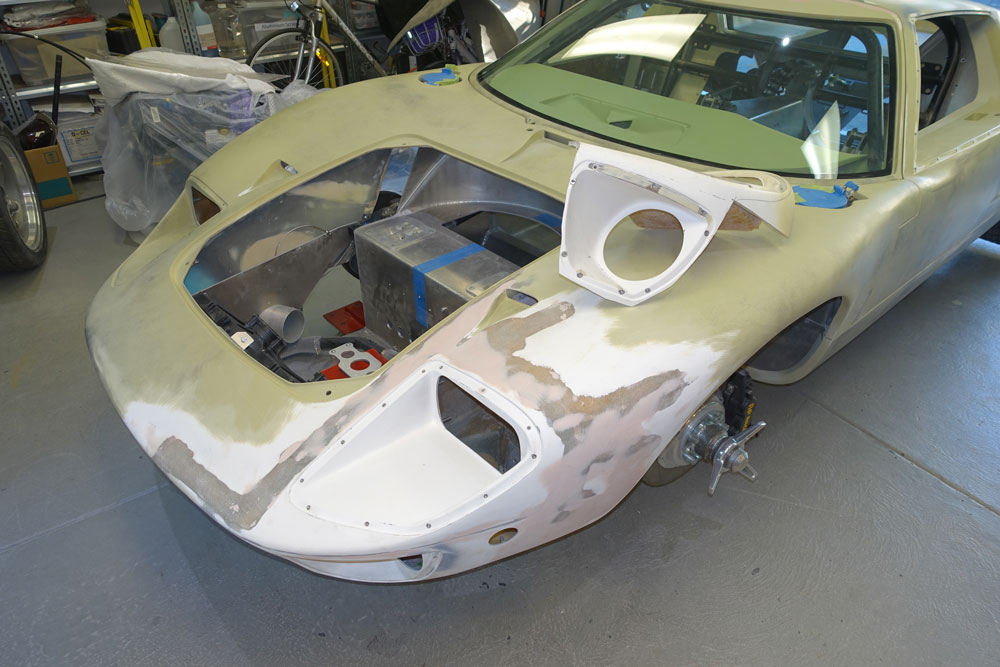
Body Assembly
Body assembly has continued with many parts still to do. Its all looking good but its really hard to assemble in such a small place without damage.
Doors line up pretty well and Americar Auto in Dromana did a great job. Very happy.
Rear clip still needs some adjustment but I'm keeping the gap large to ensure things settle without damage.
Even though I have a single and twin nostril I think I will keep the single on most of the time.
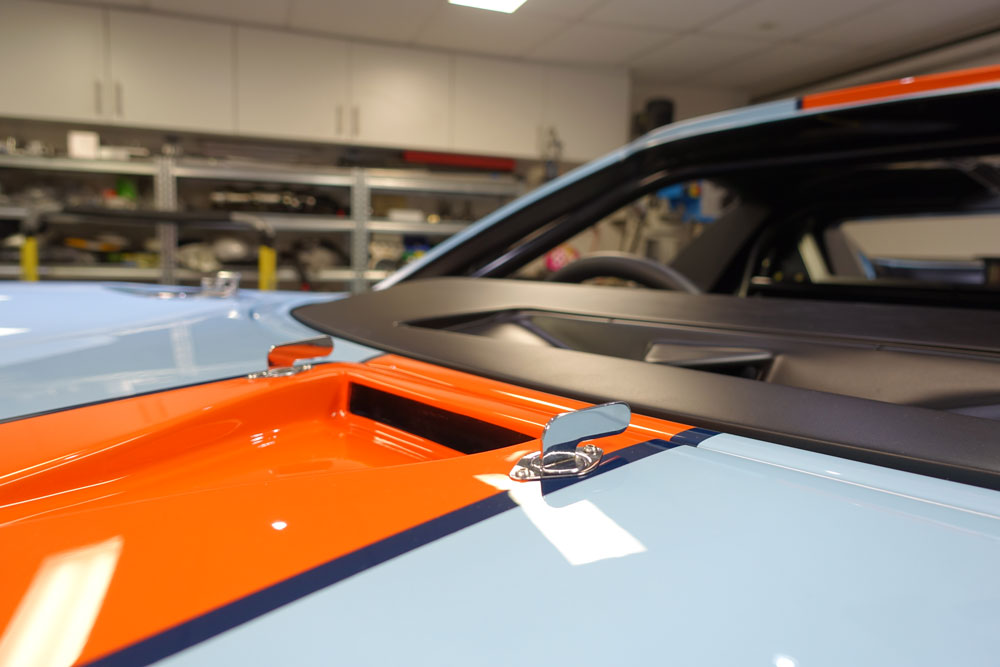
The work to make the eared dzus clips was well worth it.
For a stripe painted off the chassis its a great job by my painter. Dark blue stripe looks great to me.
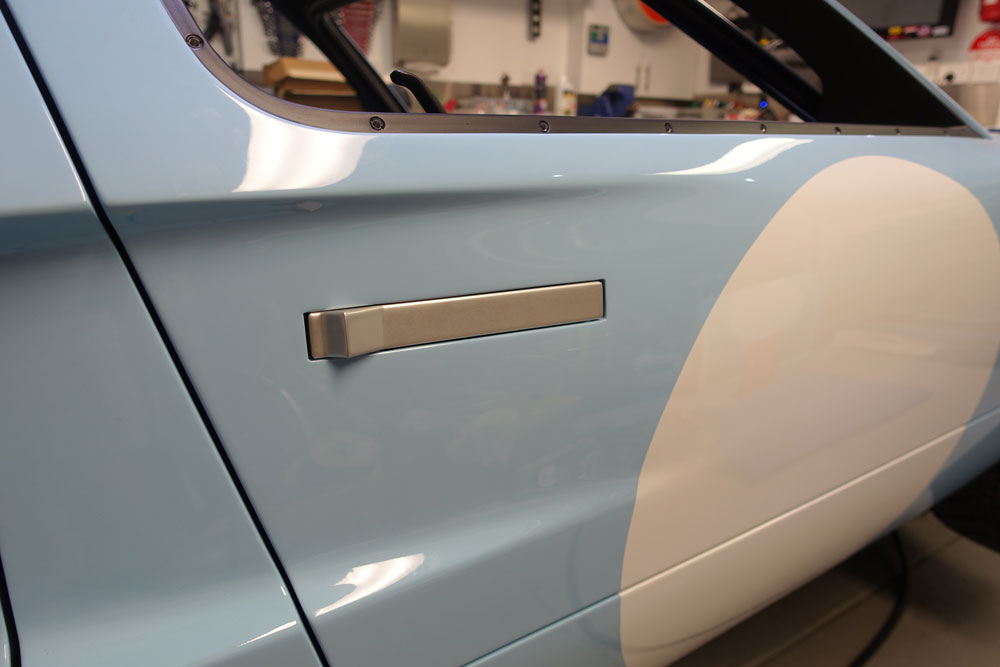
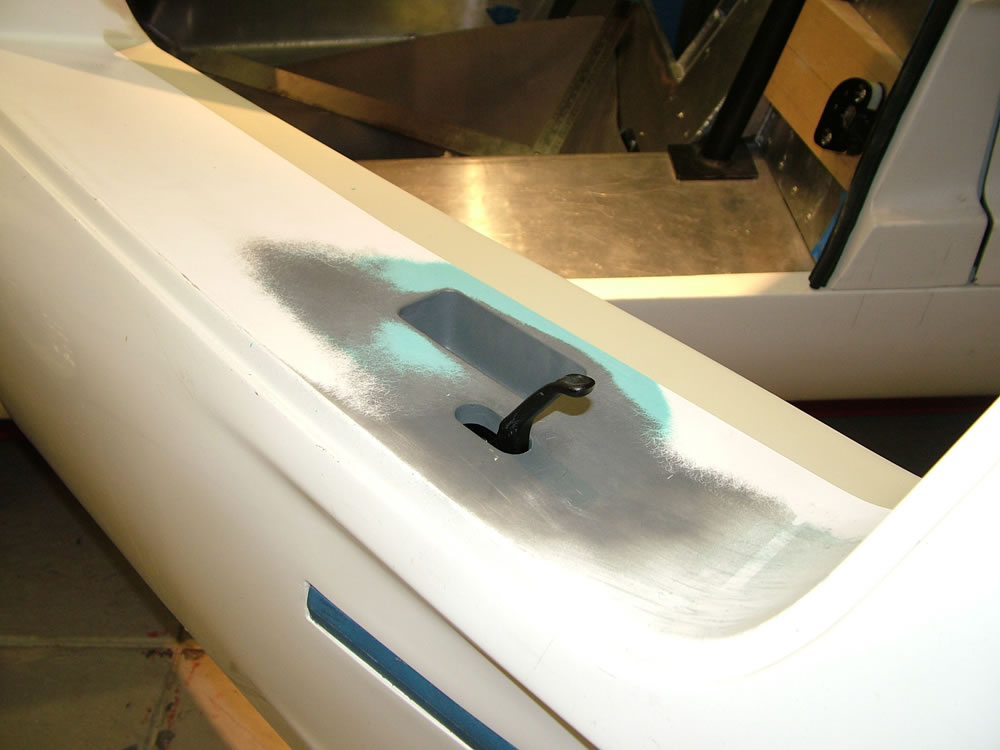
Anodised door handles suit what I wanted. I don't like too many shiny bits and this finish looks a little more subdued. Getting these gaps and maintaining them without paint damage required well engineered door handle pivots and adjusters.
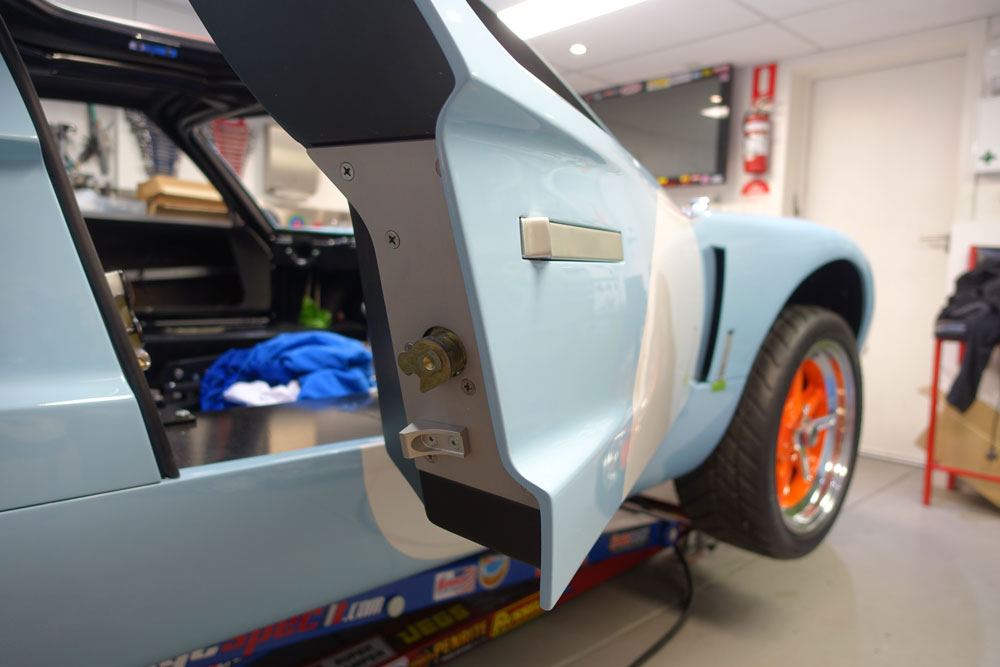
Use of the 911 locks worked well. I'm very familiar with them from past project cars.
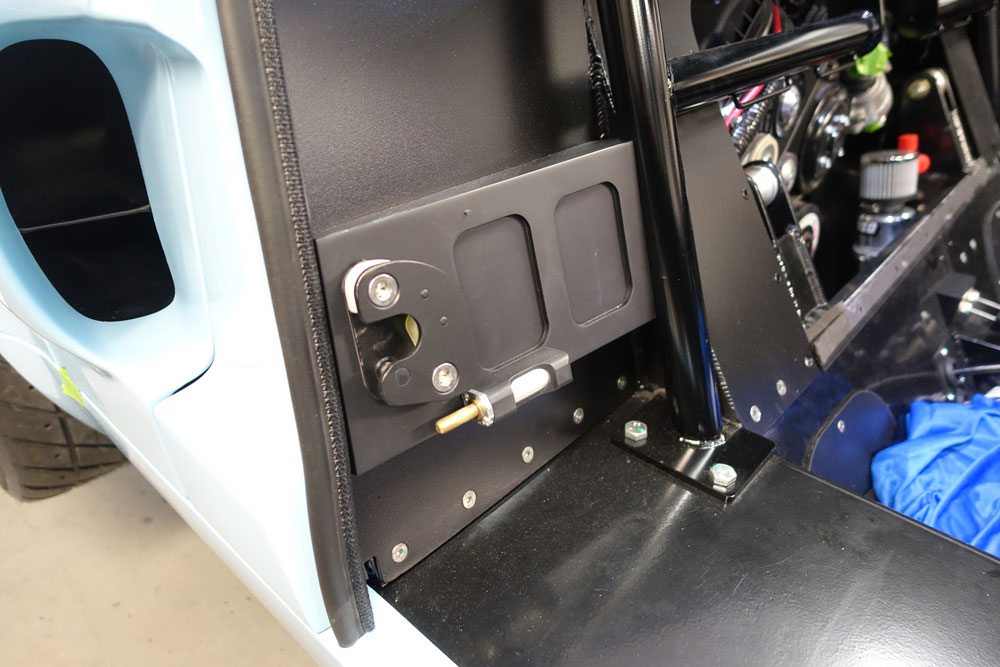
You can see the custom latch support. Also the door "popper". It really pops the door open even with considerable door seal drag from the roof area. It gives the car a good OE feel to door opening and was well worth the effort.
Update : 31st January, 2015
Paint Getting Close
Please let me start by saying that getting your GT40 painted can be a little like having a child, billions have done it before but when its your own its very special. I have a child and she does not compare to my care but I think you get what I mean.
So anyway I will share what I have done even though many have before. My car is to be based on the 1076 car from the 70's as I prefer no "moustache" on the front. It will have all the decals as well.
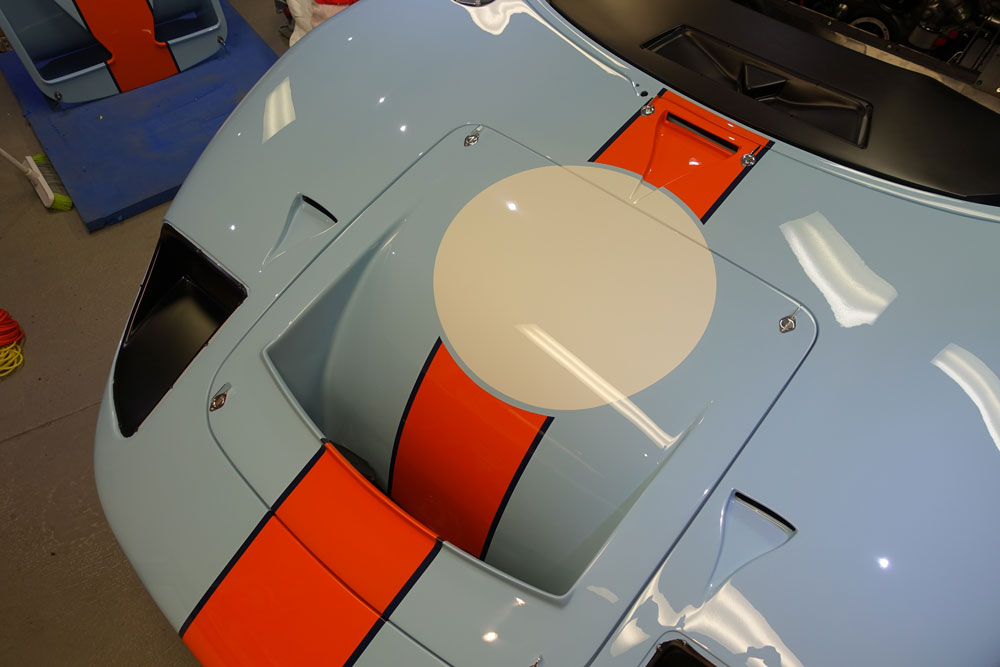
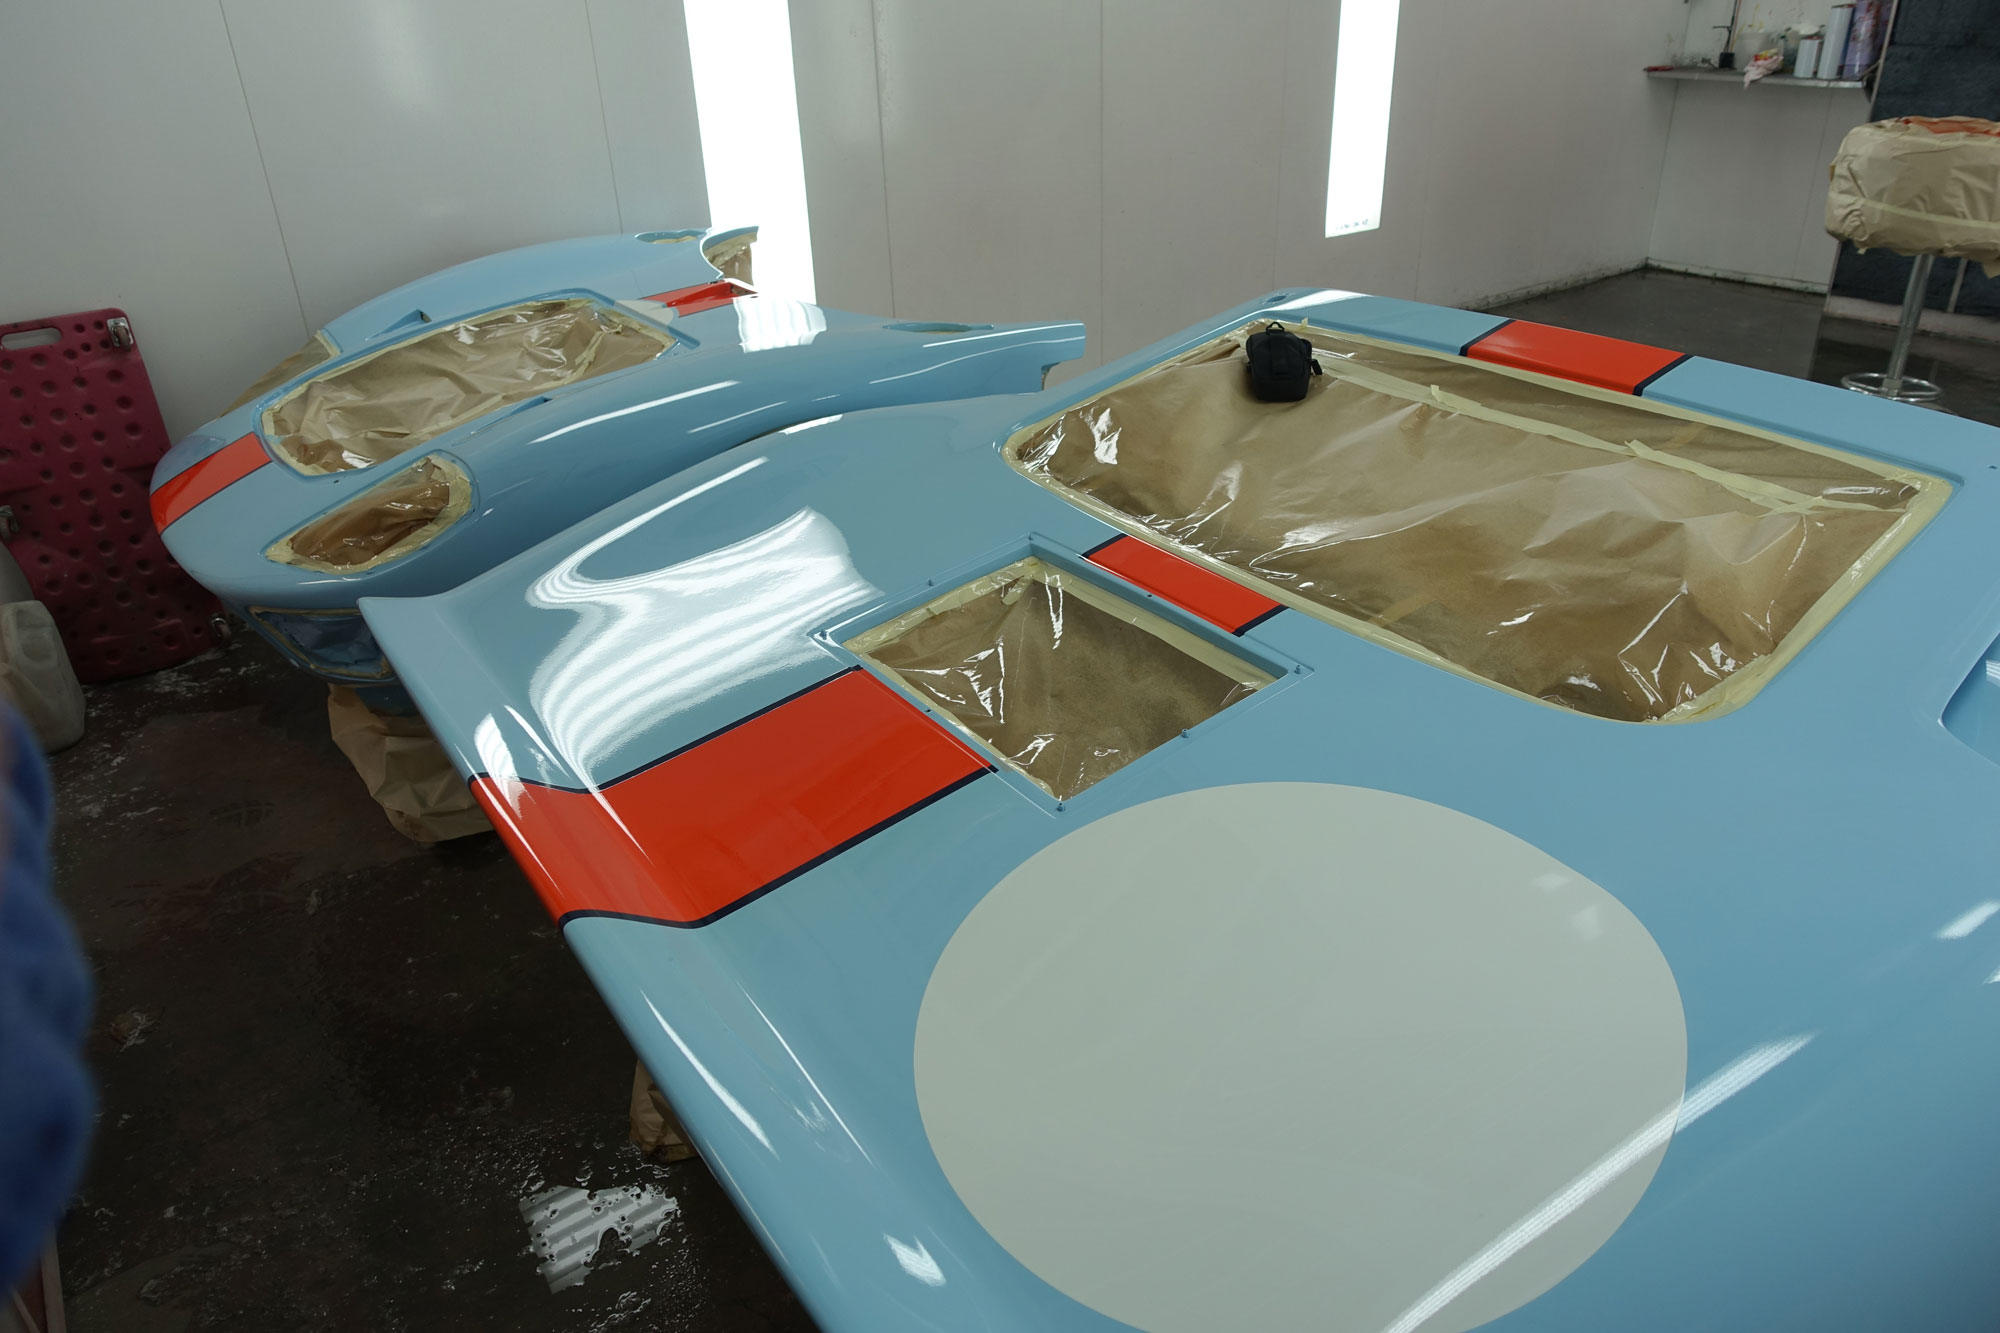
After the blue base was applied (not gloss as there is clear to be applied) my painter and I masked out the car. What a tough job. It took a day to get a stripe on and a few roundels!
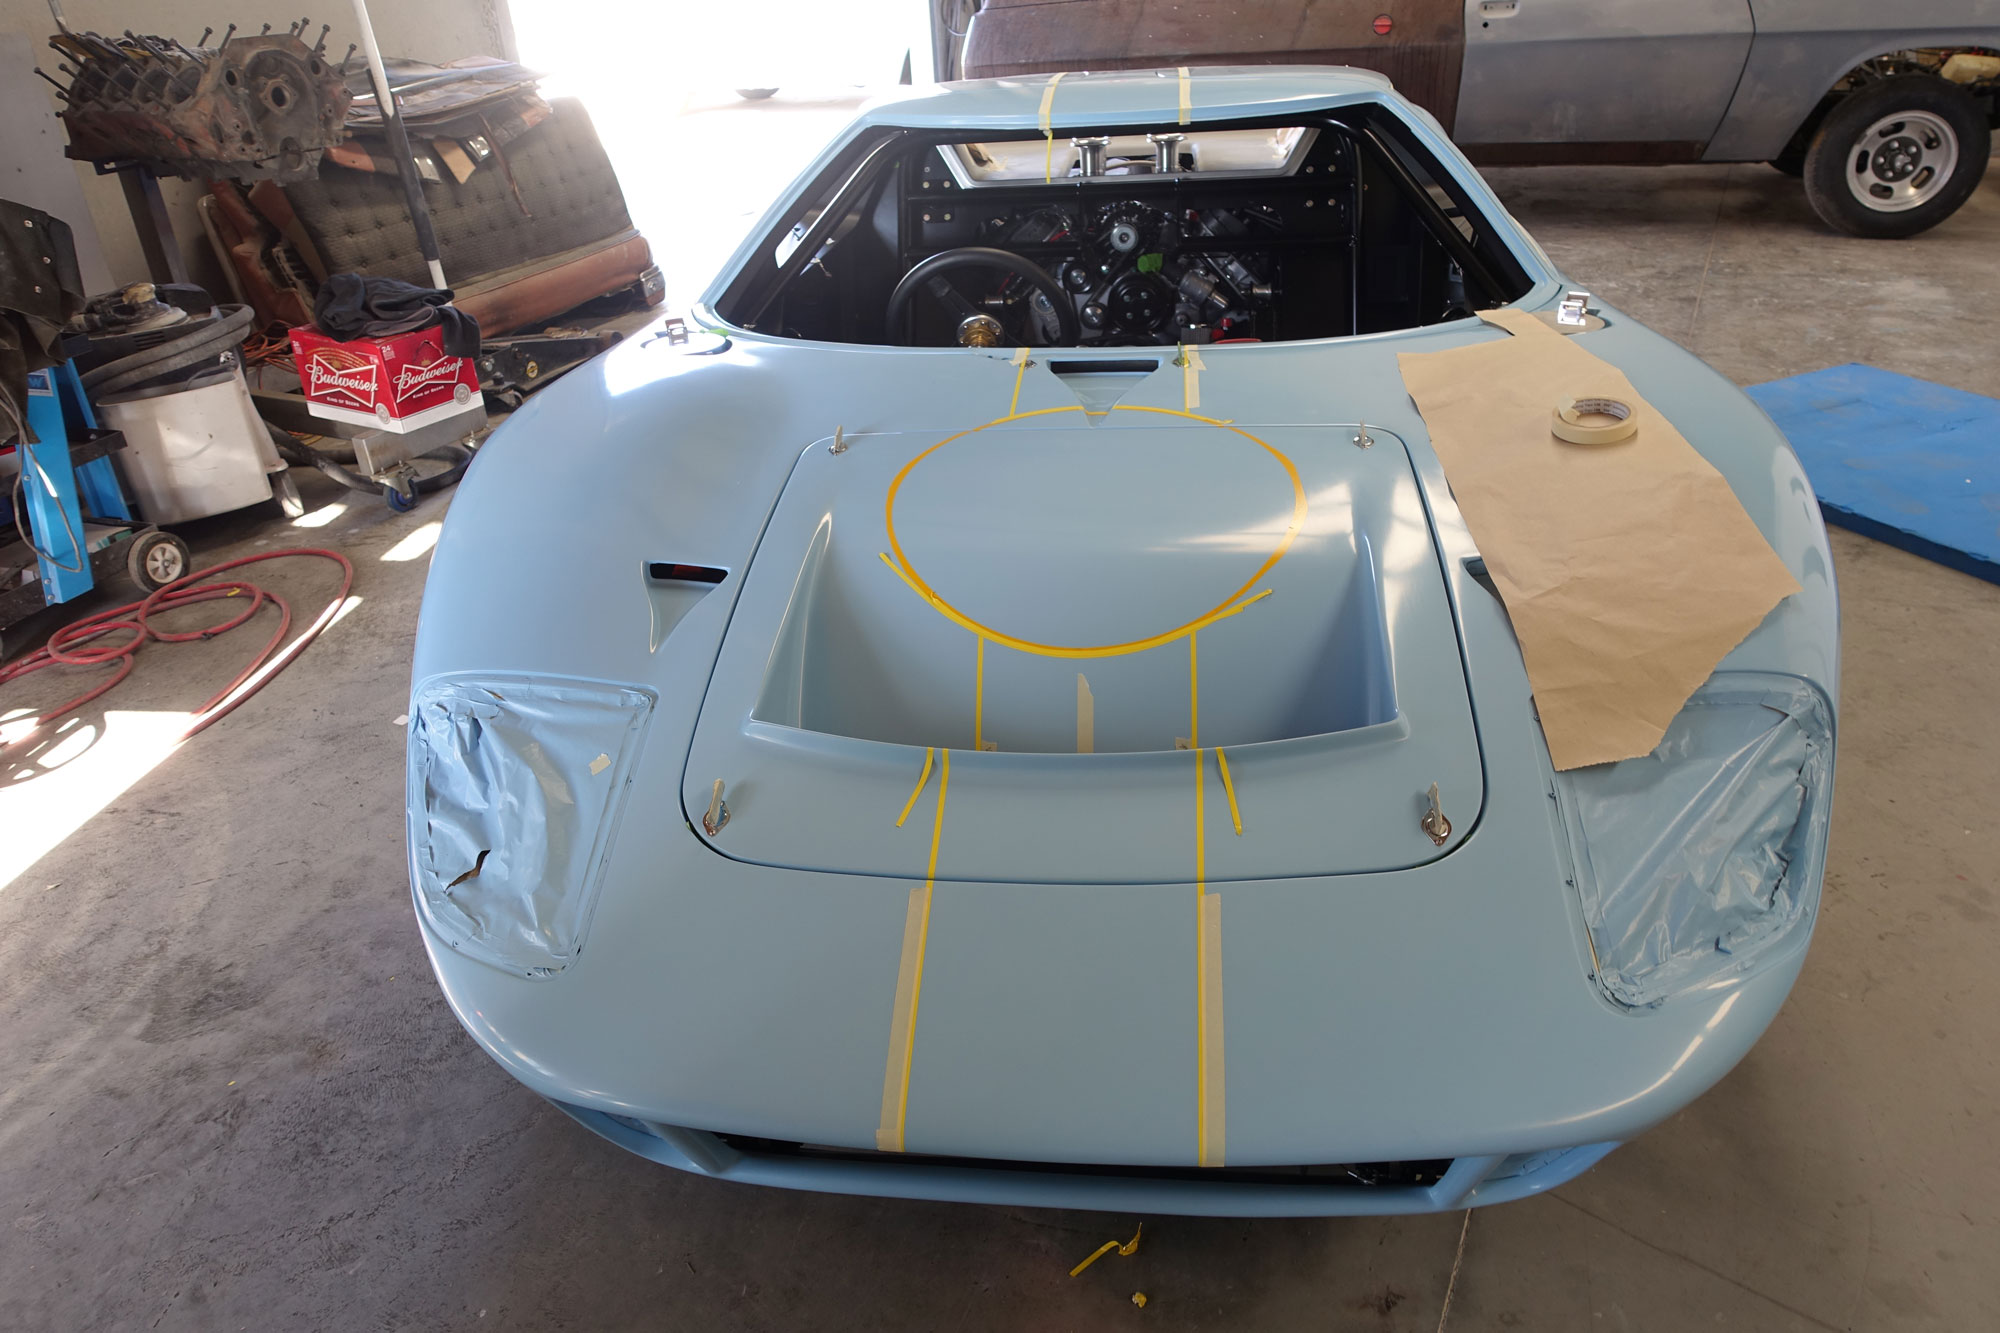
Both front nostrils had to have the stripe and roundel applied in the same position.
Panel alignment is only close enough for the stripe alignment etc. It will be adjusted further.

It all came out really well. Now I have decided, as with the whole car to do things different or take the hardest way possible so the following things were done:
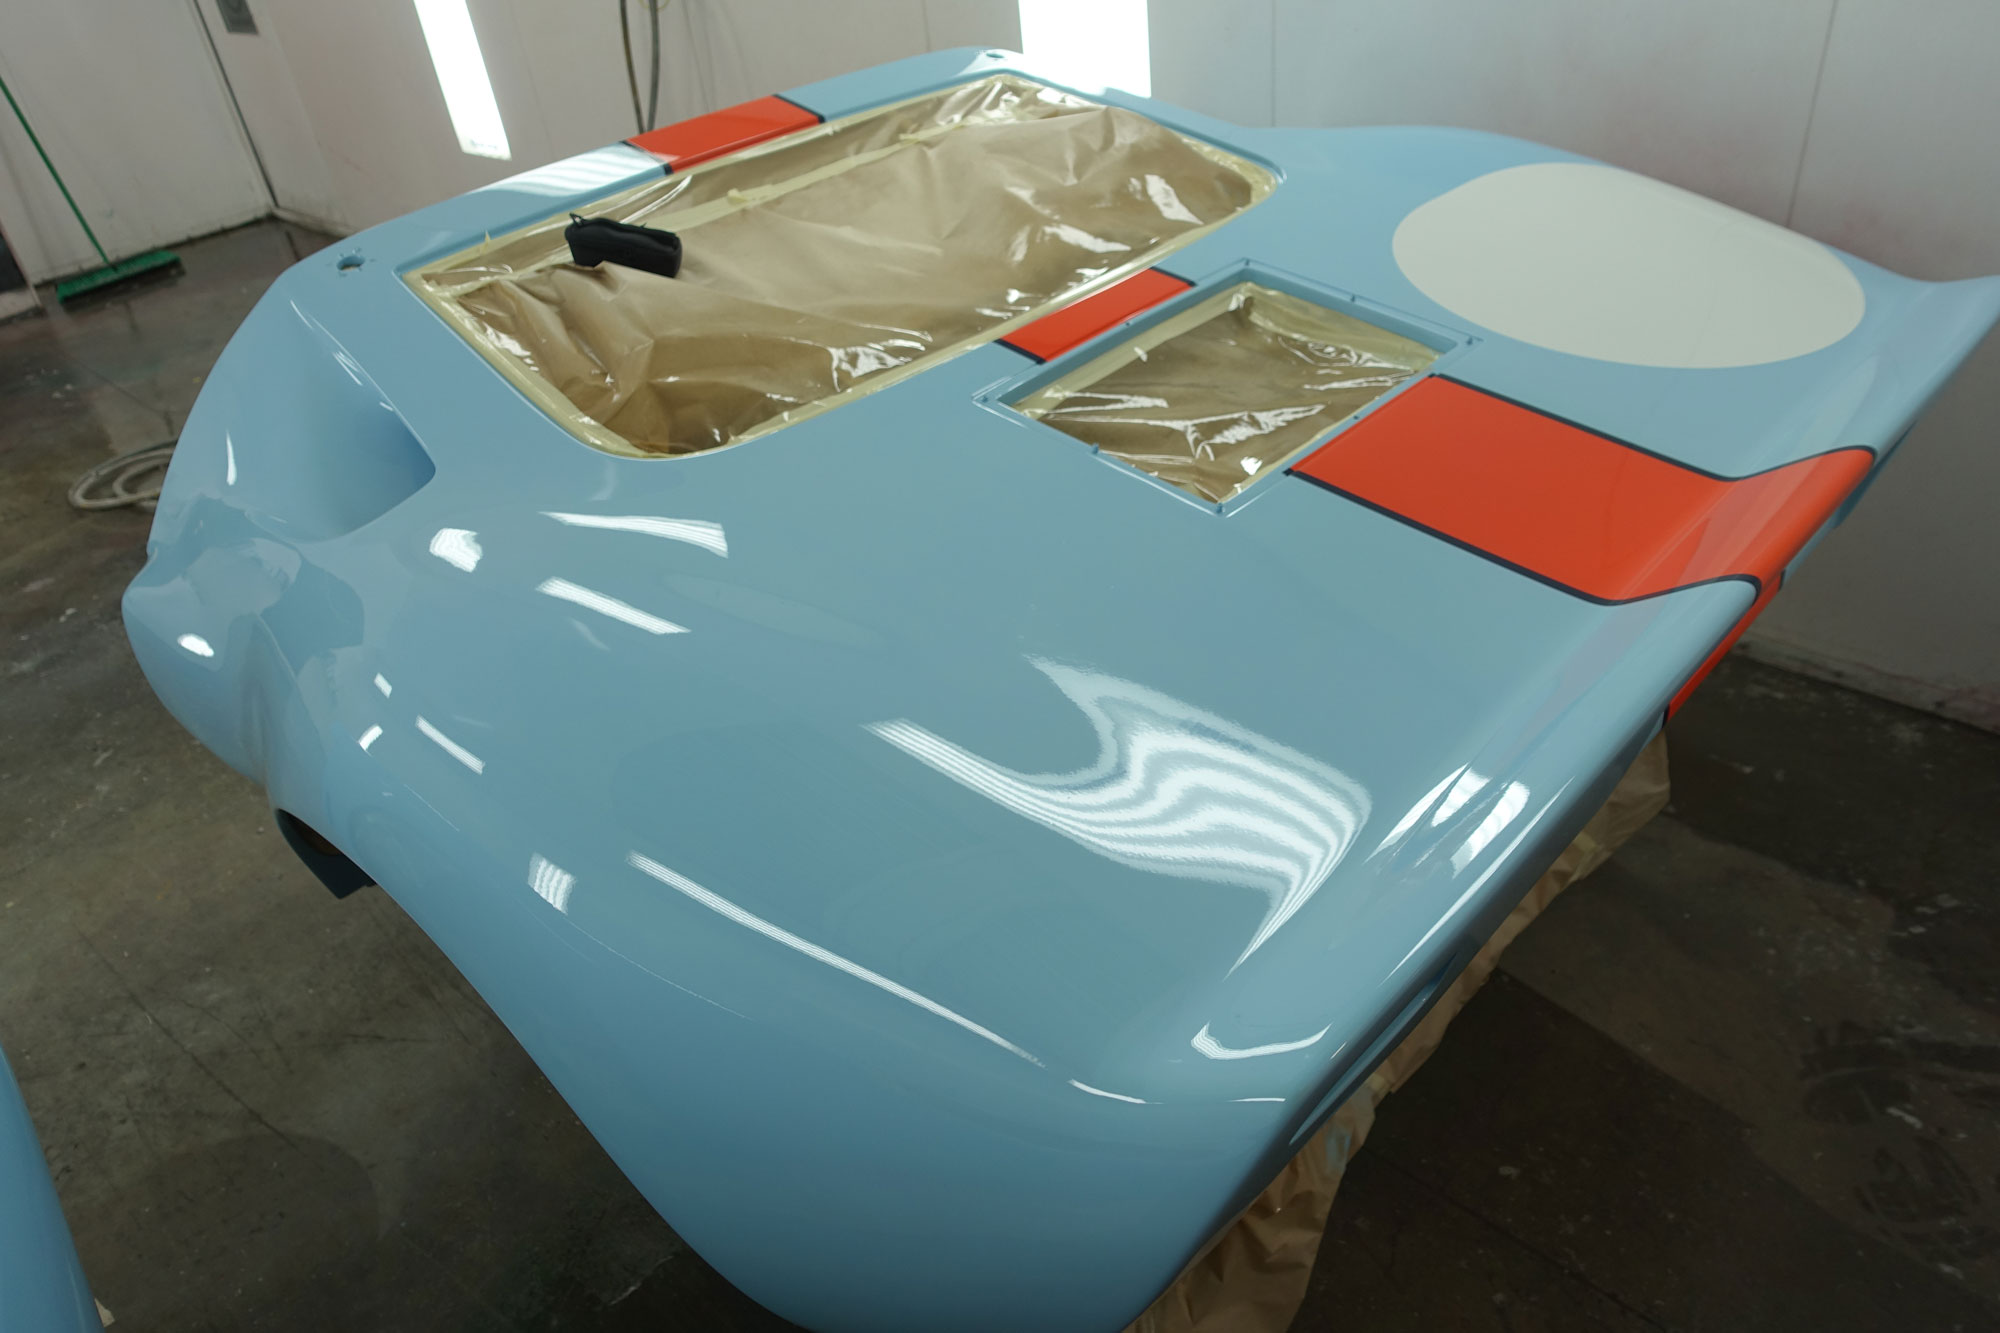
- Gaps between the roundel and orange stripe would exists as per some images I have seen of original cars. Mainly though because I liked the look.
- Pin stripes were to be dark blue and painted.
- Roundels would be painted.
- The way stripes and roundels end on the panels would be different, I did not like running them through to the panel edges at the top of sills, under nostril panels etc.
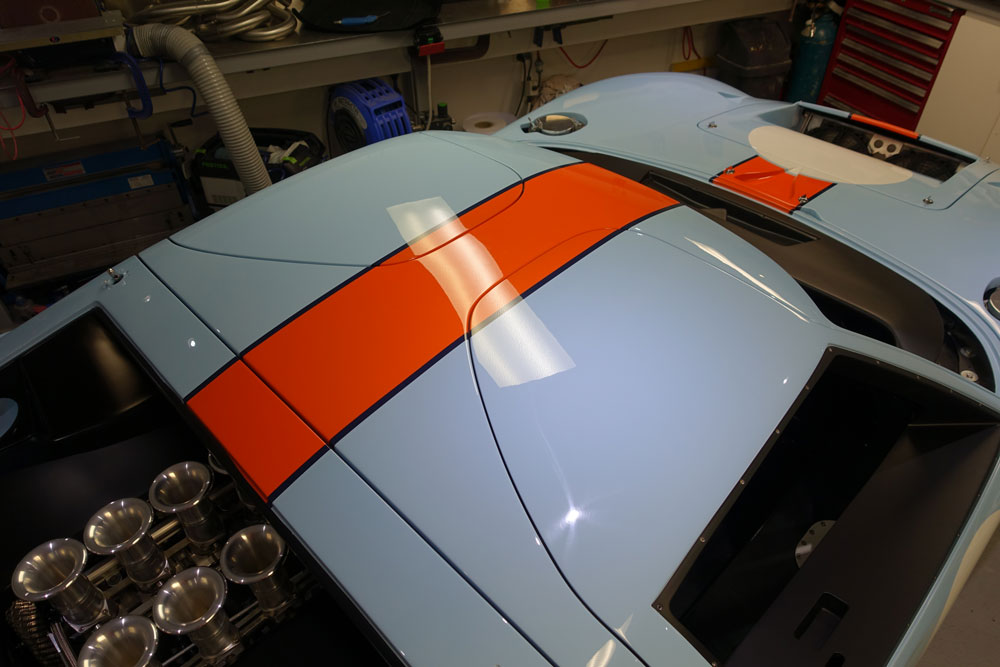
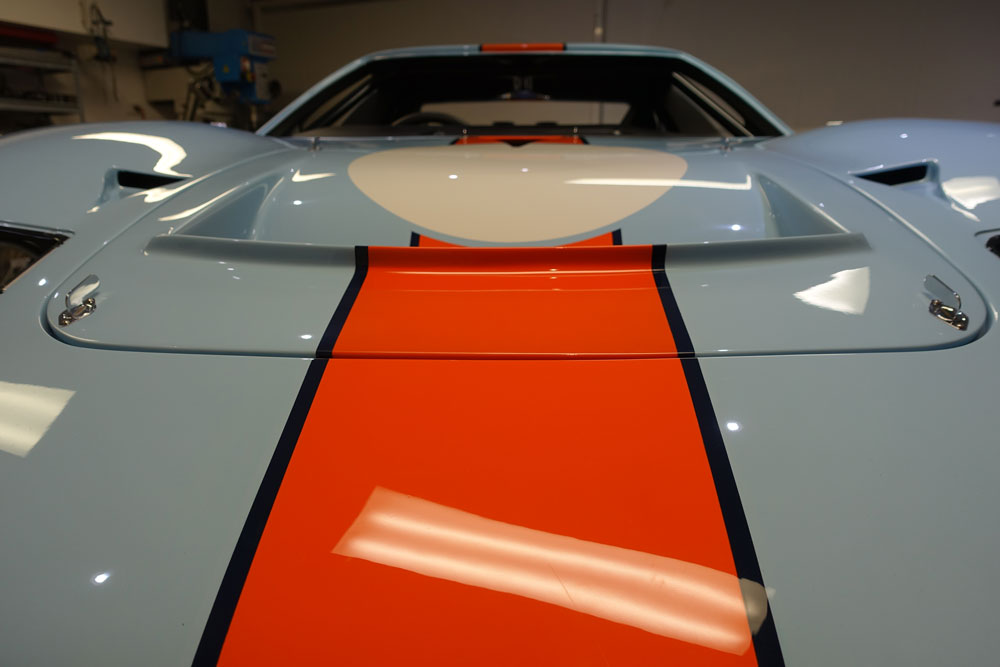
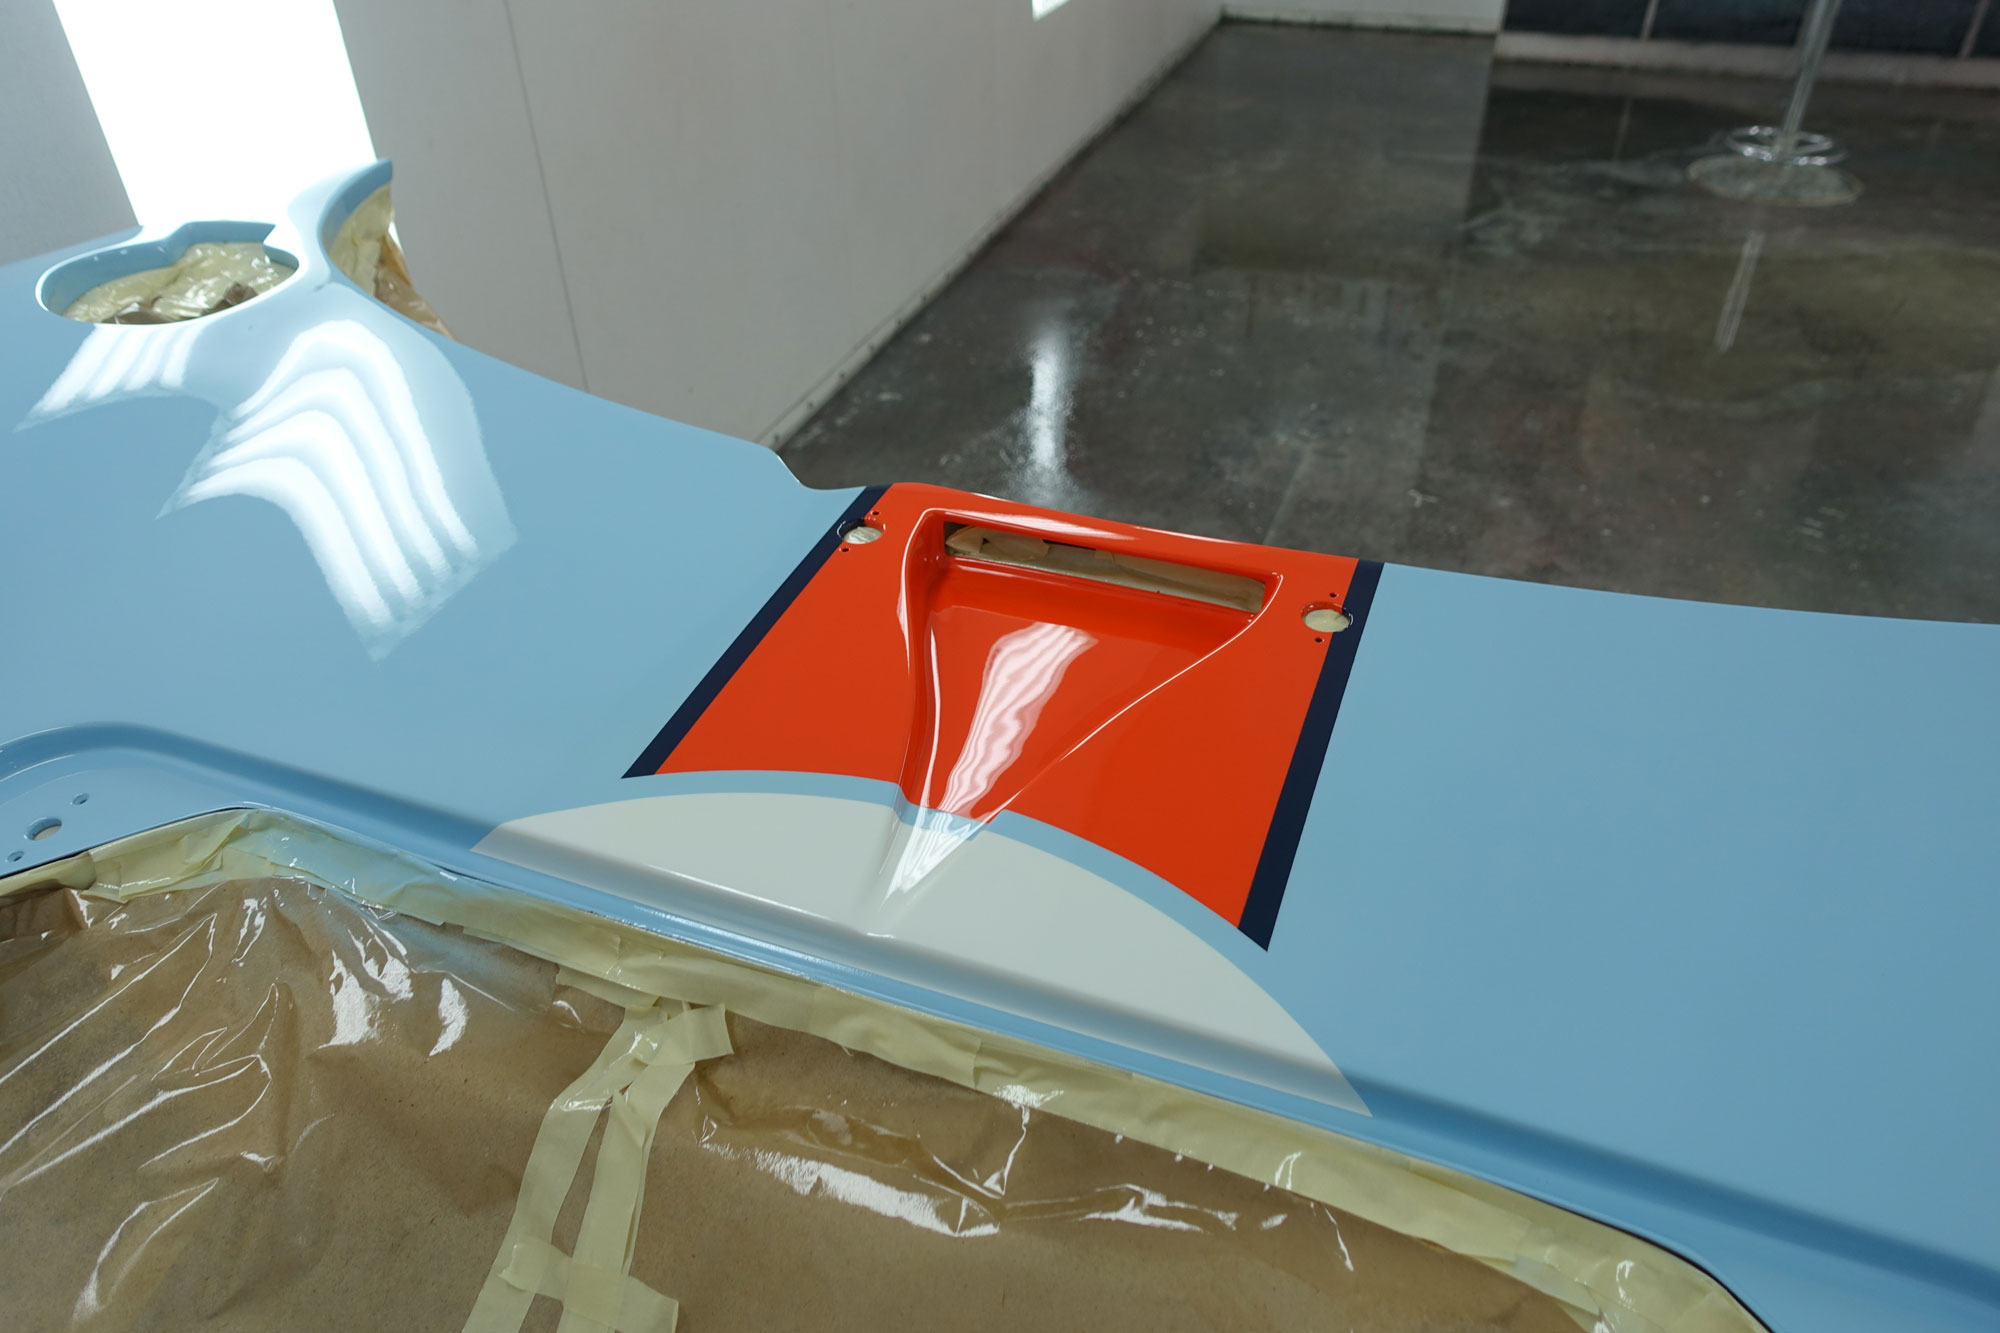
- The twin nostril (only have it because at the time with Fran I could not decide what car I was doing) would be painted differently where the stripe is wider than the nostril.
Satin black inserts and colour sand is yet to be done.
Flares turned out really good. Many thanks to Kaber and Americar Auto for this.
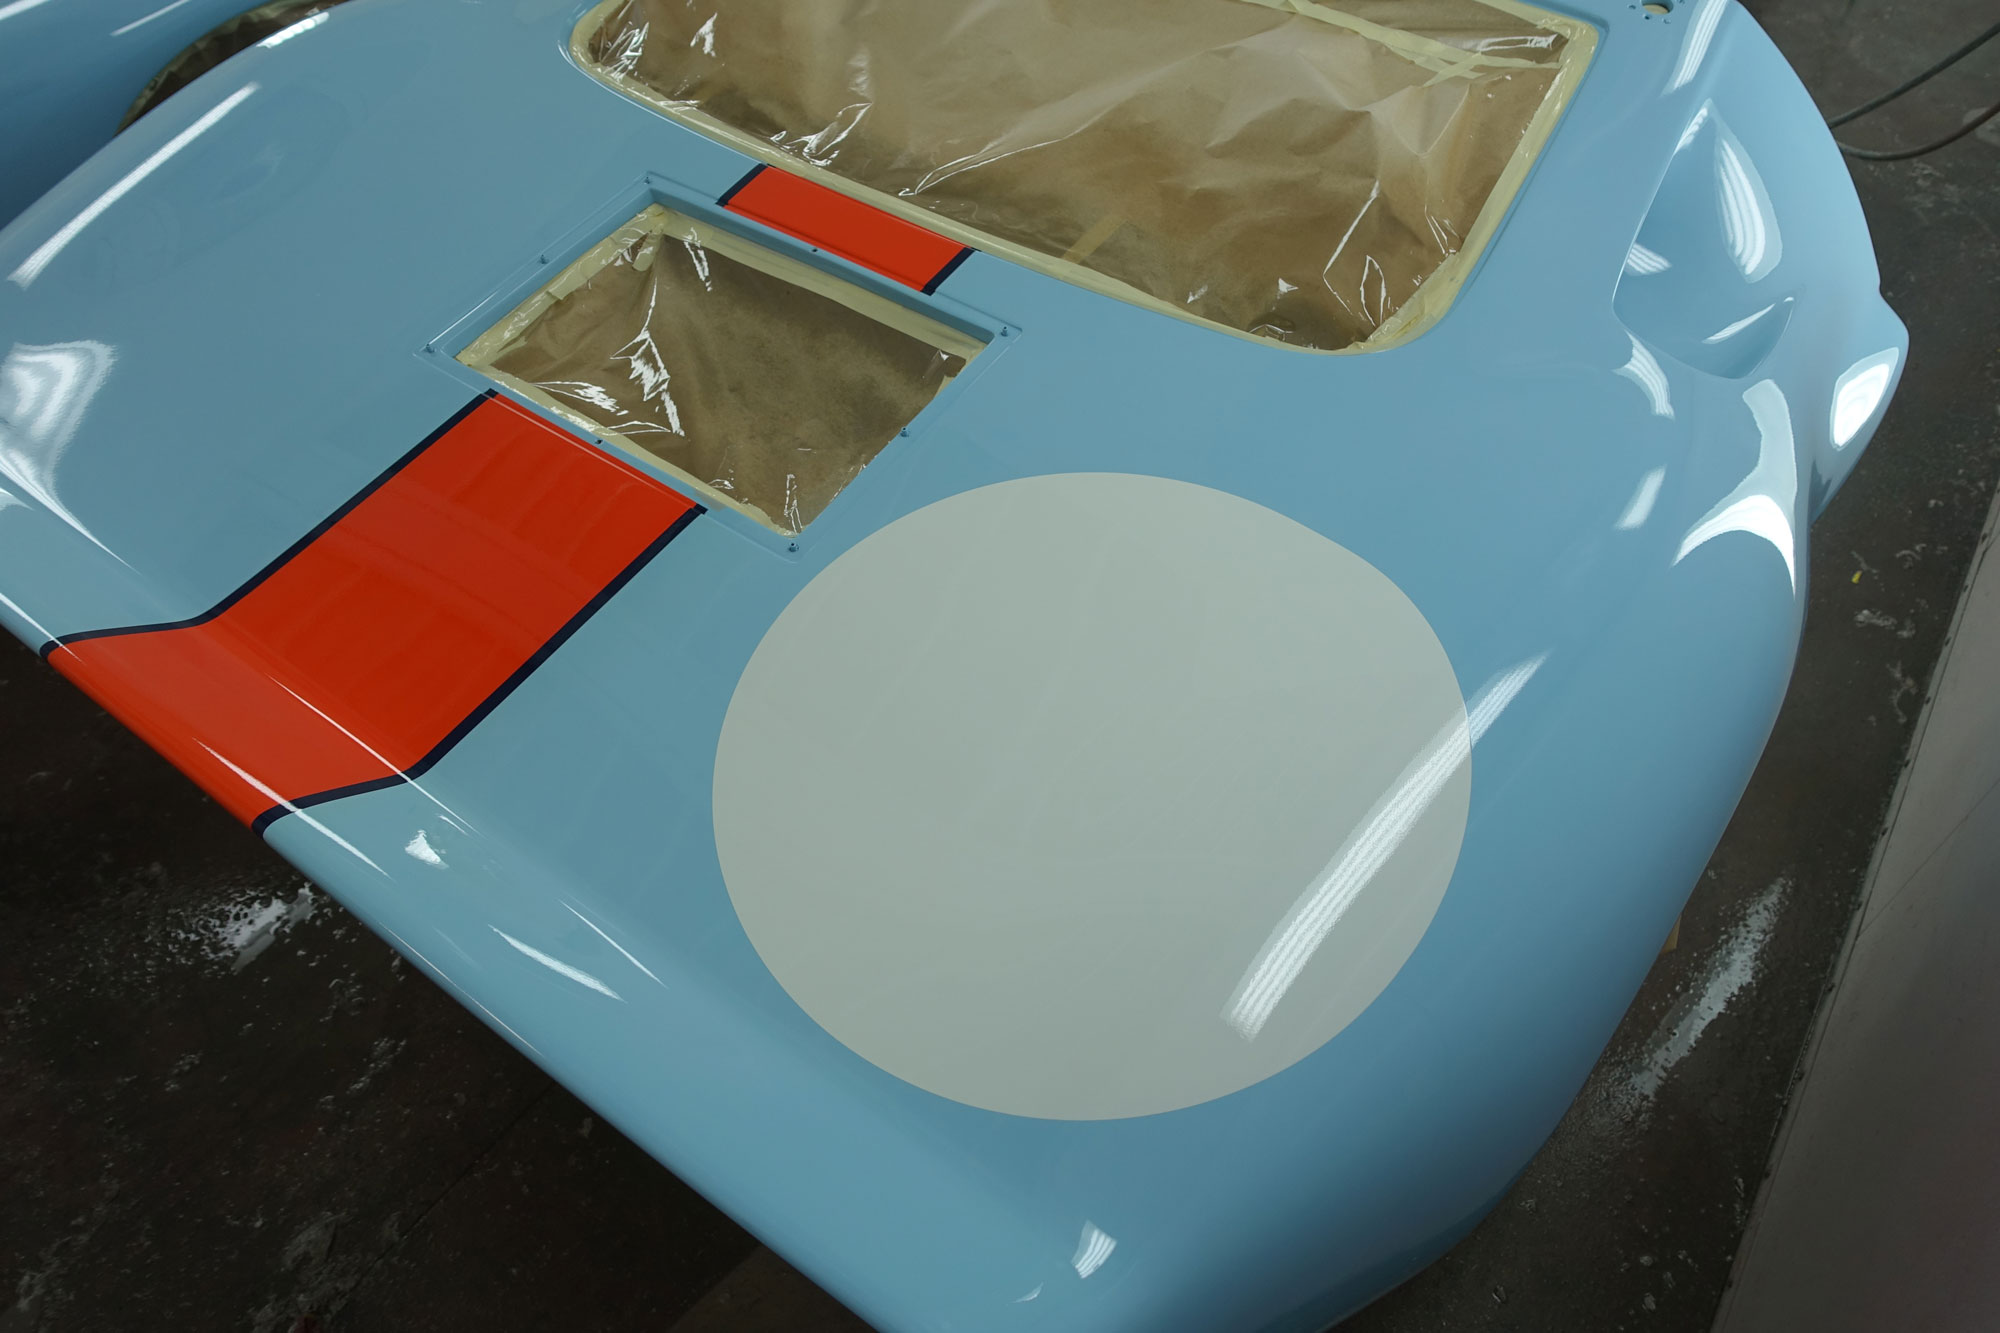
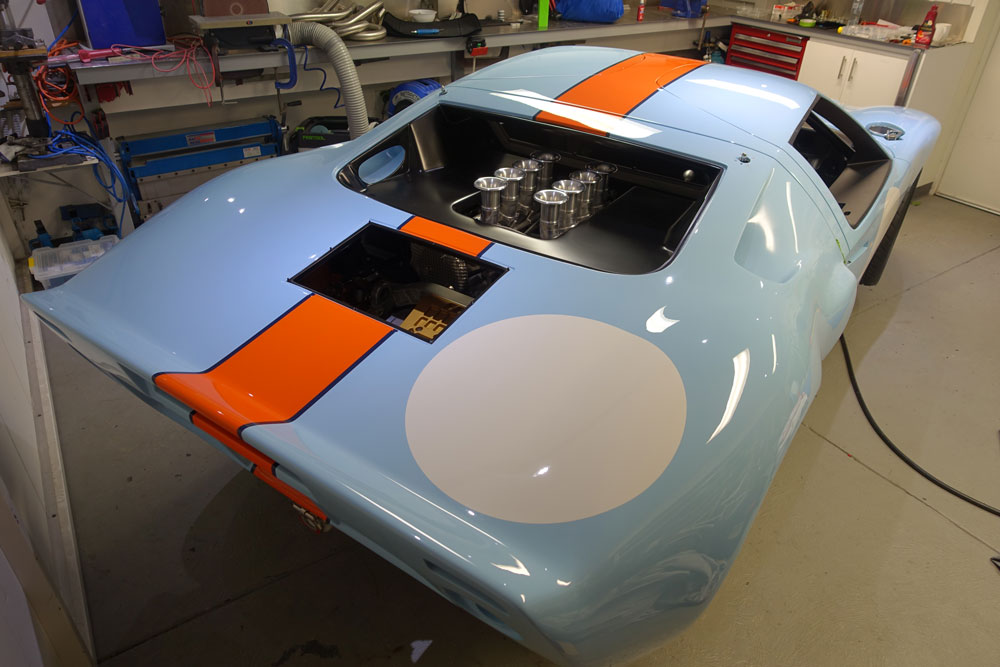
The white paint for the roundels was chosen to not look to bright, I'm happy with it.
You can see the 12mm gap I wanted on the roundel. I love it, my painter hated it :). You can also see how I wanted the paint to stop before some edges. Not sure why but I like it, and my painter hated it :) Credit needs to go to the painter, his patience and workmanship was first class in my book.
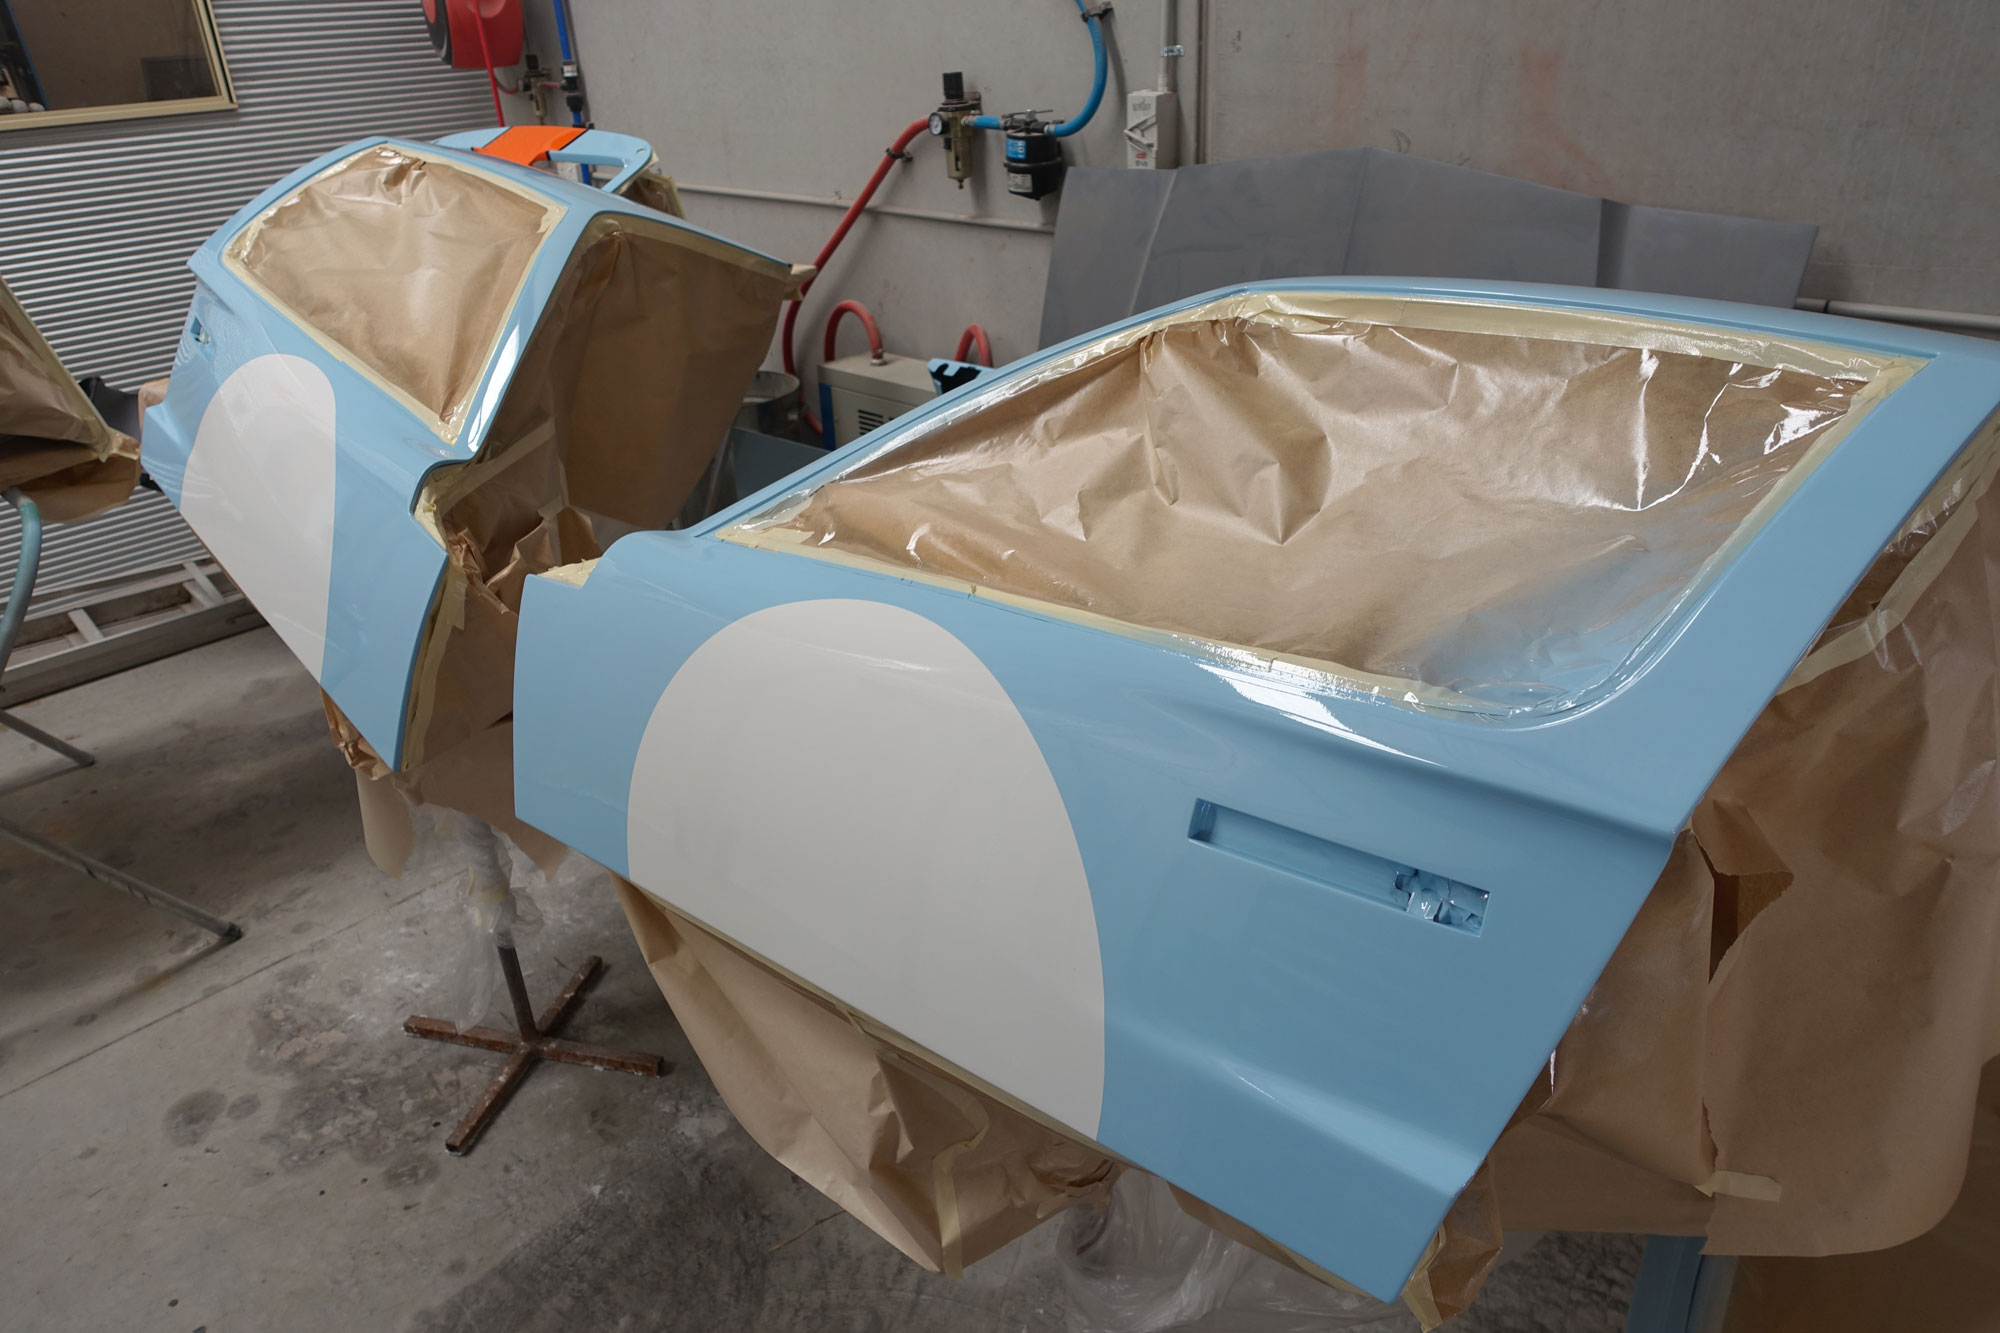
Roundels on the doors look great.
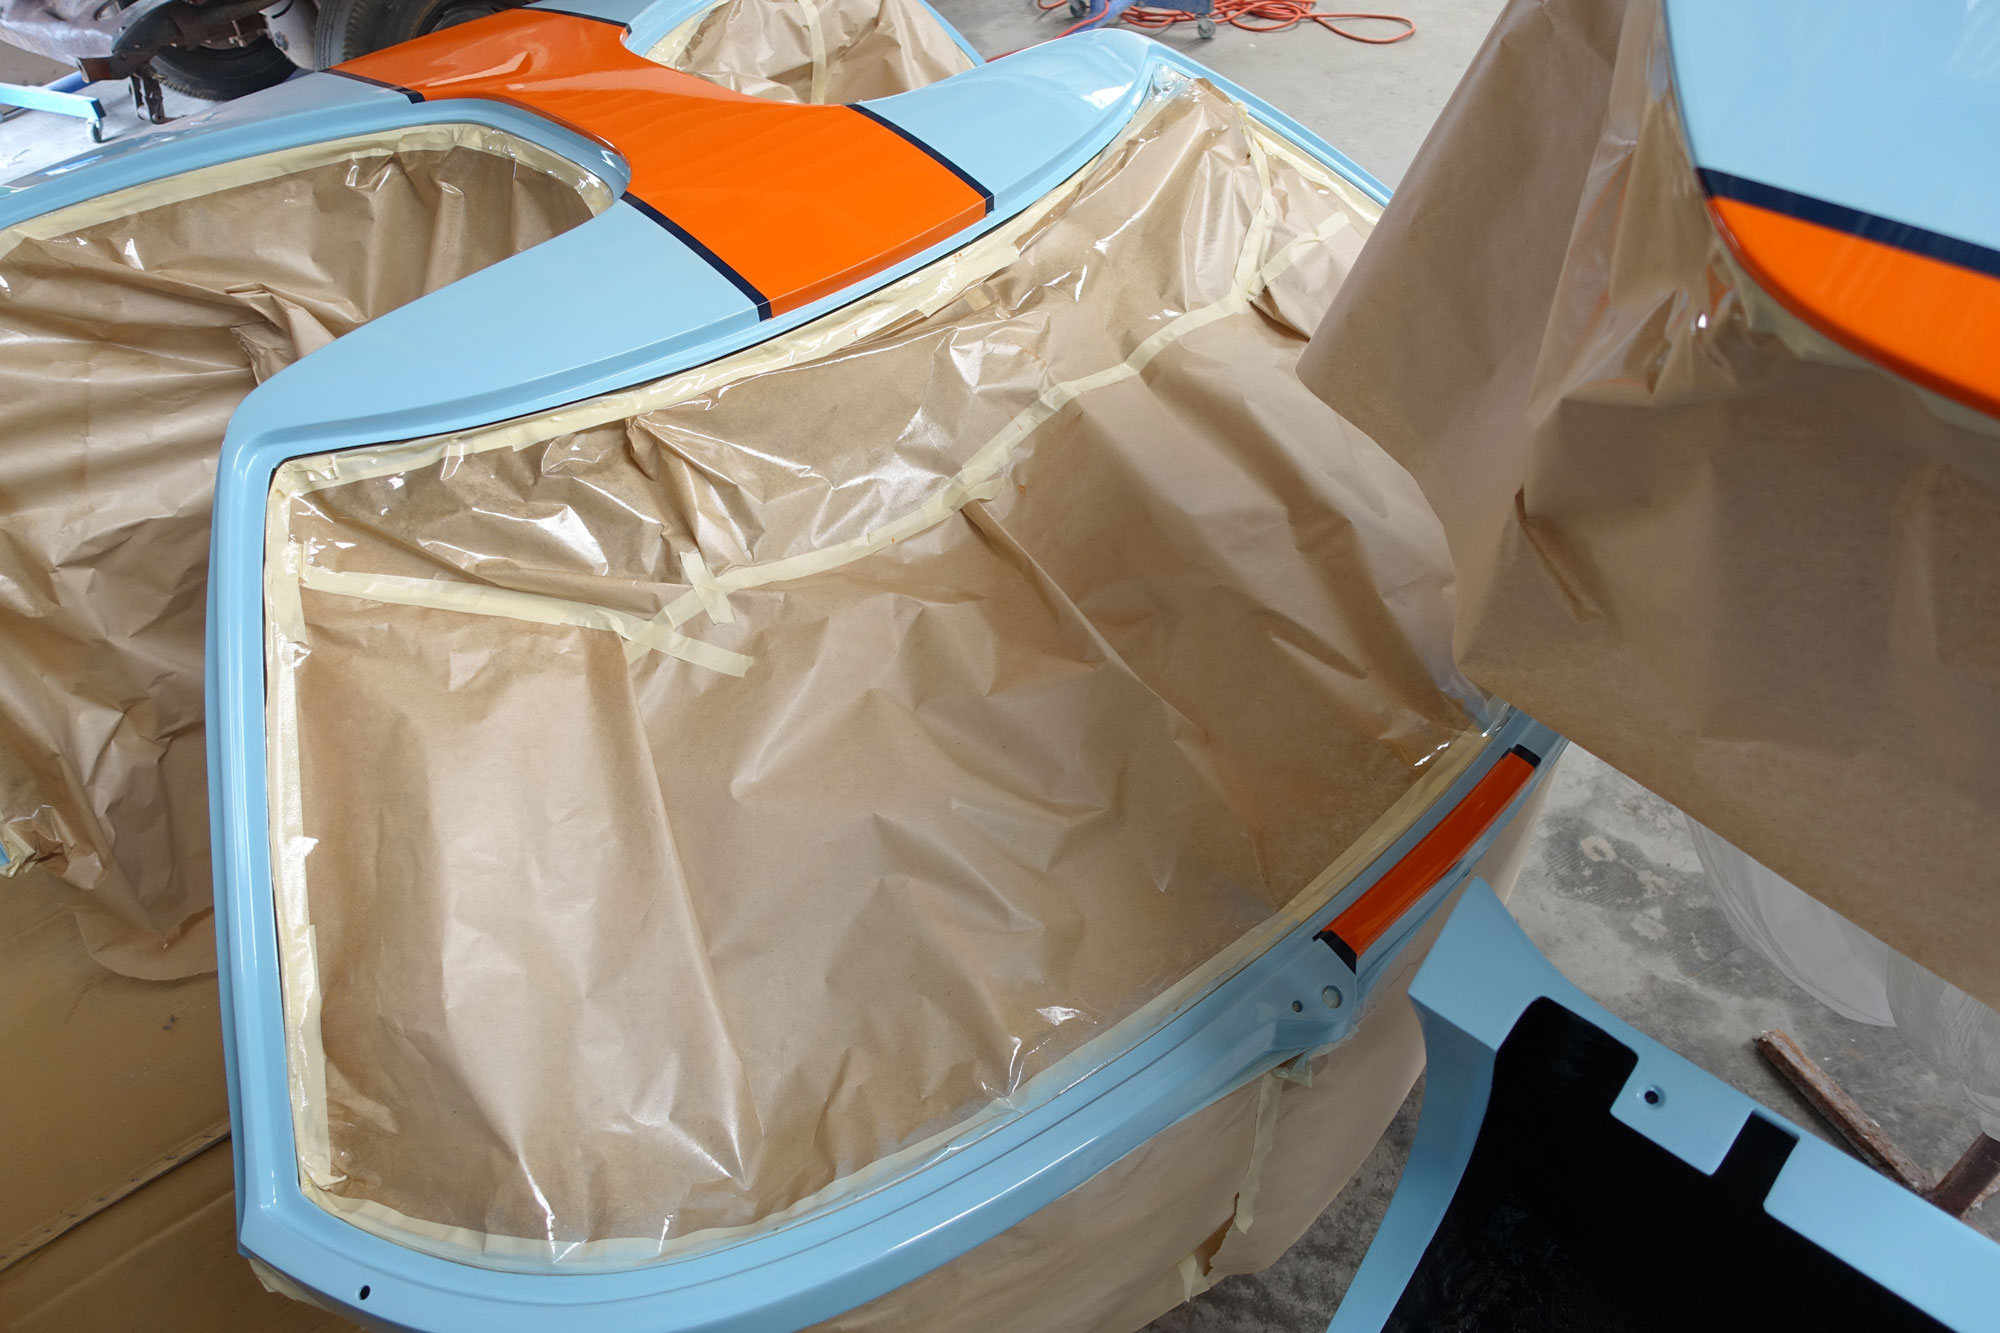
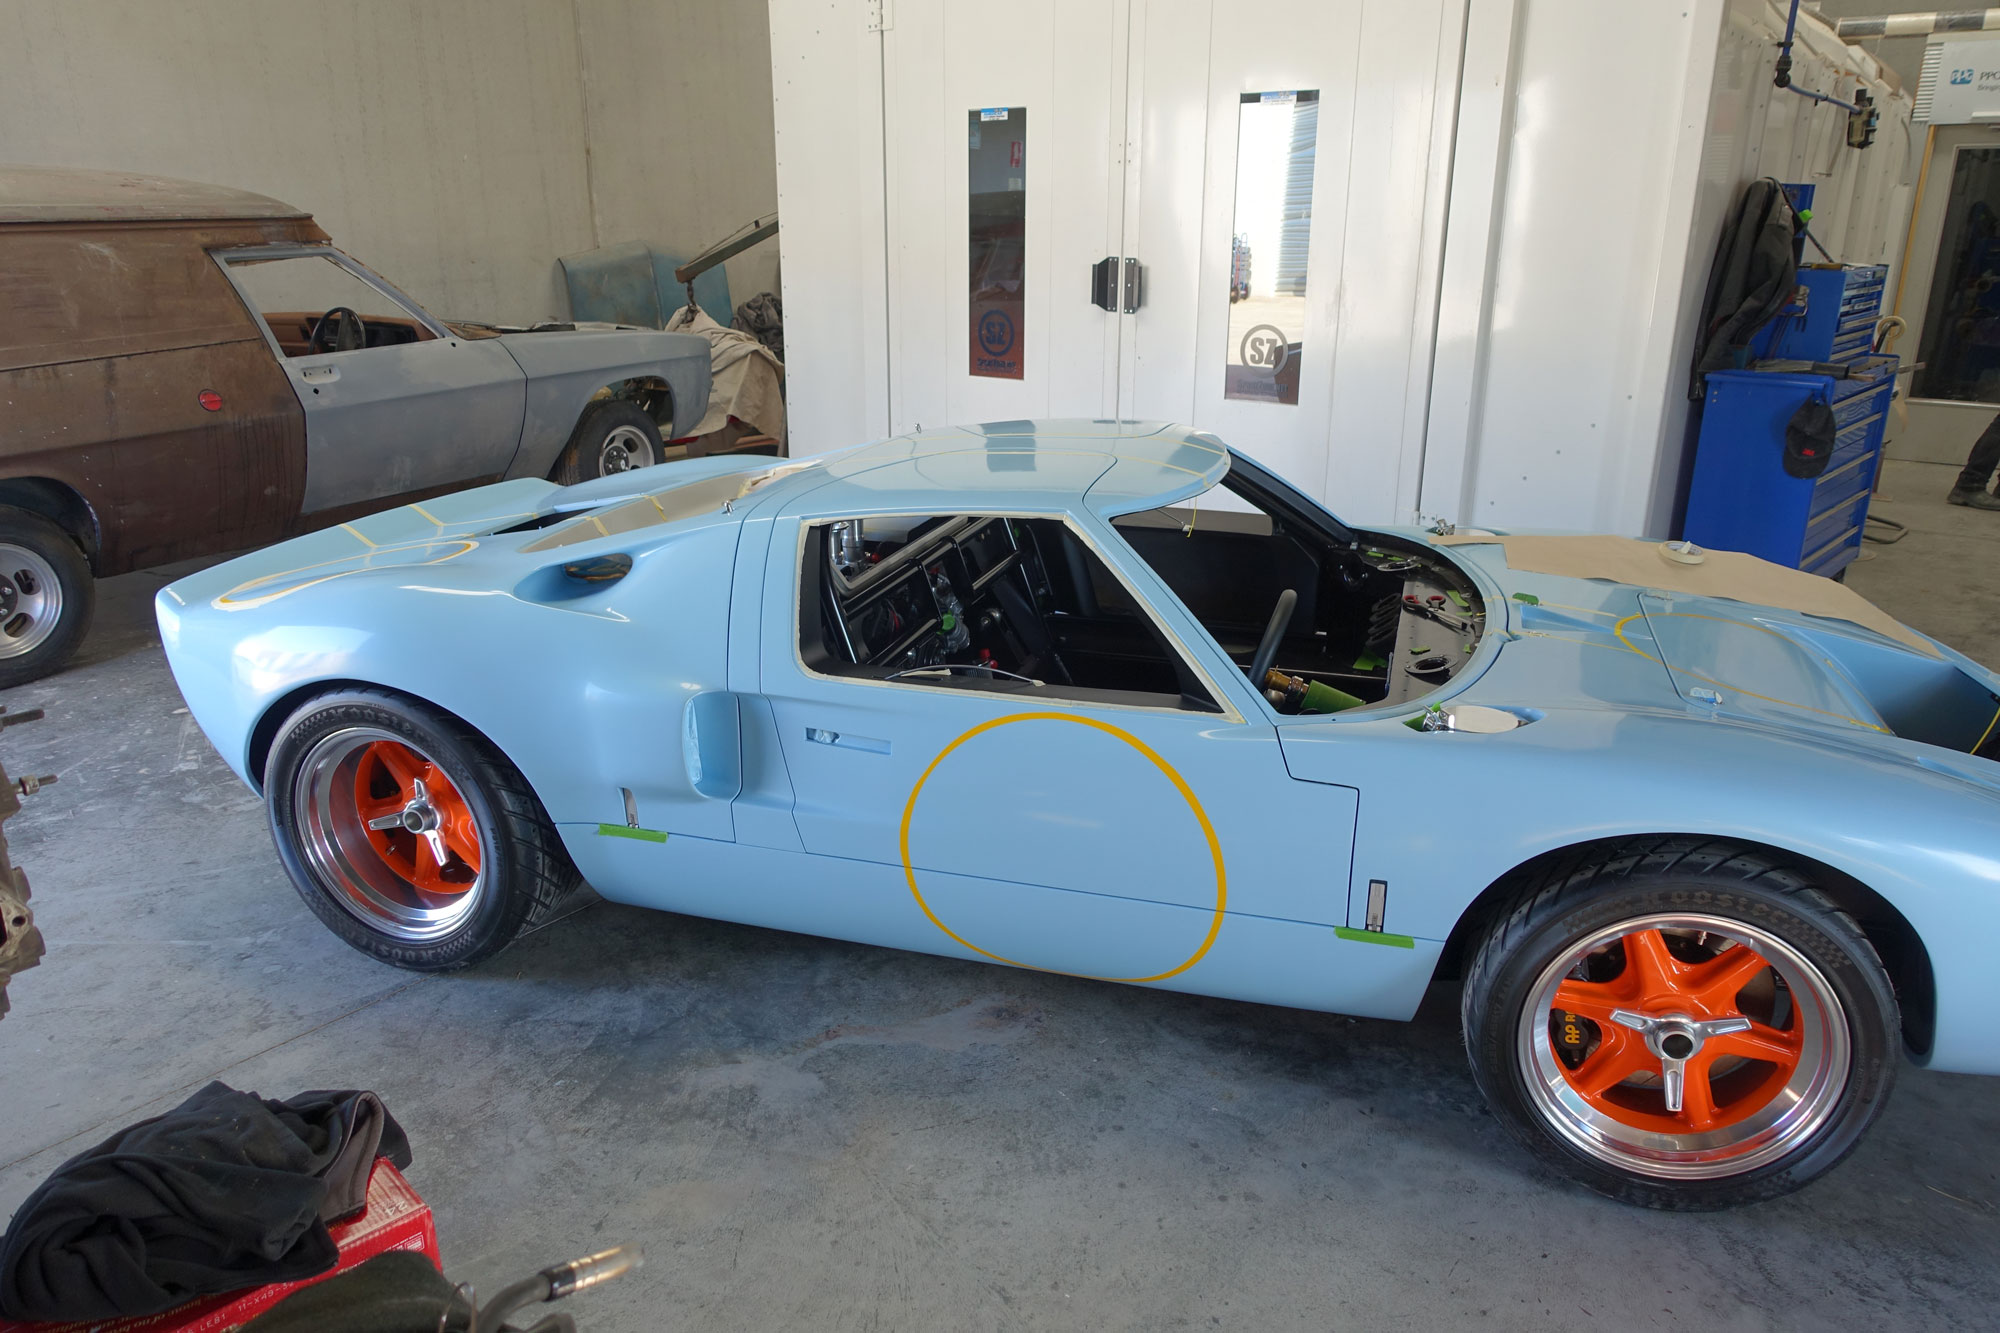
The blue and orange look great with the dark blue pin stripe. The color formulation was a long process but it came out to my liking. I actually wanted them quite subdued like they may have been in the 70's.
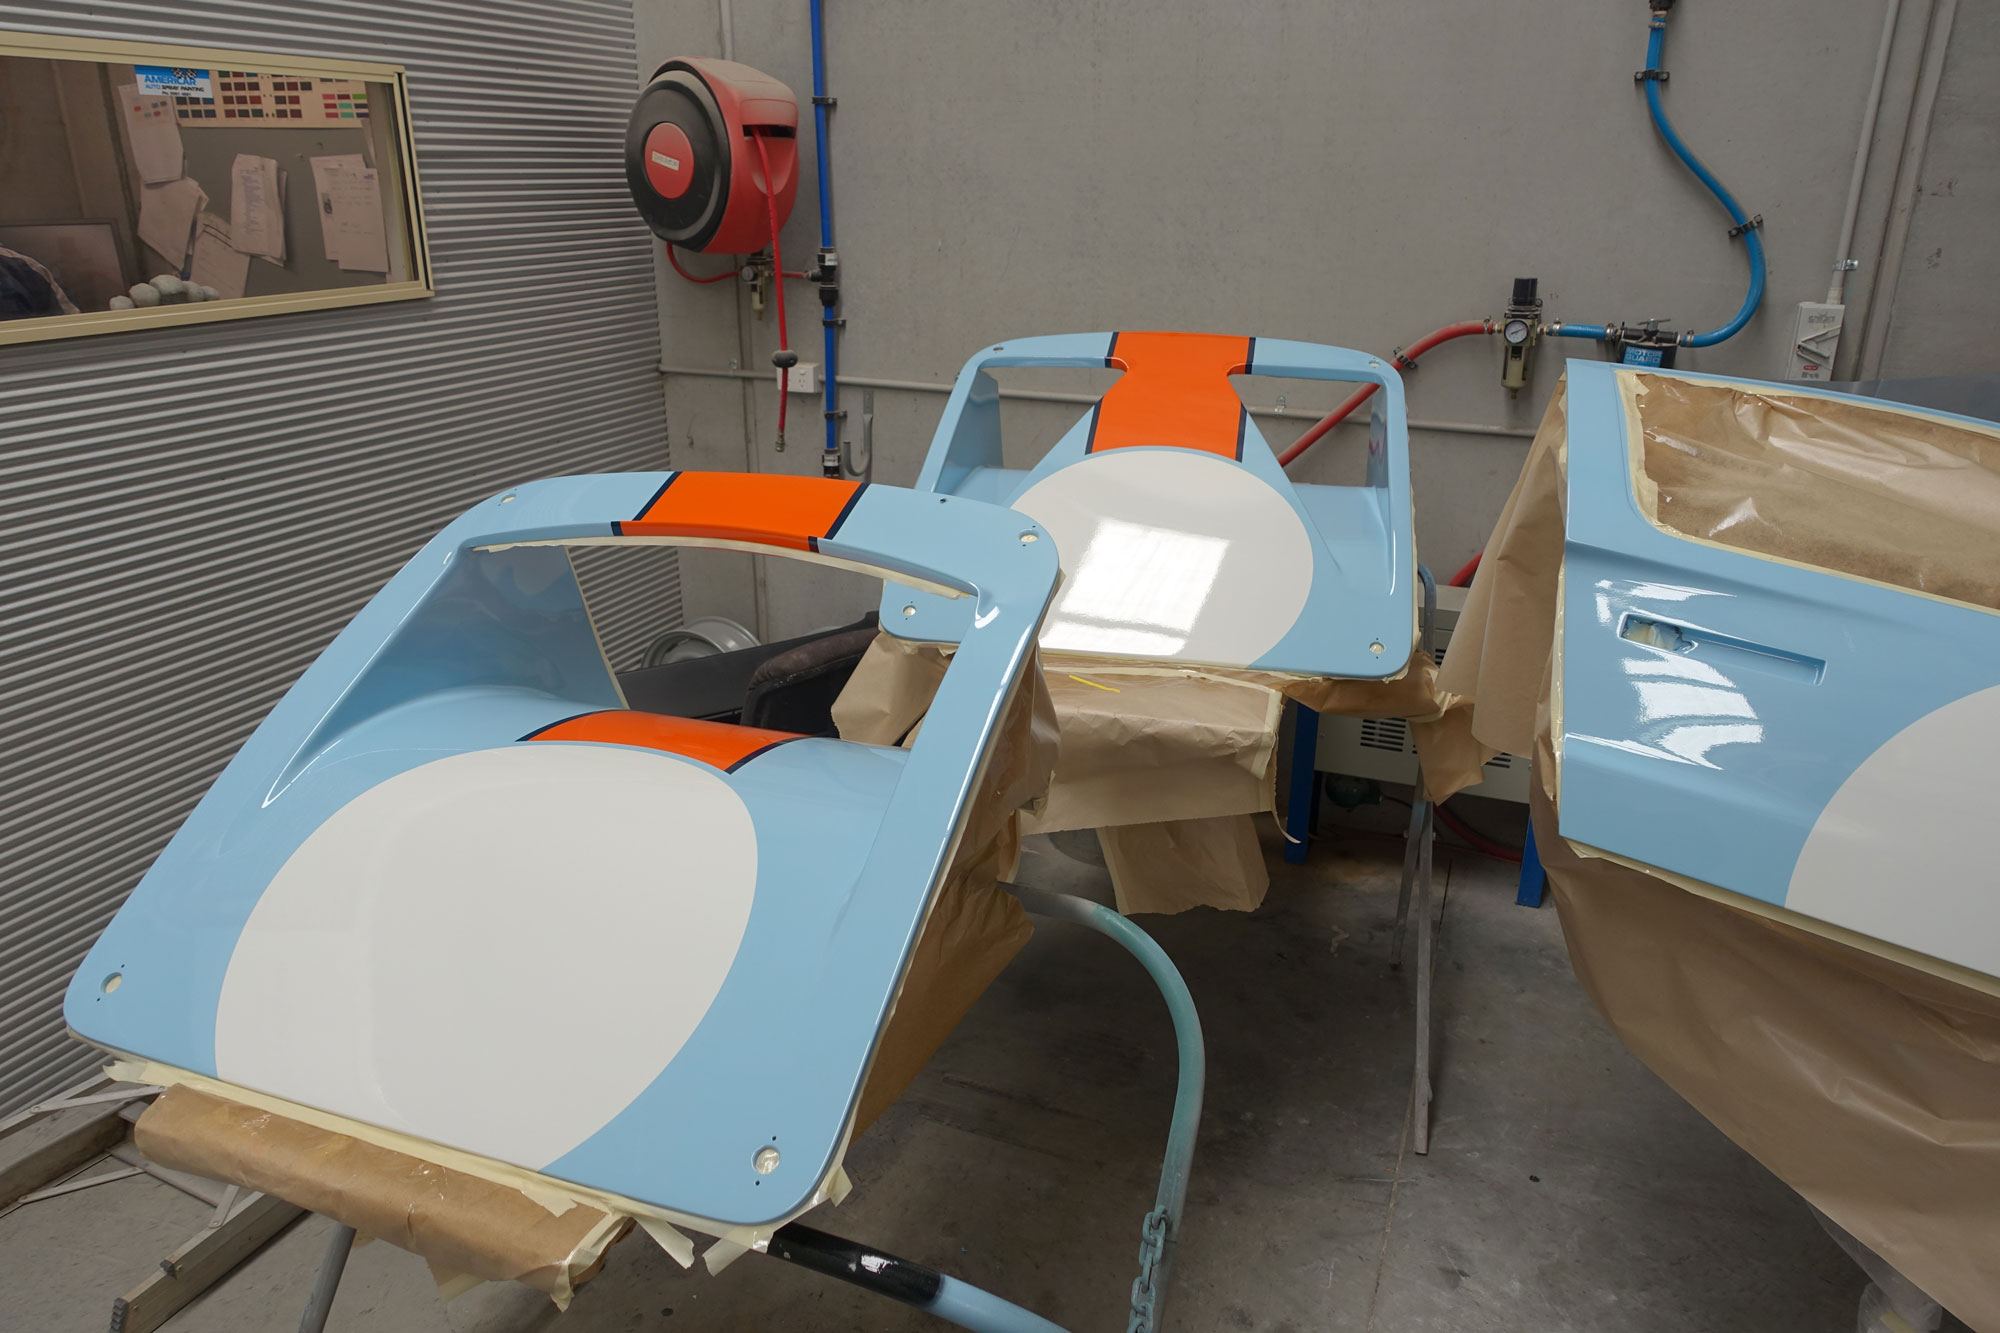
Yes the single nostril is the one meant for the car but it may be swapped for the twin from time to time. The twin will make a good bit of wall art if I don't use it much! All up I'm very happy with it and with a color sand to remove the peel and the decals it will look good. Just like others I have seen out there.
Update : 11th January, 2015
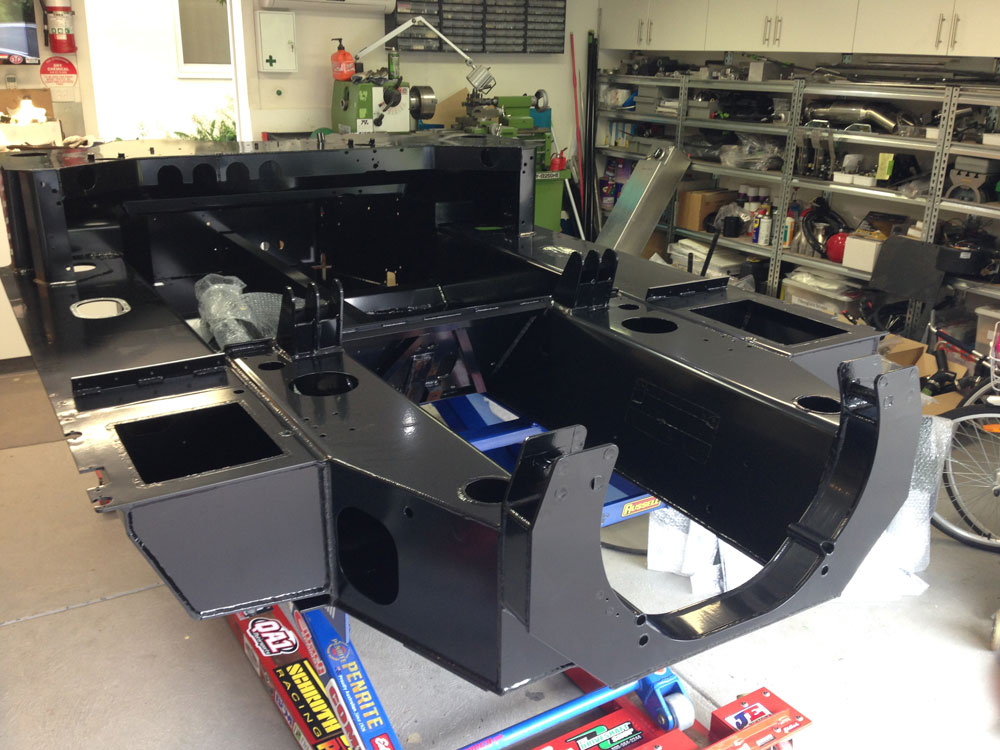
Chassis
While the aluminium chassis looked great after 6 years it had scuffed and marked up. I did not want to polish it so I took the plunge and powder coated it satin black.
First I used the orbital to sand it all down and then washed it clean.
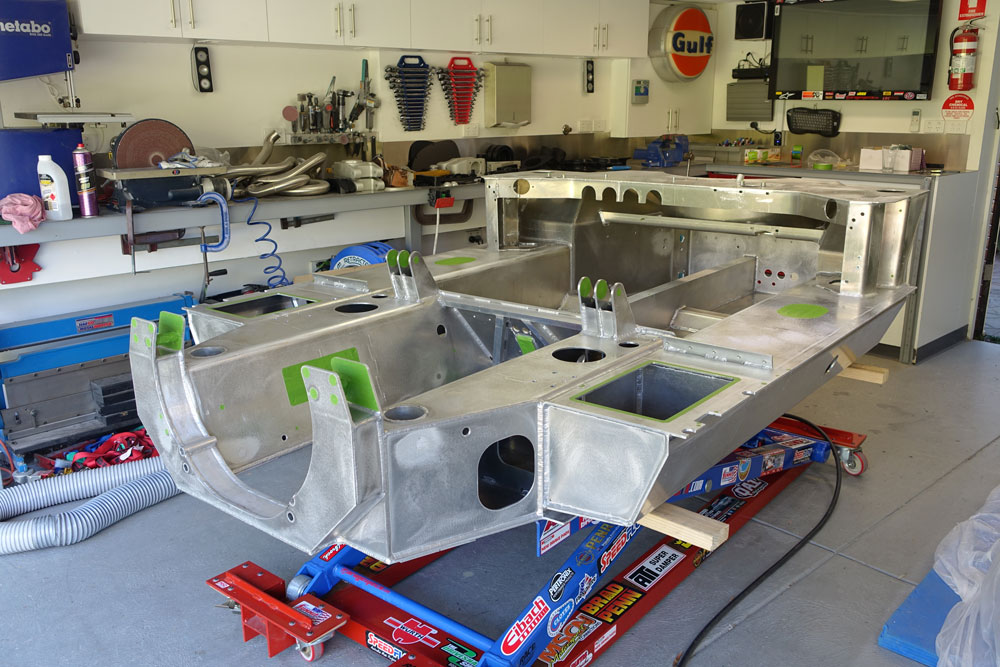
All areas that I did not want powder coat on were masked.
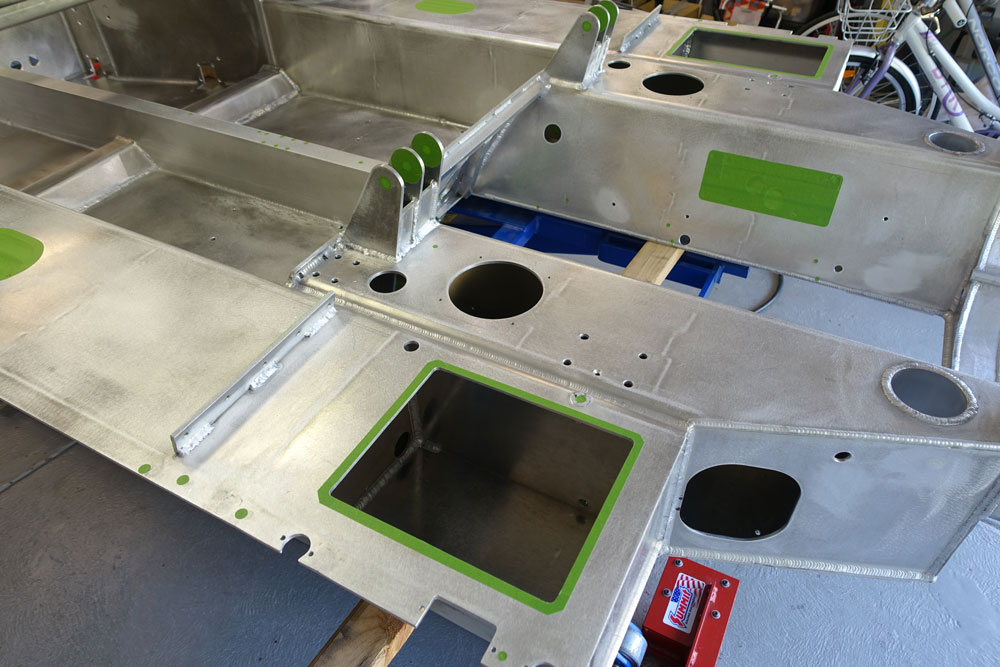
It was then primed win powder and given the top coat. Adhesion is really good. Its very hard to chip and does not peel off. The preparation and primer was worth it.
Update : 16th December, 2014
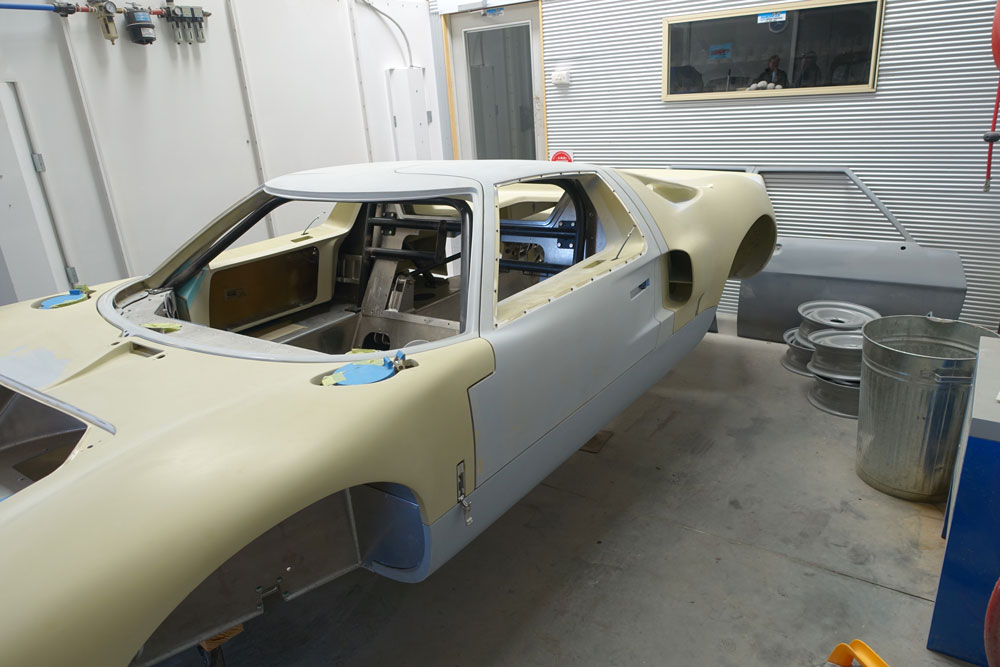
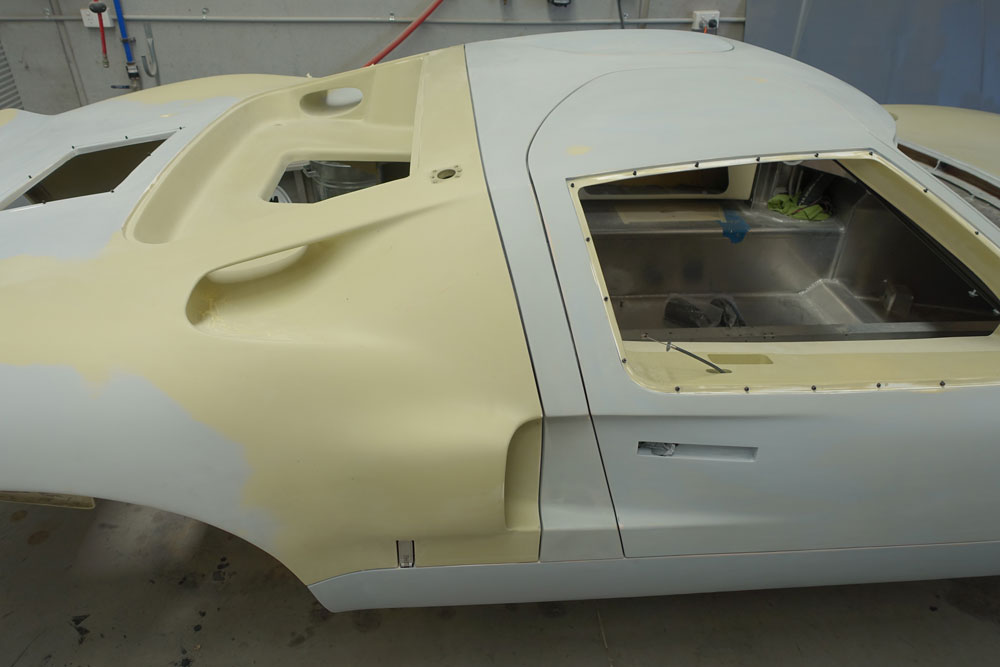
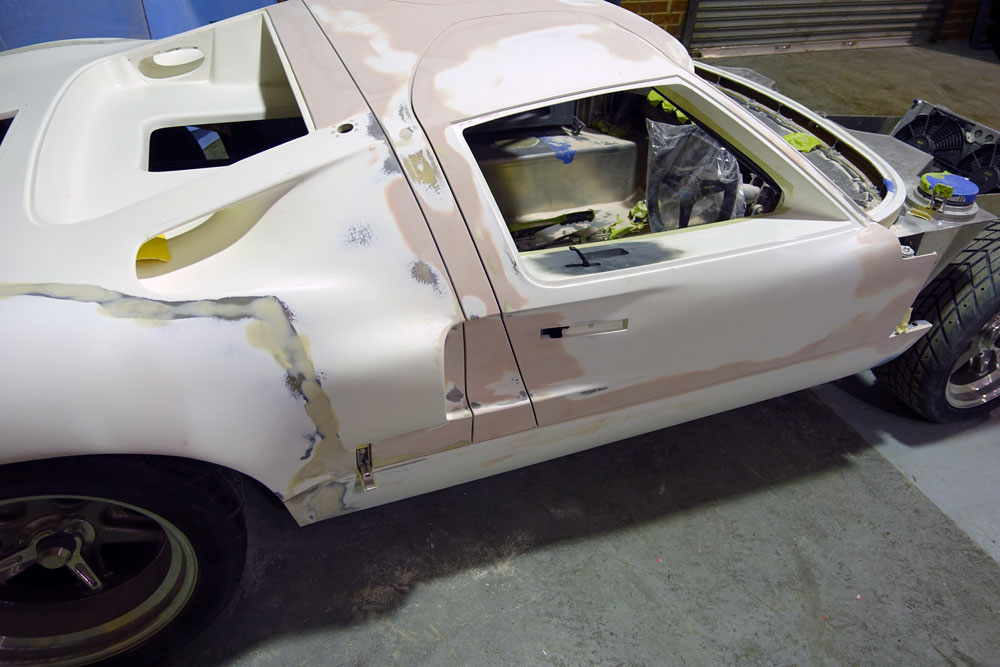
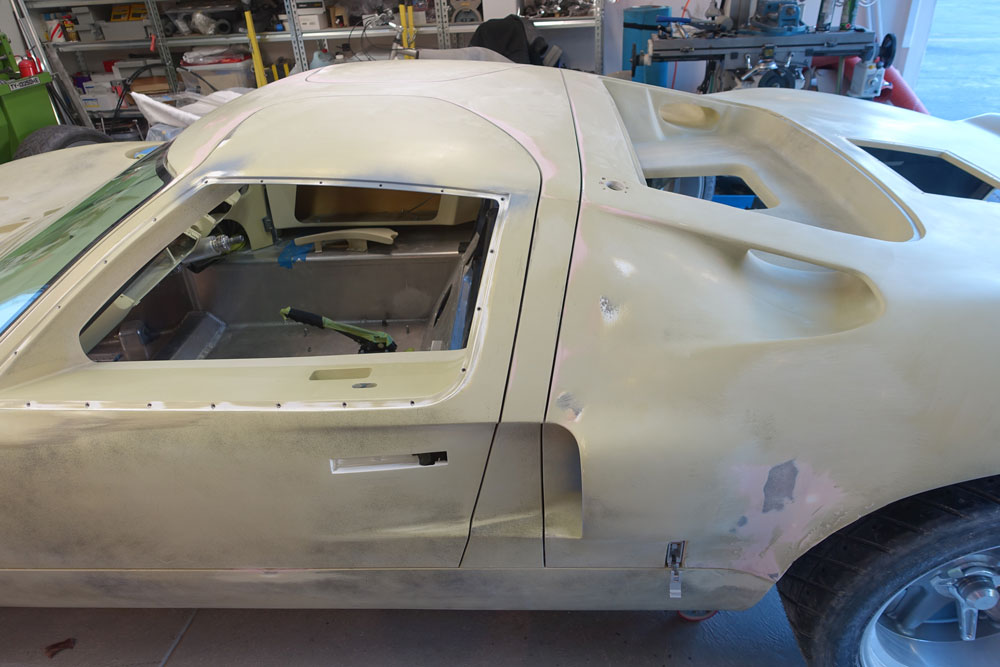
Nearly Ready for Colour!
All the hours of preparation are coming to an end. Gaps are looking good and the body has gone through a lot of checking. Trial fit to check and adjust gaps one more time and then is off to colour!
Update : 13th December, 2014
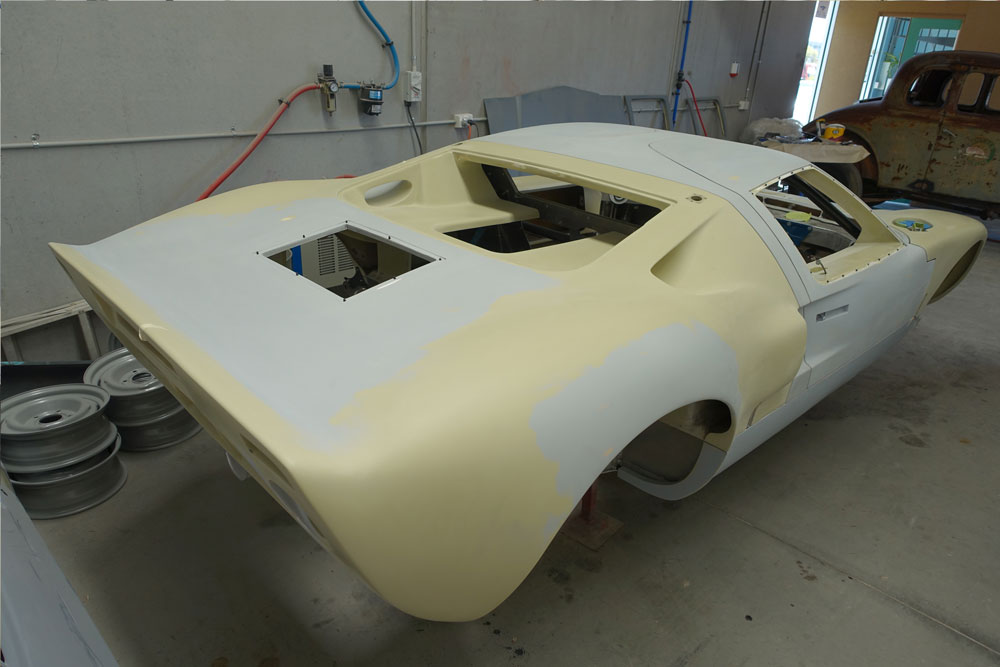
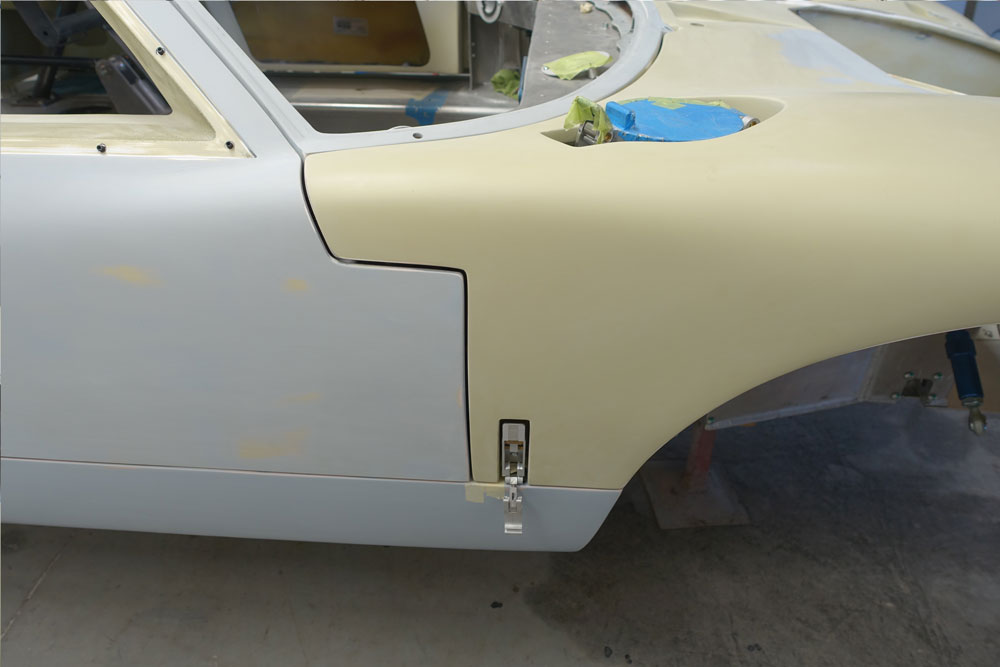
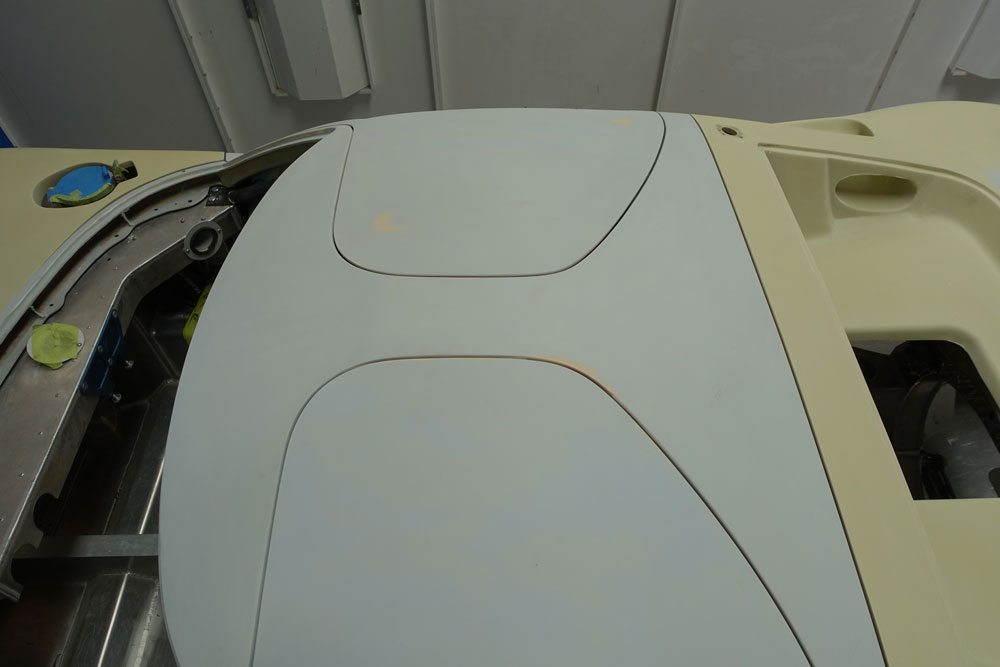
Body Work
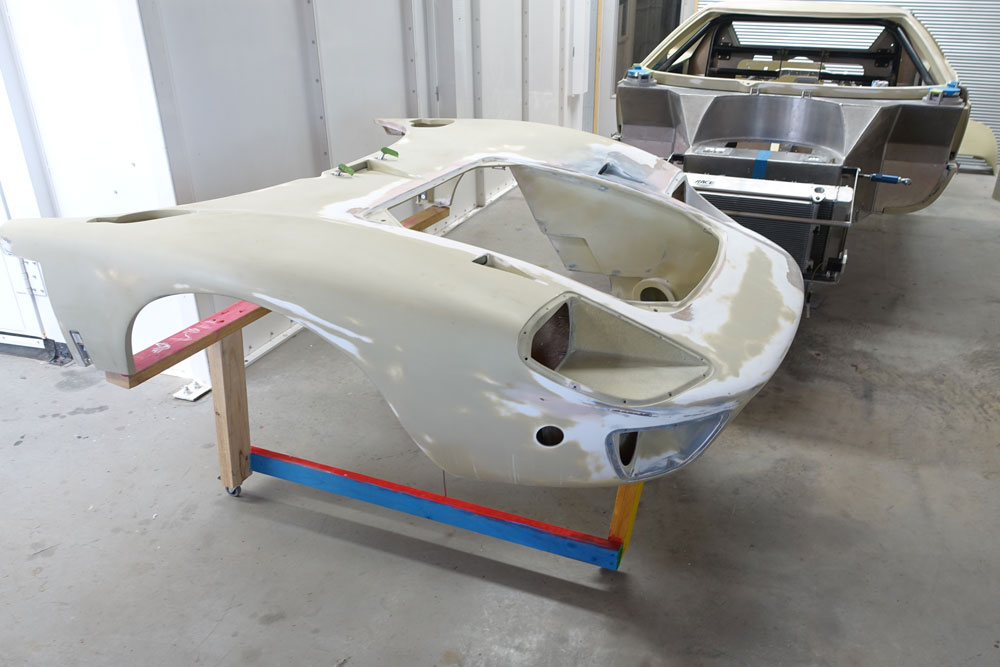
Many nights of late work. Much sanding. A lot of work from Kaber, laser scanning, mould making and body symmetry fixes. Its now ready for the painter to finish panel work and paint. What an ordeal! I think I will just list some images and a bit of text.
Yes I think the LHS and RHS rear flares do not match perfectly. Lets laser scan the car, make a mould and remake the LHS of the car at the back!

LHS now perfectly mirrors the RHS in every detail.
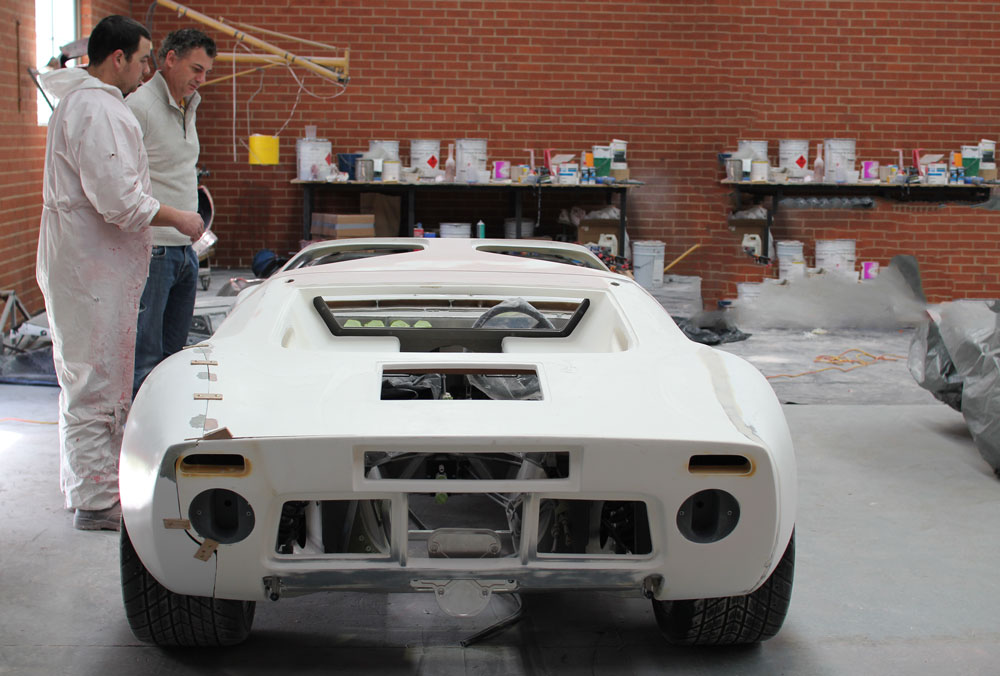
The LHS front also does not really perfectly mirror the RHS, lets remake that off a laser scan of the RHS as well. More cutting.
New LHS made and placed on car by Kaber. Car is now perfectly symmetrical when viewed front on. Originals were not so this is a bit overboard but what the hell!
Precision hinges allowed for tight body gaps all round.
Car is now at the painters for 1.5 months. Full gulf paint and full color sand finish. I want the car like a mirror, not what the originals were but this is just a replica so I am doing what I want.
I think these are boring photos to all but those that have done this or are about to!
Update : 15th October, 2014
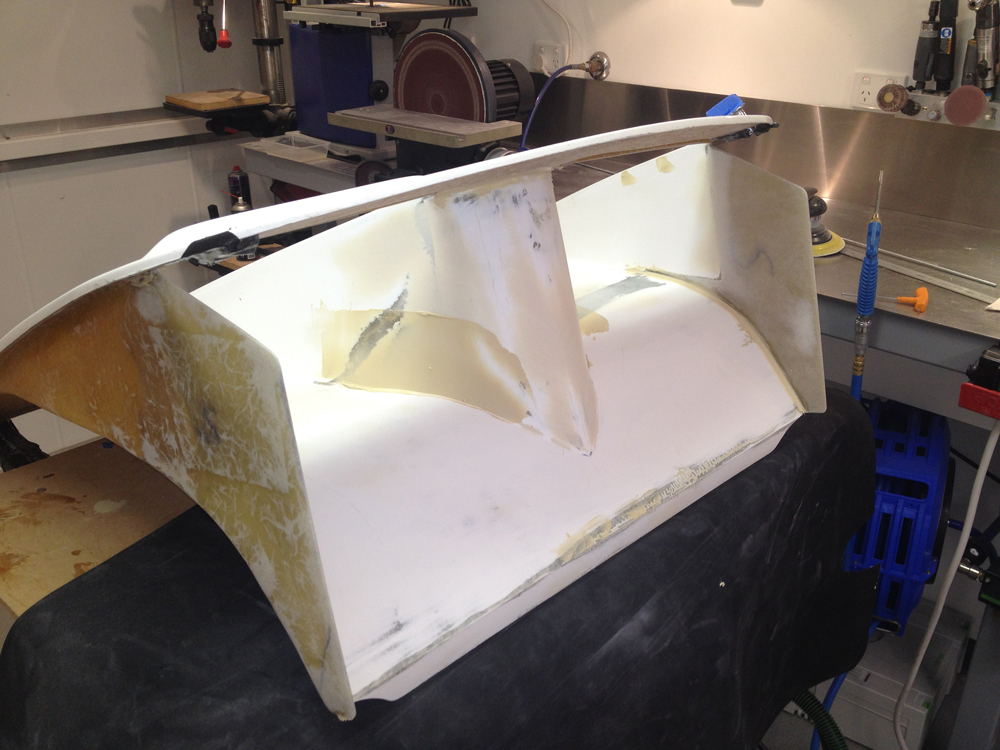
Rear Brake Cooling Ducts
I always wanted to make functional rear brake cooling. I really liked the cooling setup on a Porsche 962 when I saw one at the races this year (my photo below).
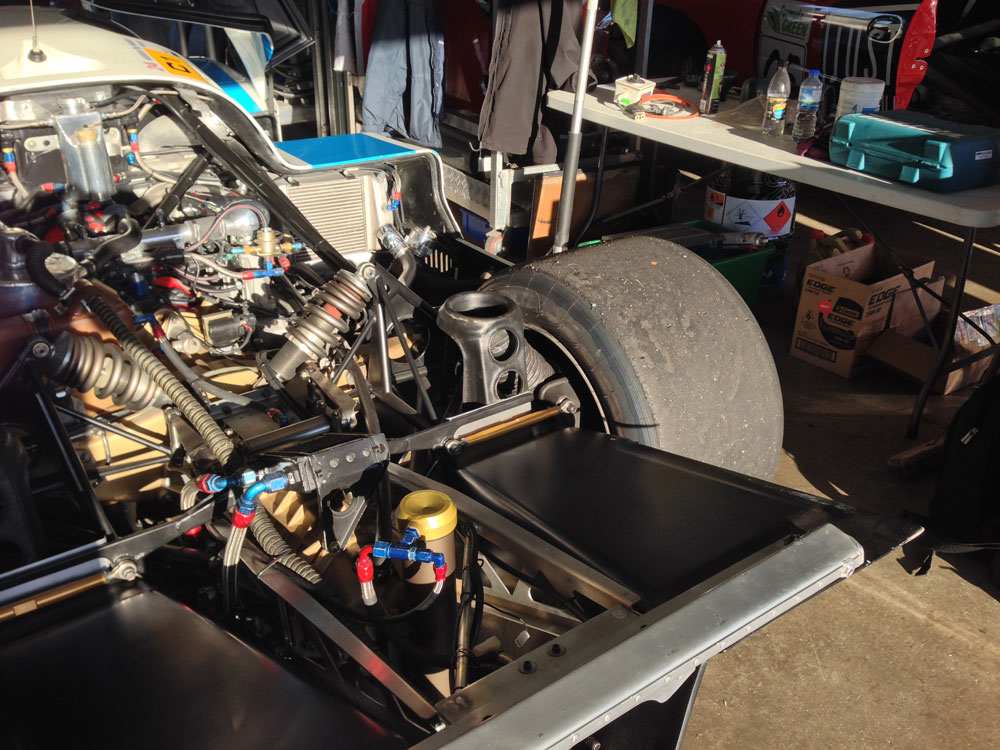
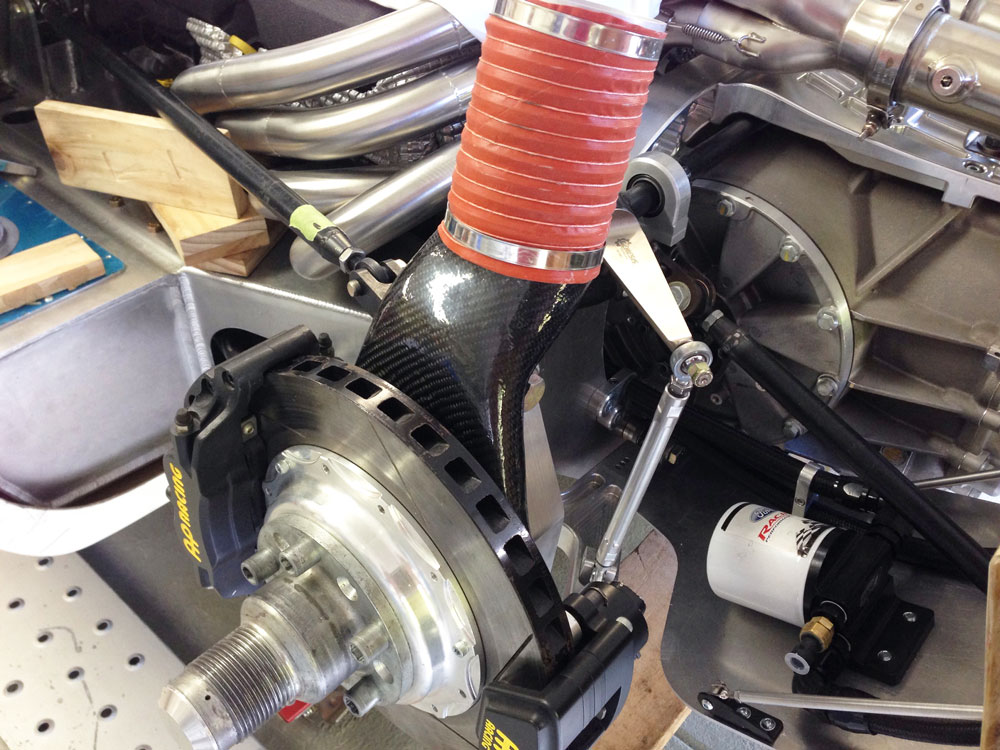
Air coming in from the top down and the flexible hose compressing vertically is very neat.
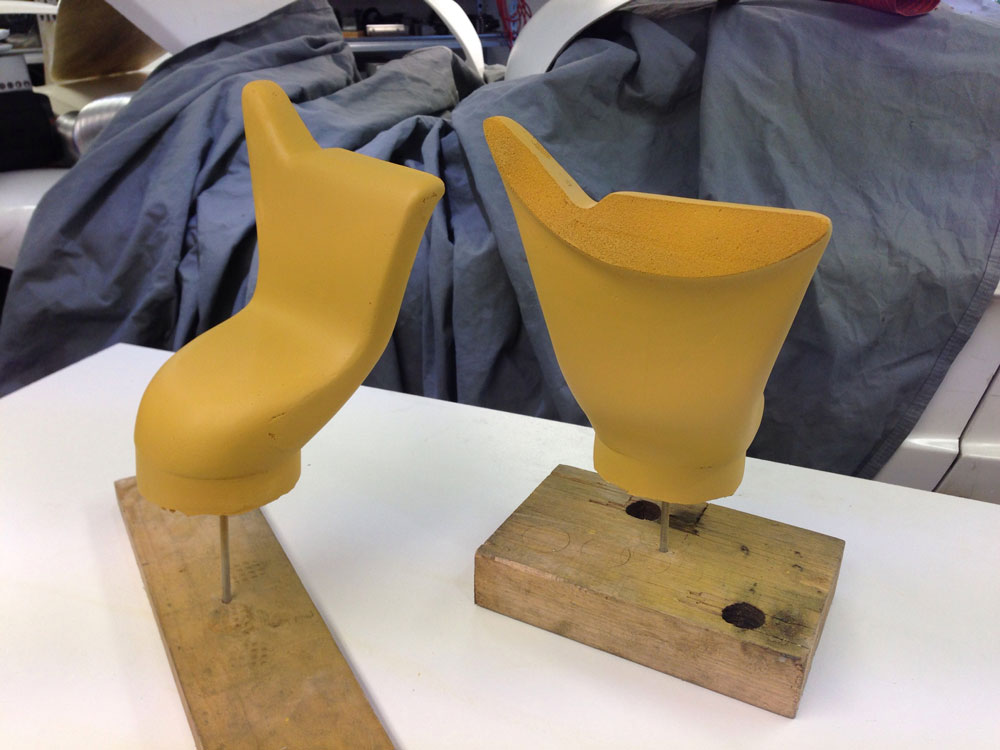
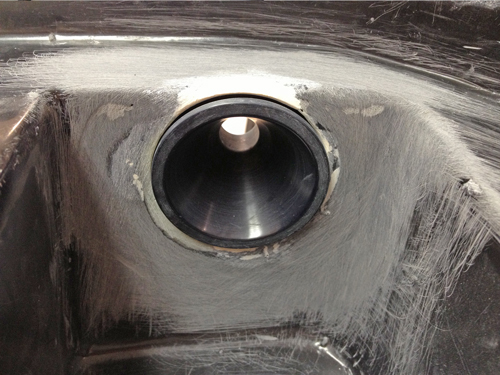
First step was to get air into the middle of the rotor (as I did in the front brake cooling duct I made earlier). Space was tight. I made a foam pattern and then constructed the duct out of carbon fiber. I will cover the area near the rotor in gold heatproof material to protect it somewhat from high radiant heat from the rotor.
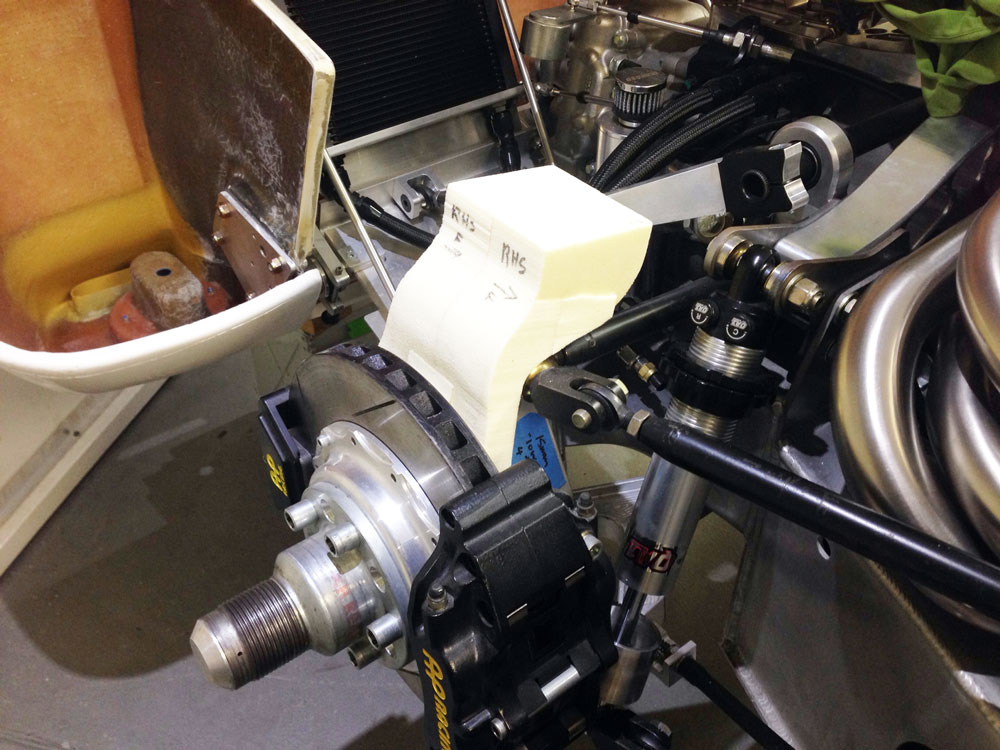
Foam patters ready for carbon lay up. They do neck down near the rotor as space is tight but the air will accelerate and flow OK.
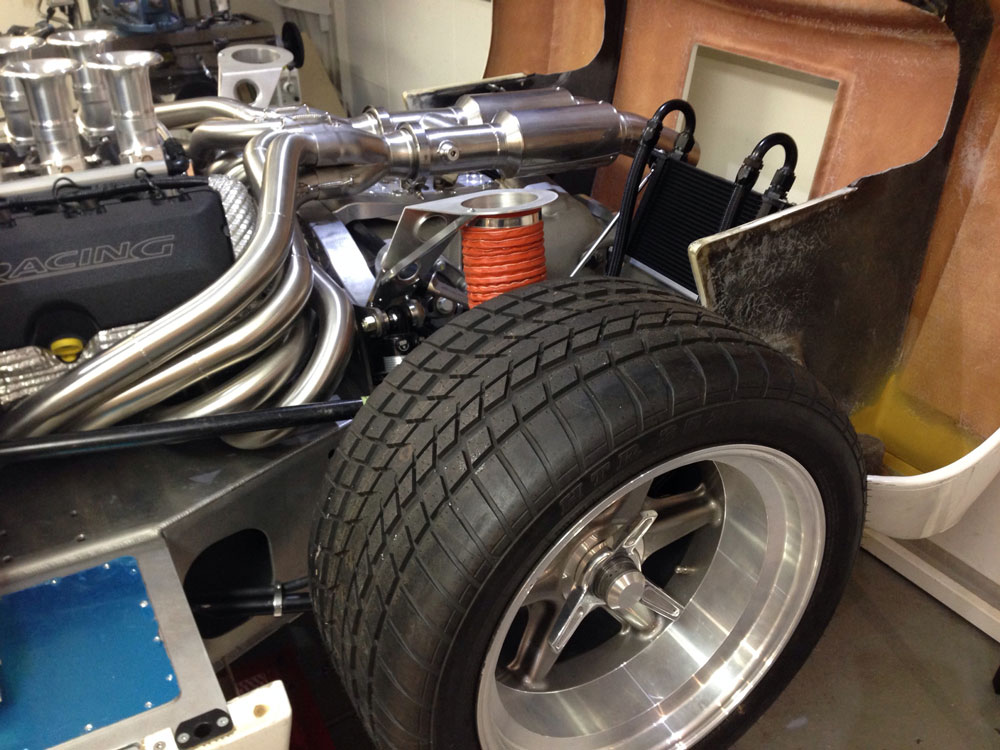
Carbon dust bolts securely to the aluminium upright in three places.
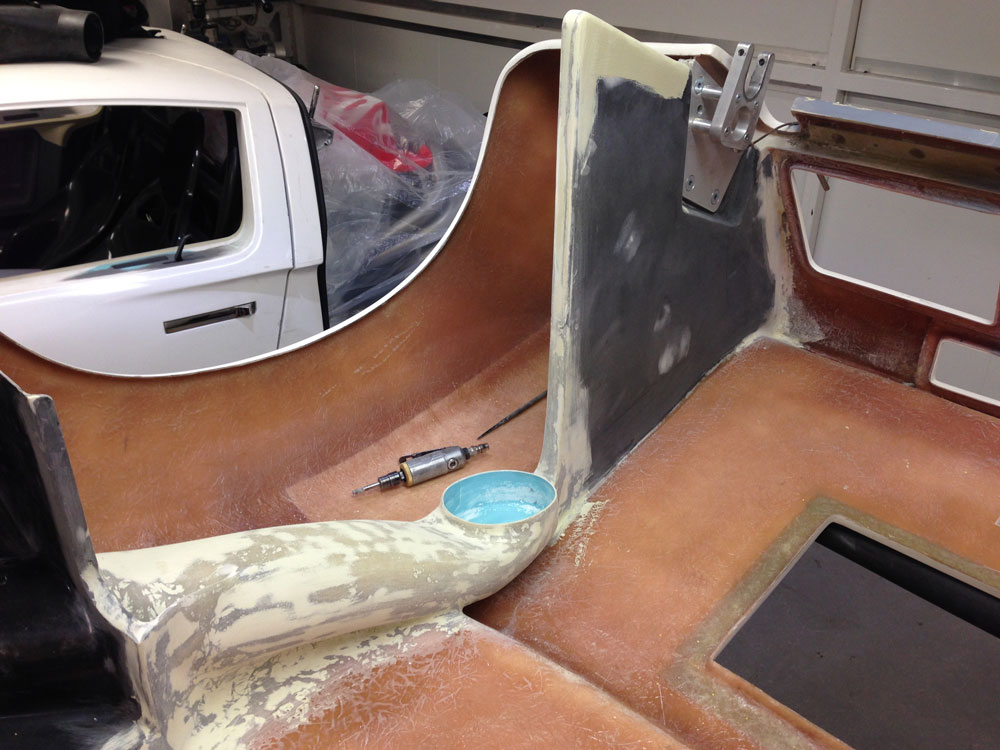
Next step was to create a fixing point for the top of the hose to marry to the body. The trick is to keep this whole system low enough to fit under the rear clip and allow full suspension travel. An alloy spacer on full suspension travel was used to position the upper mount that is fixed to the chassis.
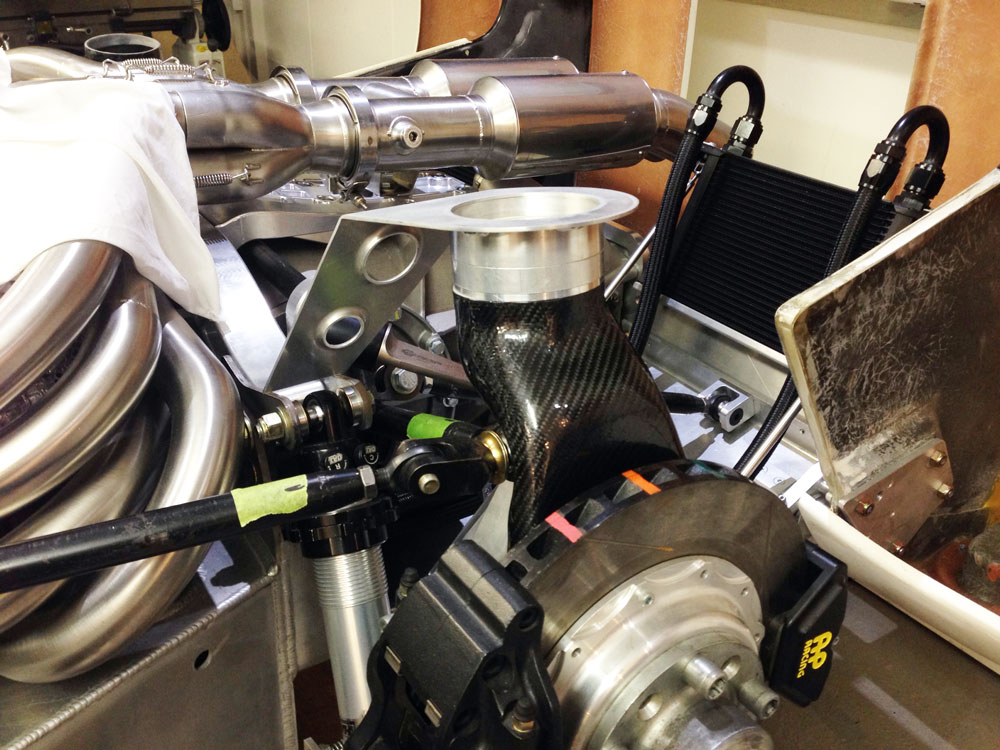
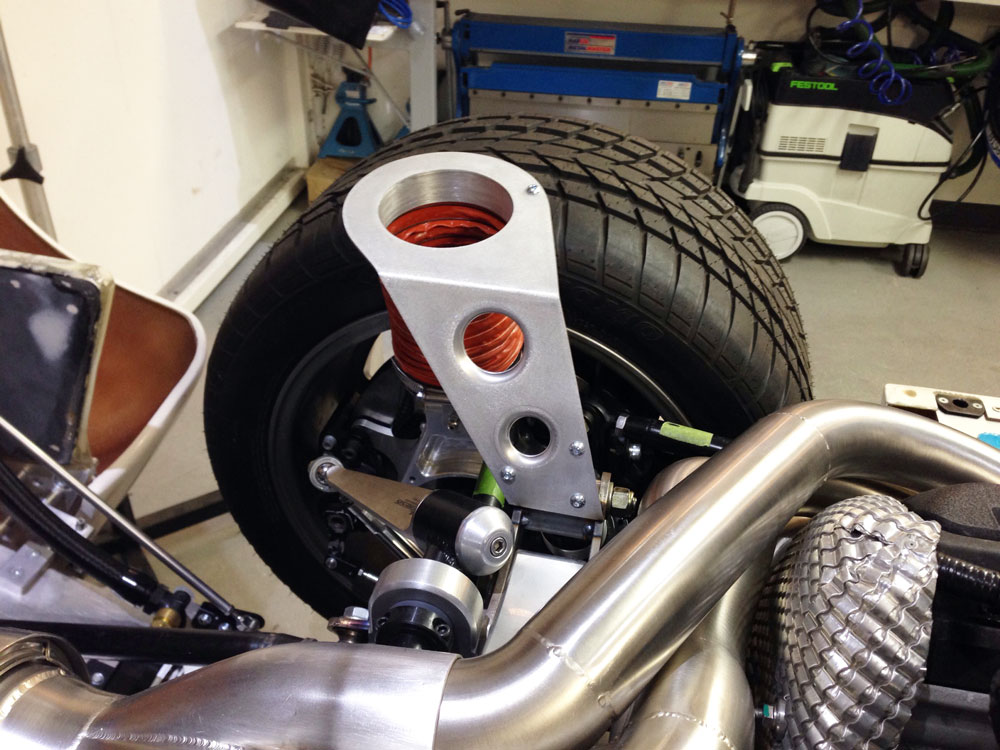
This alloy plate will allow a pinch weld rubber seal on a body duct to seal correctly when the rear clip is lowered.
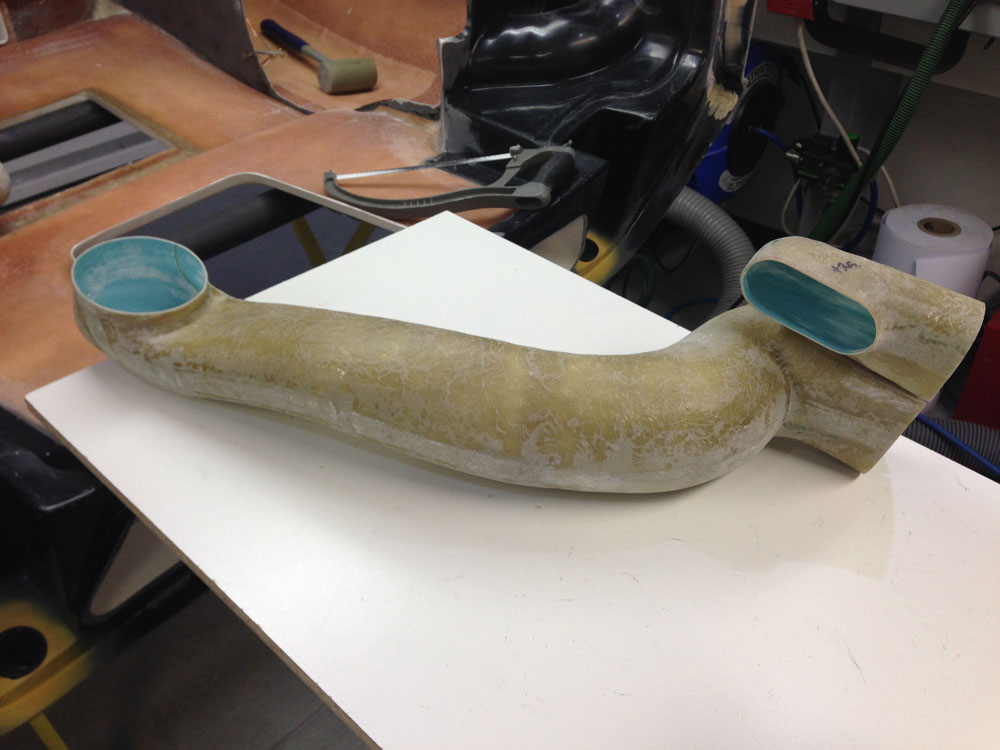
Now for the ducts. First foam patterns were constructed. This took a while!
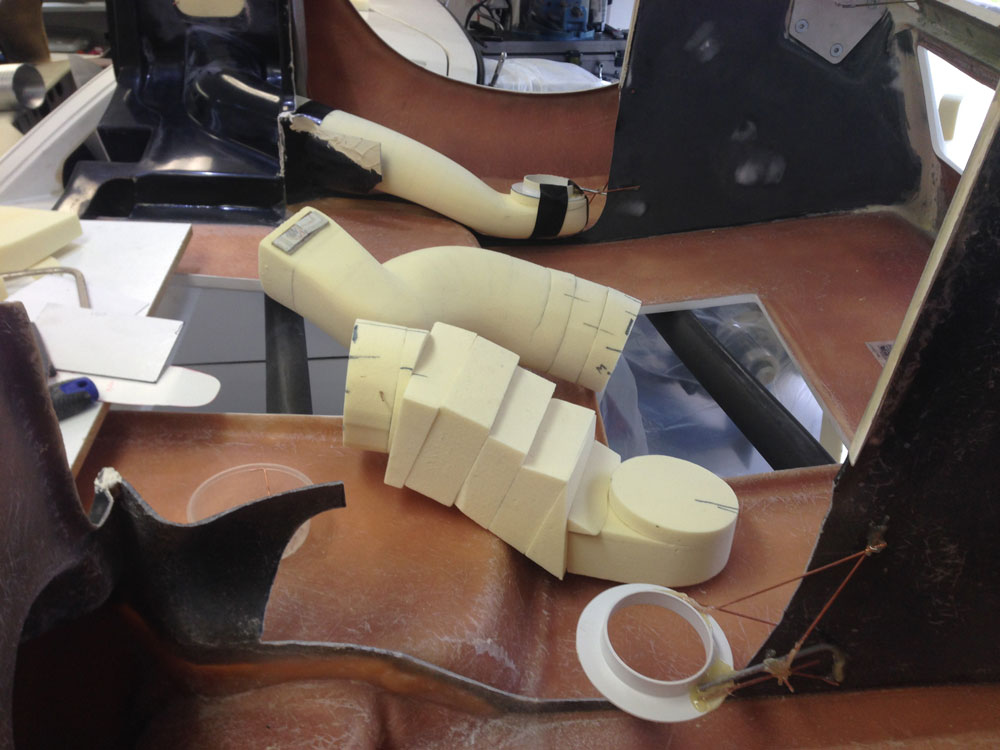
Plastic fitting was the exact point of the allow chassis mounts so a perfect seal could be made. I also made the smaller ducts that channel air to the original cars cooler positions. On my car this will simply cool the extractors a little.
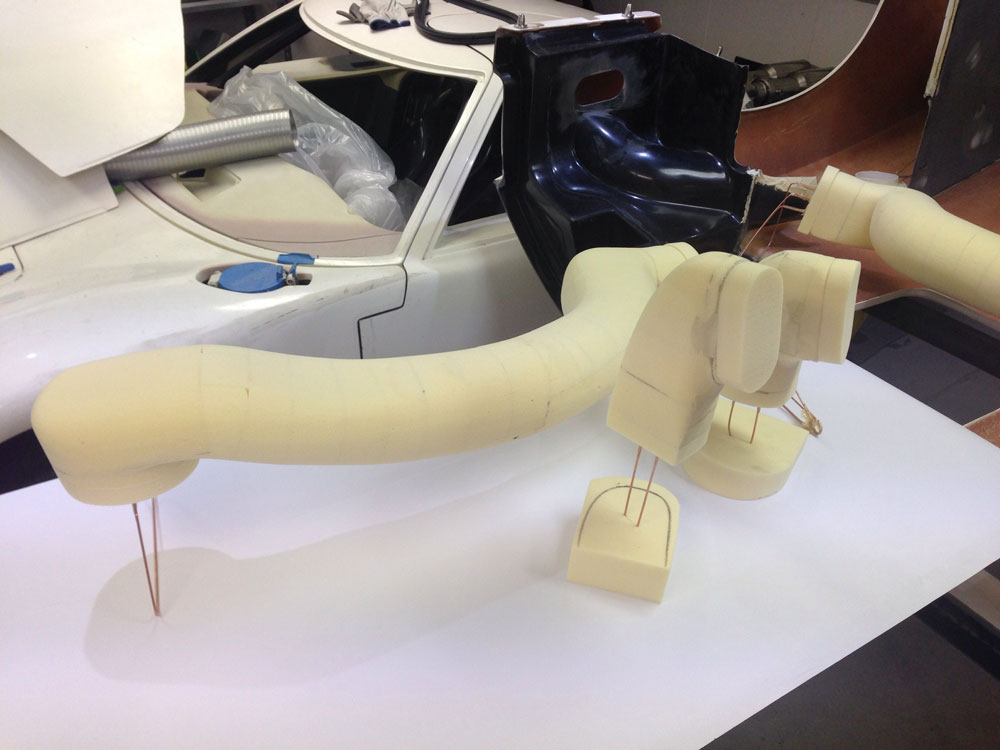
Now to cover in fibre glass, split, remove foam, join again and fill the internal cut line. I wanted perfectly smooth inner surfaces so that when you look down the duct it will be perfect. Nothing looks worse than raw fibre glass.
Finished duct was then fixed into the rear clip.
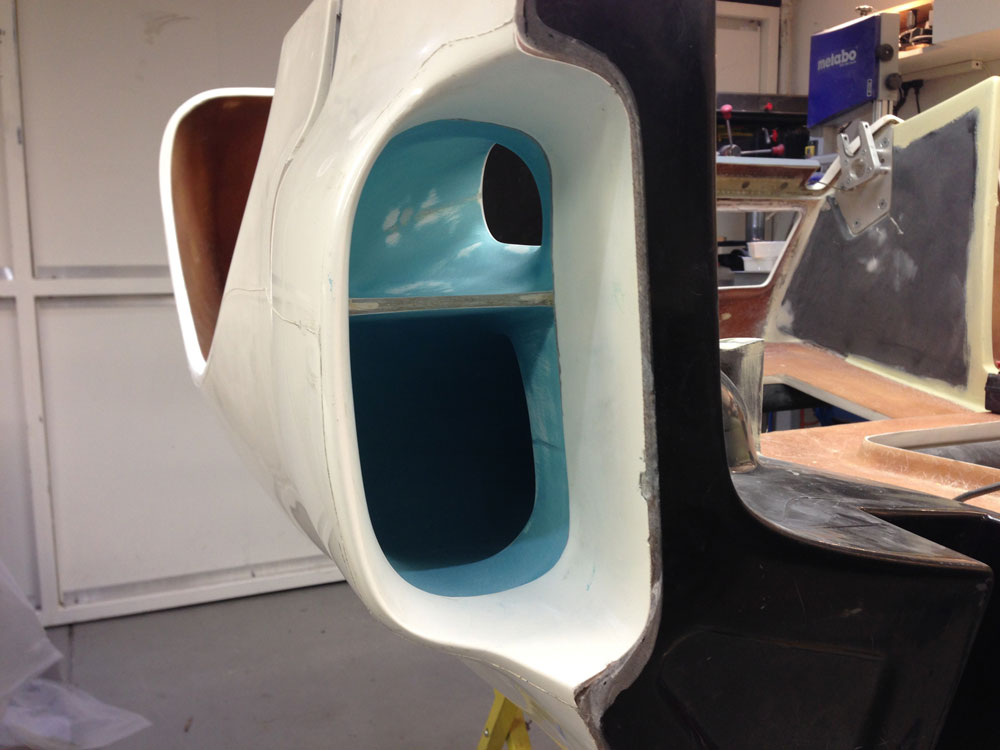
As you can see below, the duct has to be mounted high on the clip to allow suspension compression. Outer surface of the duct was also smoothed off.
Ducts are symmetrical and don't look too out of place. Not original looking but hell none of the guts of the car does.
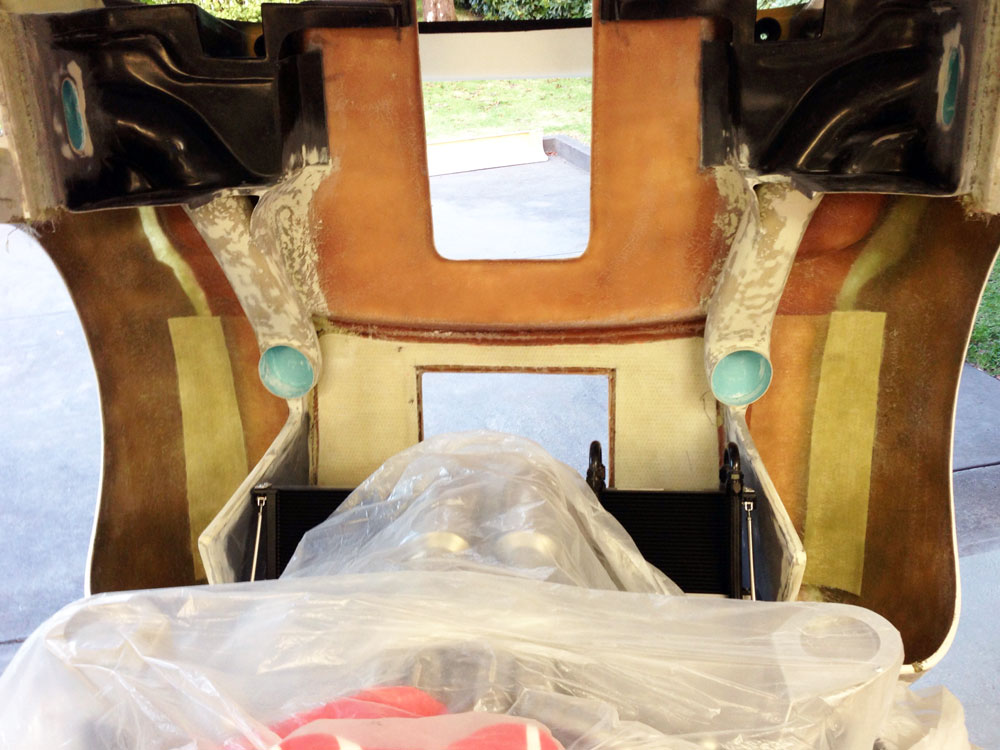
Then I also put the gulf rear flares on. What a hell of a job that is, lining them up to be within 1mm side to side took 3 nights!
Edges were feathered on top but without removing too much of the top surface, underneath they were feathered and 4" of glass either side of the join was added along with additional core mat where it had been cut off. Seriously, pay someone to do this if you can it was a PITA! I should have got RCR to do it when they offered!

Update : 13th May, 2014
New Door Hinges
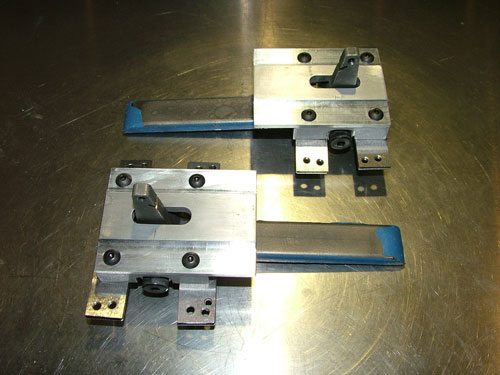
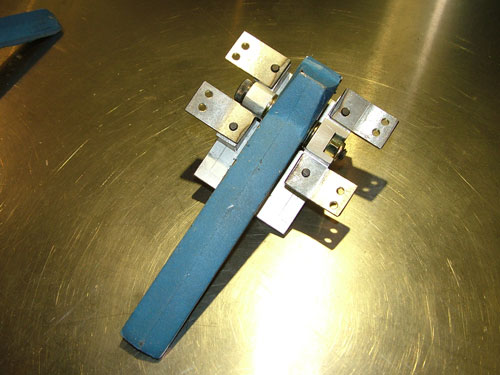
To get better detail alignment of the door and install a full length stainless steel pin and door plates I made the following.
The door plate hinge is original RCR with the rod end boss welded on and the assembly zinc plated. This has allowed me to fine tune the door position and have zero "slop" in the door hinge. With the way a GT40 door passes over the roof when closing this was important.
Update : 23 March, 2014
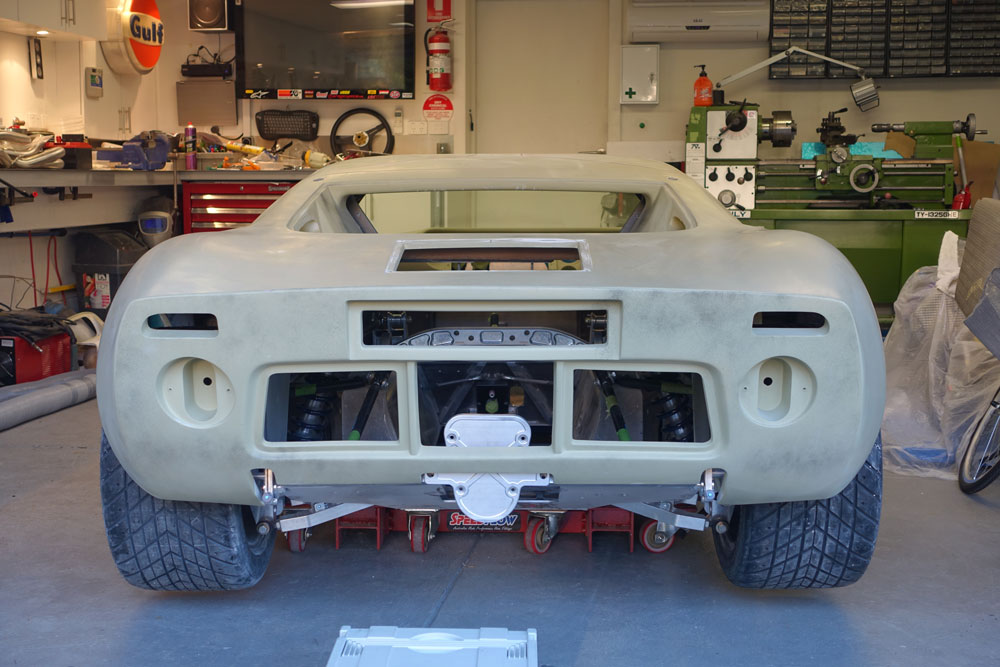
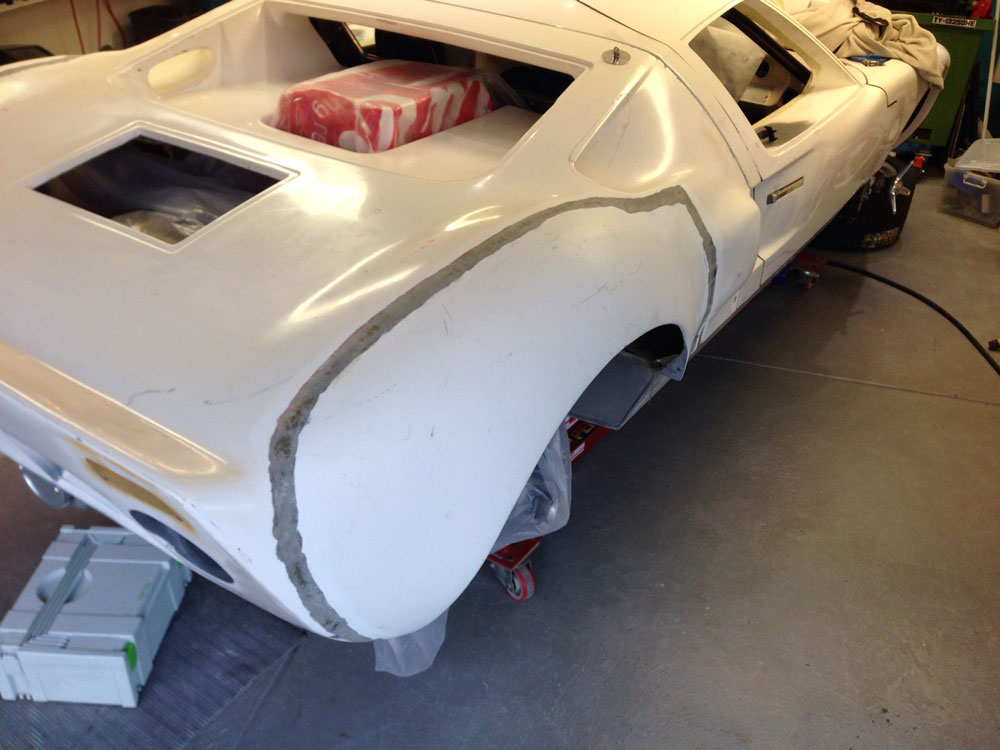
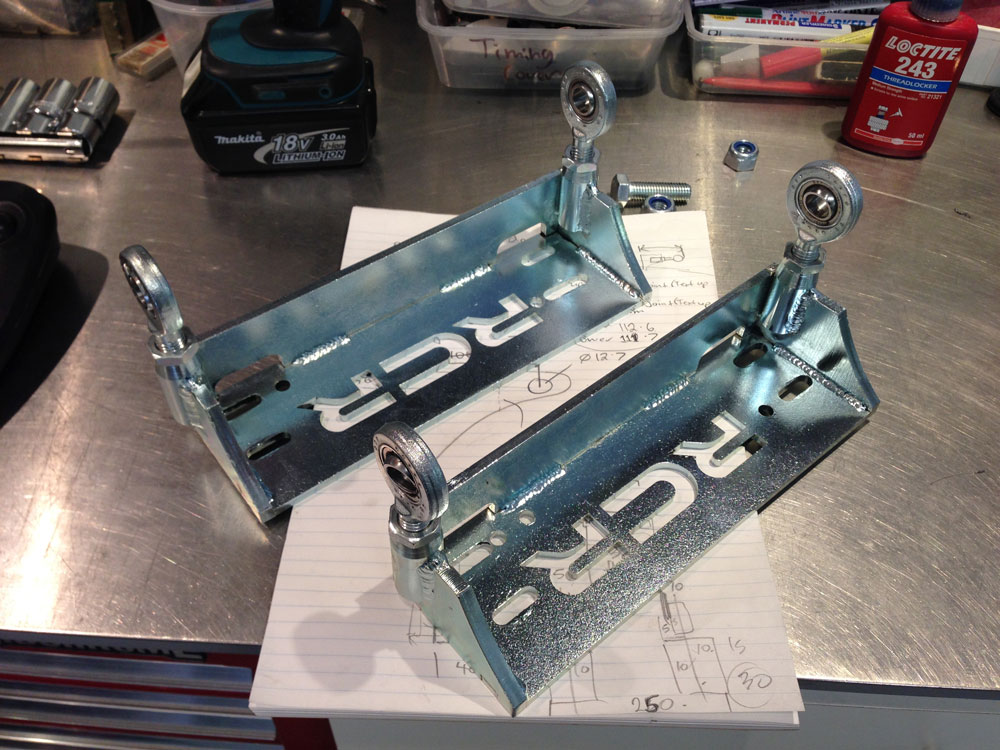
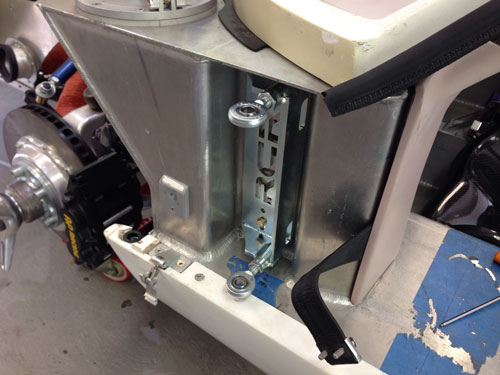
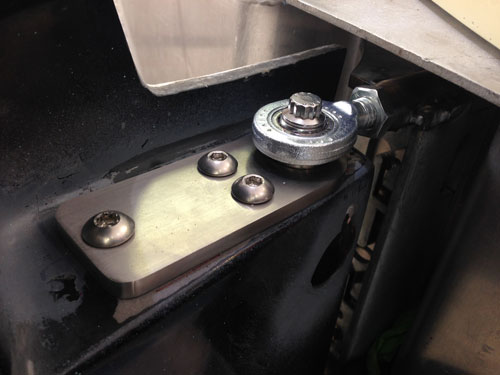
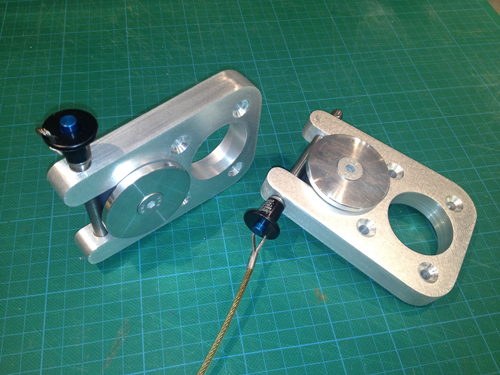
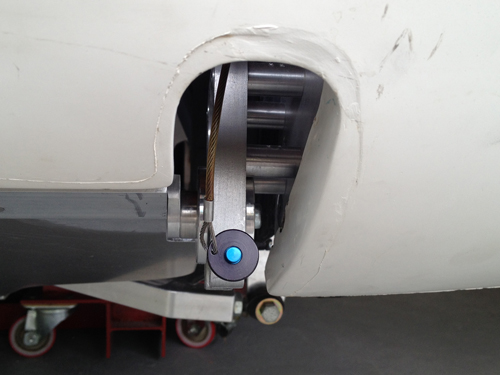
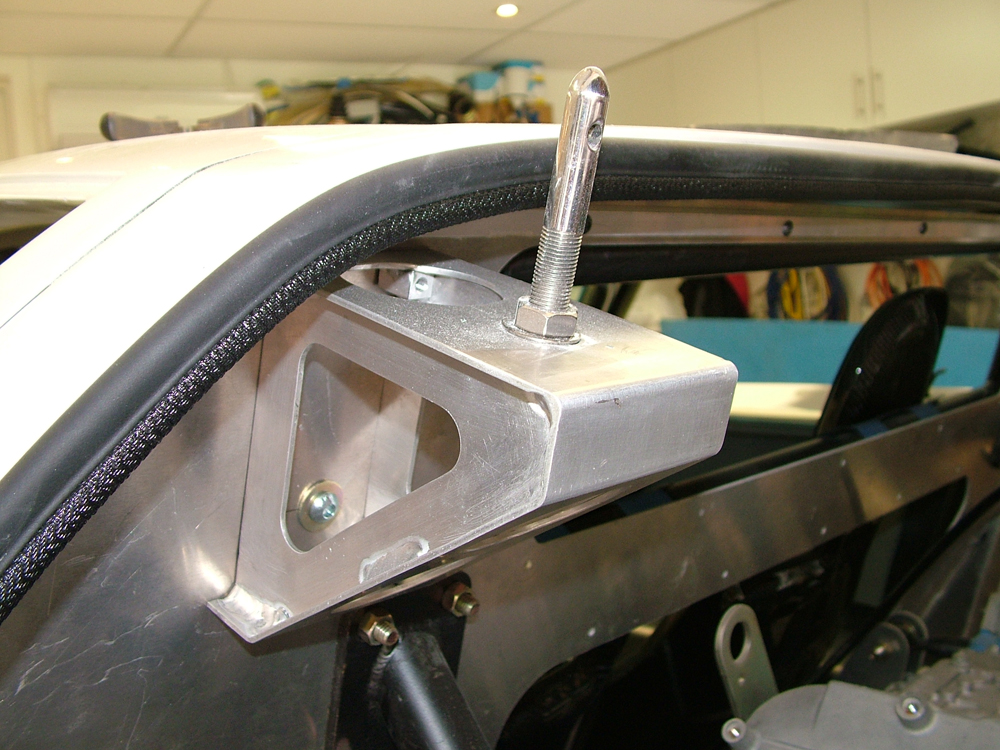
Rear Clip Pivot Points
To make the removal of the rear clip easier I have made some rear mounts (shamelessly copied from other GT40's!). To remove the clip one just removes the quick release pin.

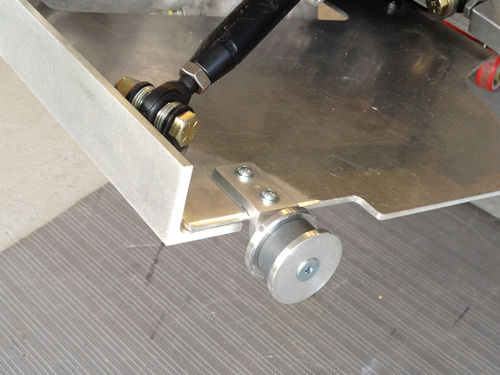
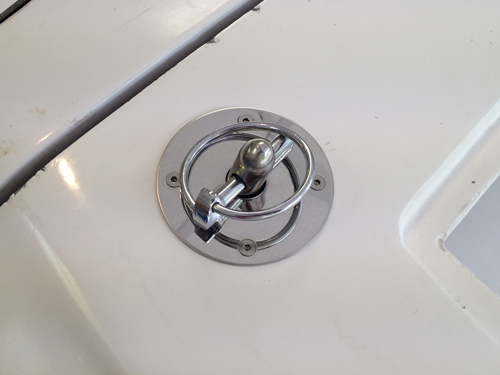
I also placed the hood pin caps on the body. To assist in closing without damage to the body I also bolted in nylon "pin guiding cones" under the clip. It allows me to just drop the clip into place and the cones ensure the pins guide easily into the neat holes.
Update : 6 January, 2013
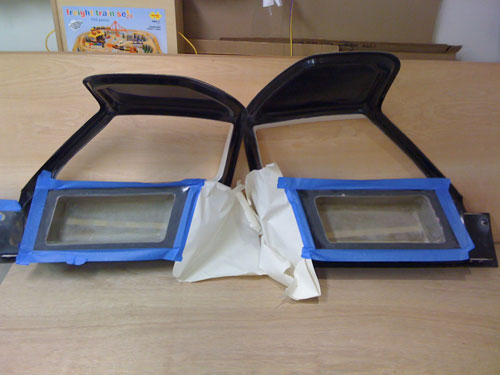
Glass
I wanted to swap the rear cabin window differently to other RCRs in glass and with a custom frame. I designed an alloy frame in CAD and had it NC machined out of plate. It came out great but it will be hardly seen so this is another one of those "i did it because I wanted to" parts :)


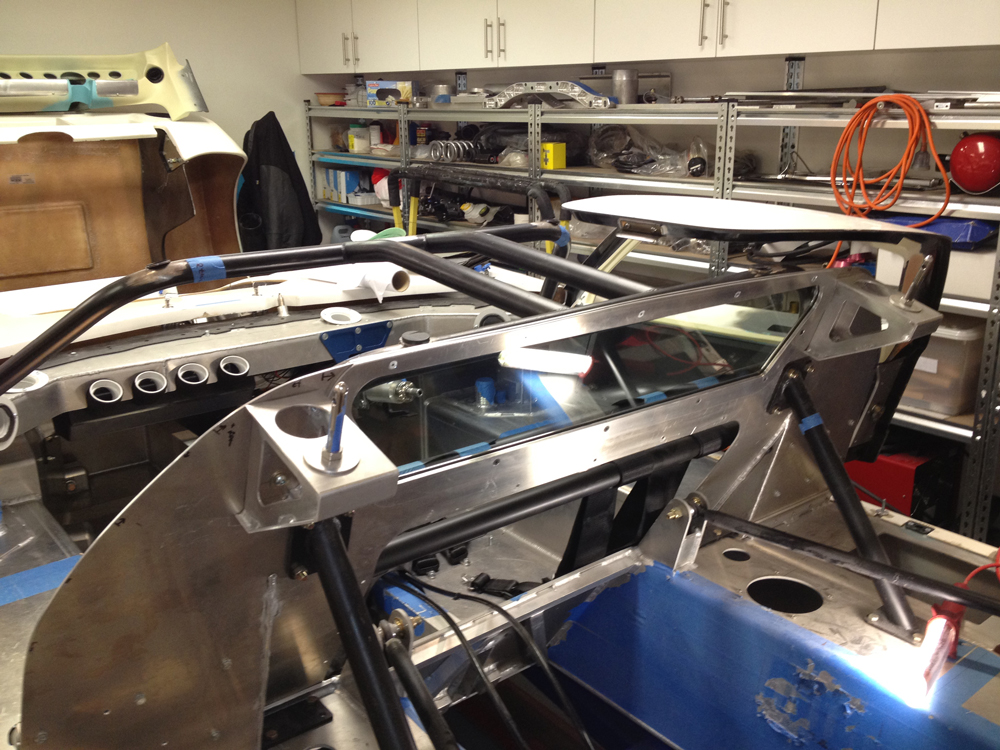
The rear window from Roaring Forties was also trimmed slightly to fit the RCR rear clip.

I sold my engine in the background. The real one is on the way from the USA right now. Cannot wait for it to arrive!
Update : 14th August, 2012
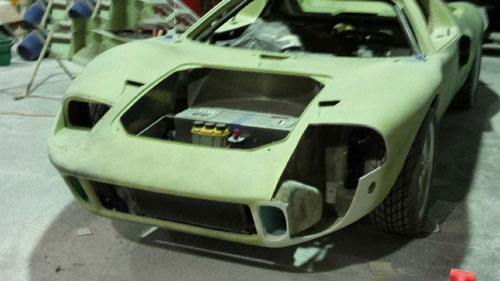
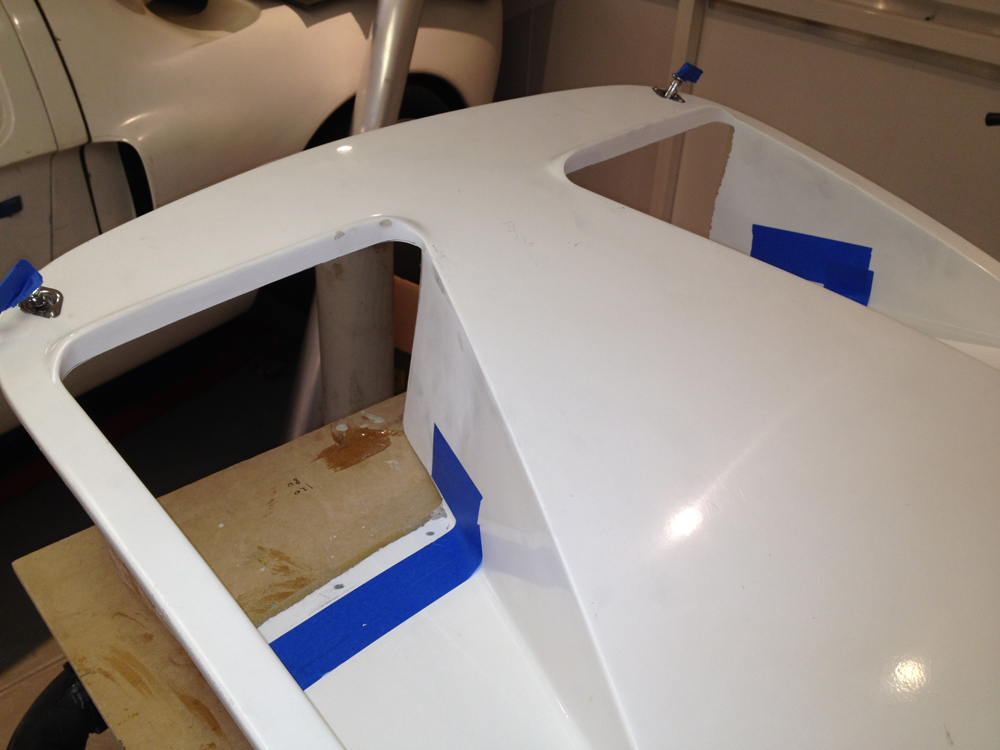
Front "nostril" Panels
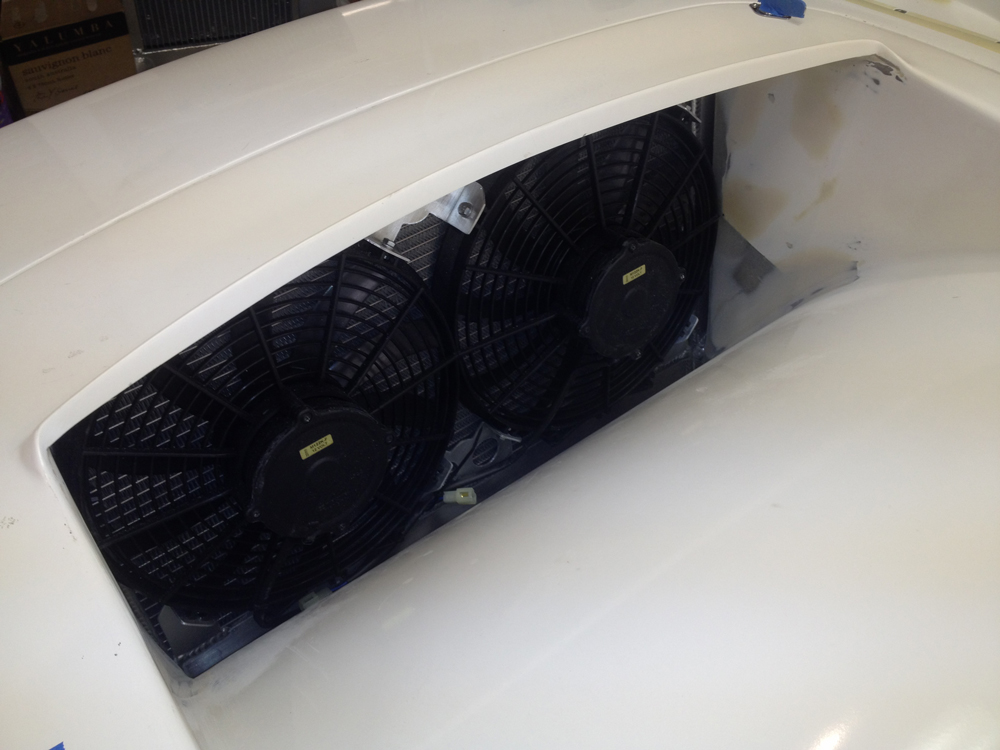
I could not decide on what nostril panels to use on by car. After fitting my crazy large radiator I wanted to make sure airflow was optimised. After seeing a depressing amount of good work in this area by many others I decided to do something similar but as always slightly different. I will use the single one on the track and the twin when cooling is not that critical. The twin hides the fans a little more.
First the single. Cut the hell out of it and extend it. Alloy used as a mold surface. Putting a return in the fiberglass at the bottom made the leading edge very rigid.

Full flow from the radiator and up and out was achieved.
Now the dual.
I then made another alloy form for the extensions.
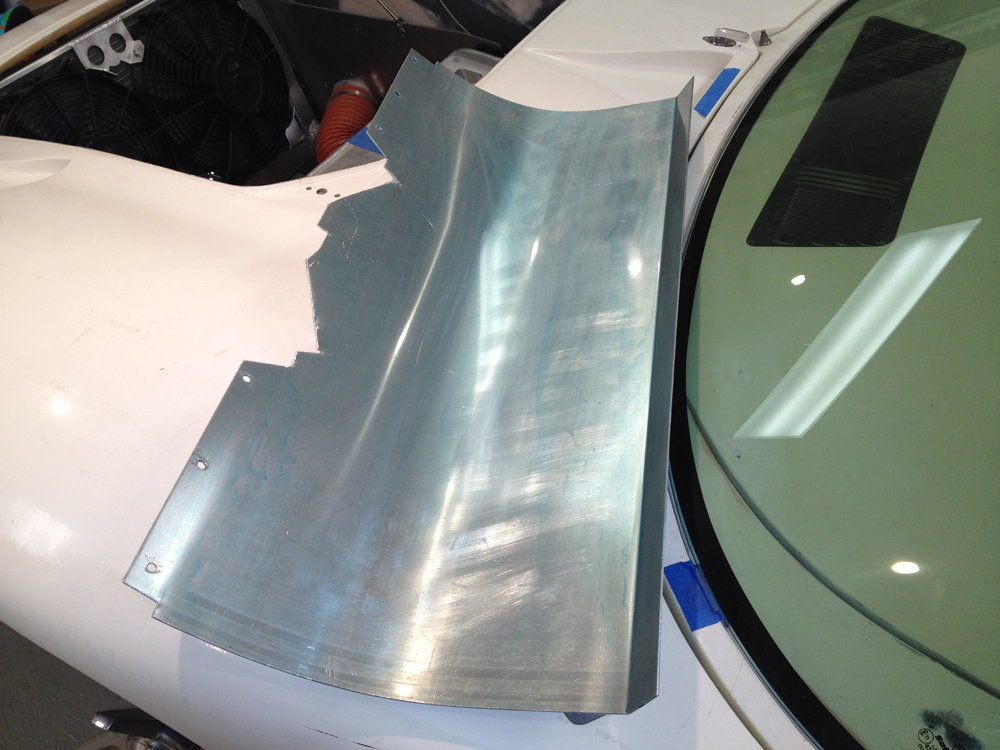
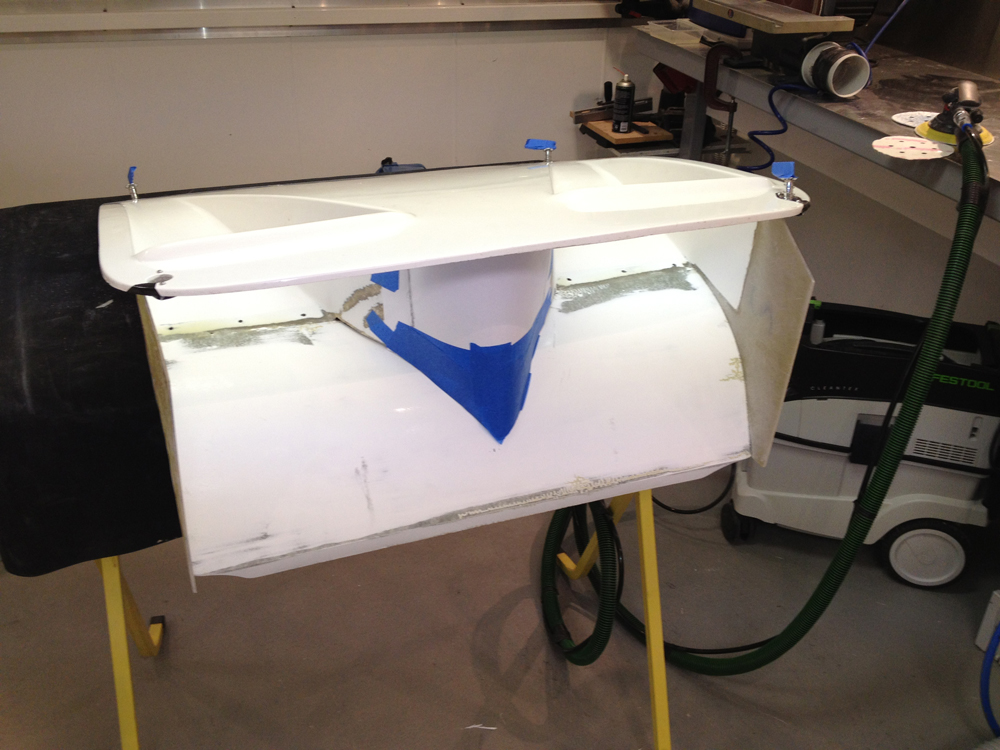
For the nose the above image is a pattern. Another alloy form. Some gel coat below. Then backed up with glass.
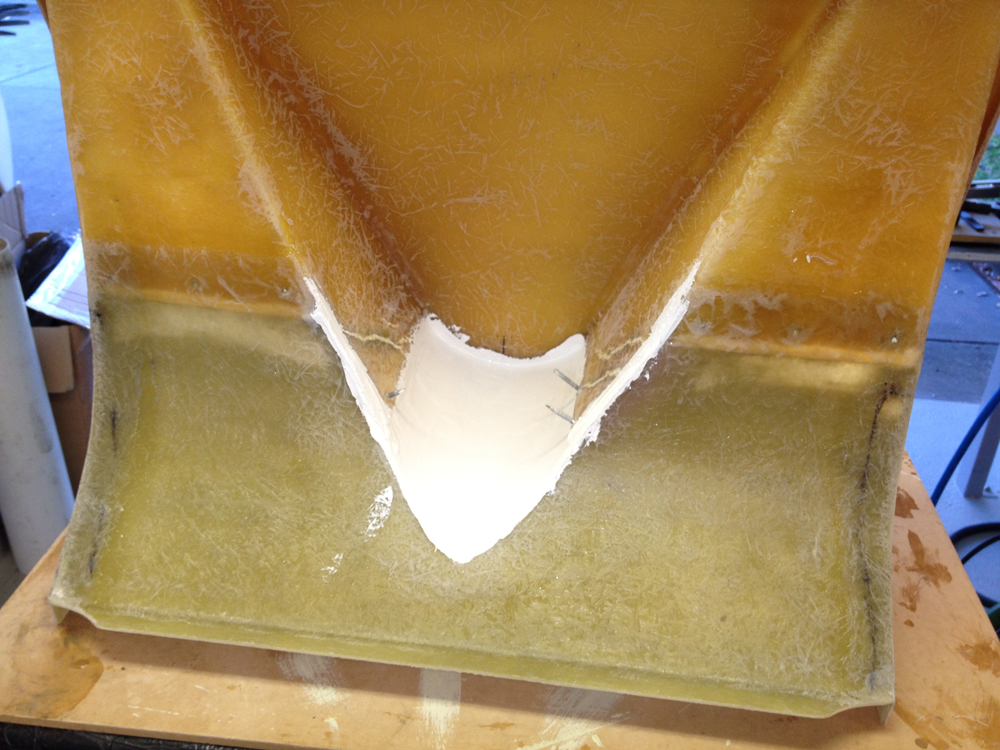
The end result above before finishing gets the air out again. Boy I hate fiberglass!
Update : 30th July, 2012
Rear Clip Pins
Do not want the rear clip flying up so I made some rear clip brackets. Got to keep practicing tig welding the aluminium so I was happy with the result.

Update : 12th November, 2011
Lights & Wipers
Continuing from the work from Page 1.
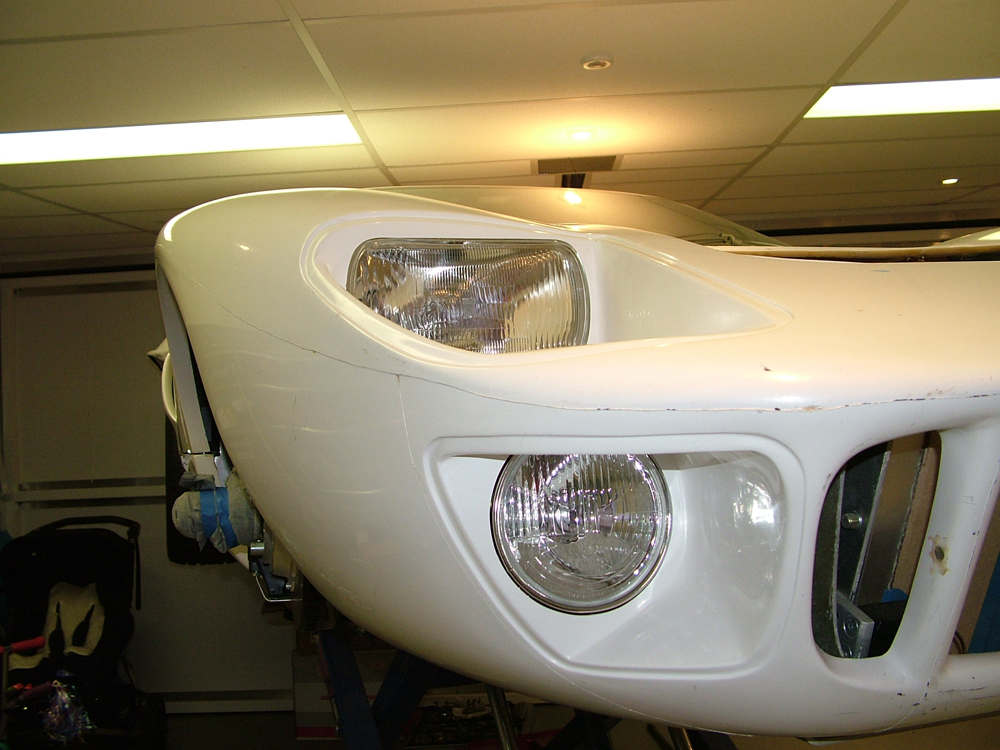
Decided to tackle the lights. Made up adjusters etc for the headlights and it has worked very well. get behind the lights and I have 3 knurled adjusters to aim the headlights. Parts with holes shown are glassed into the body.
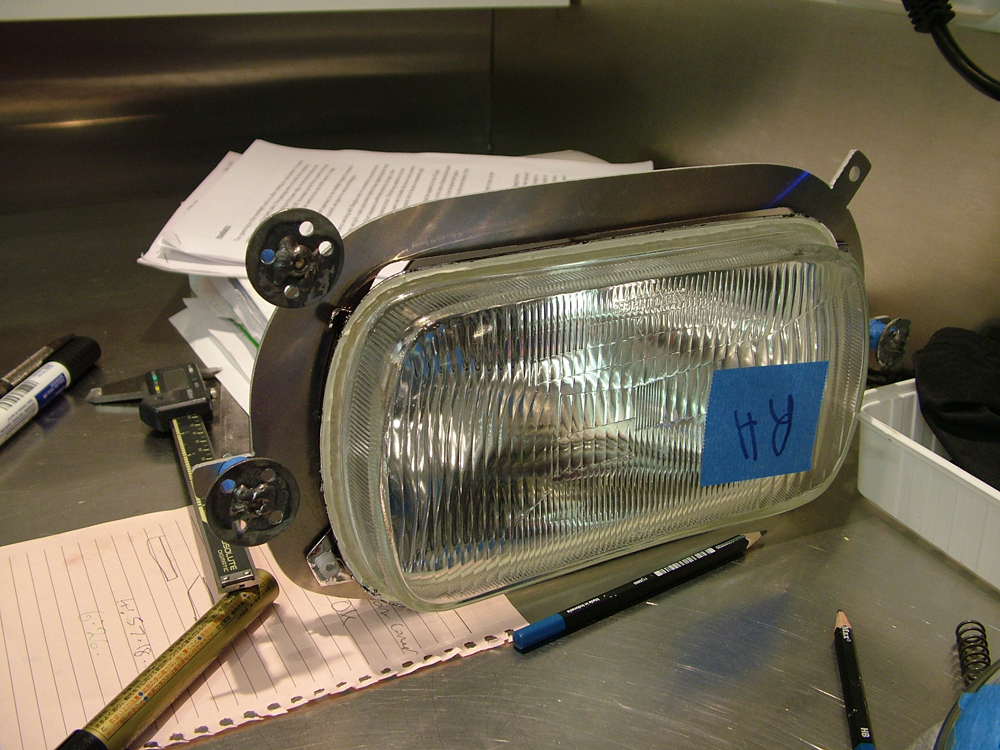
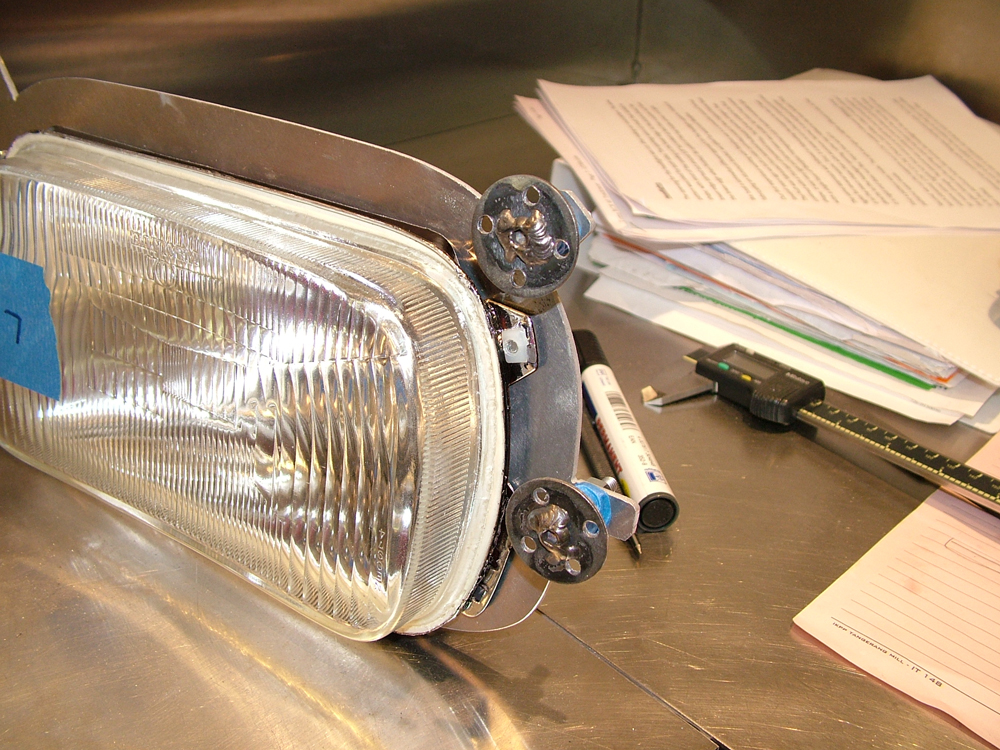
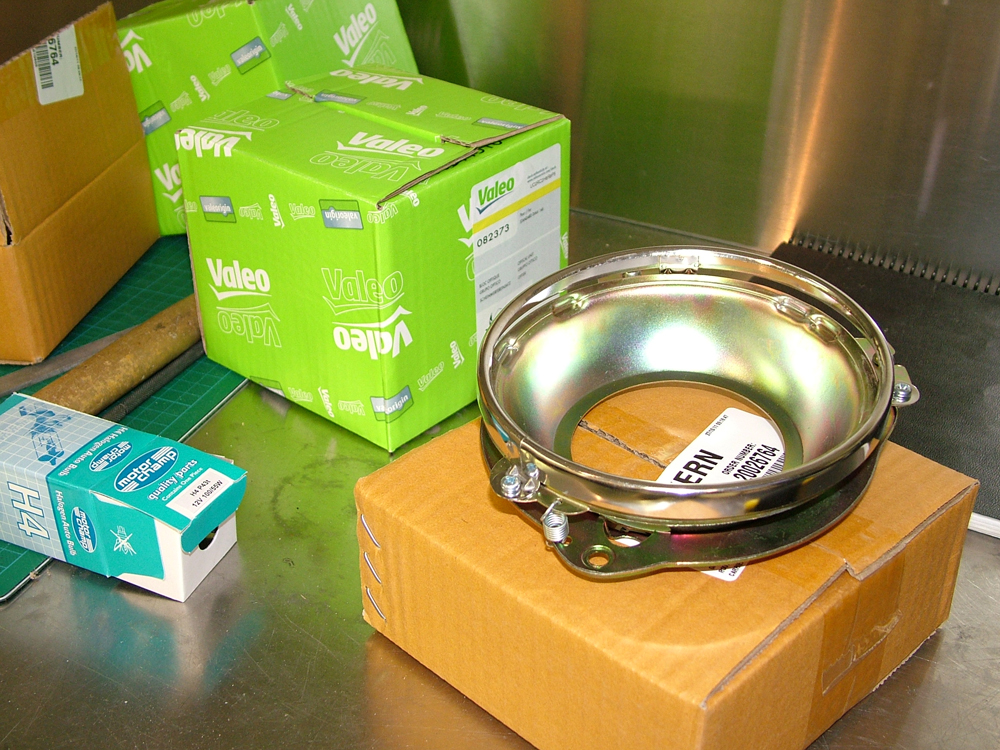
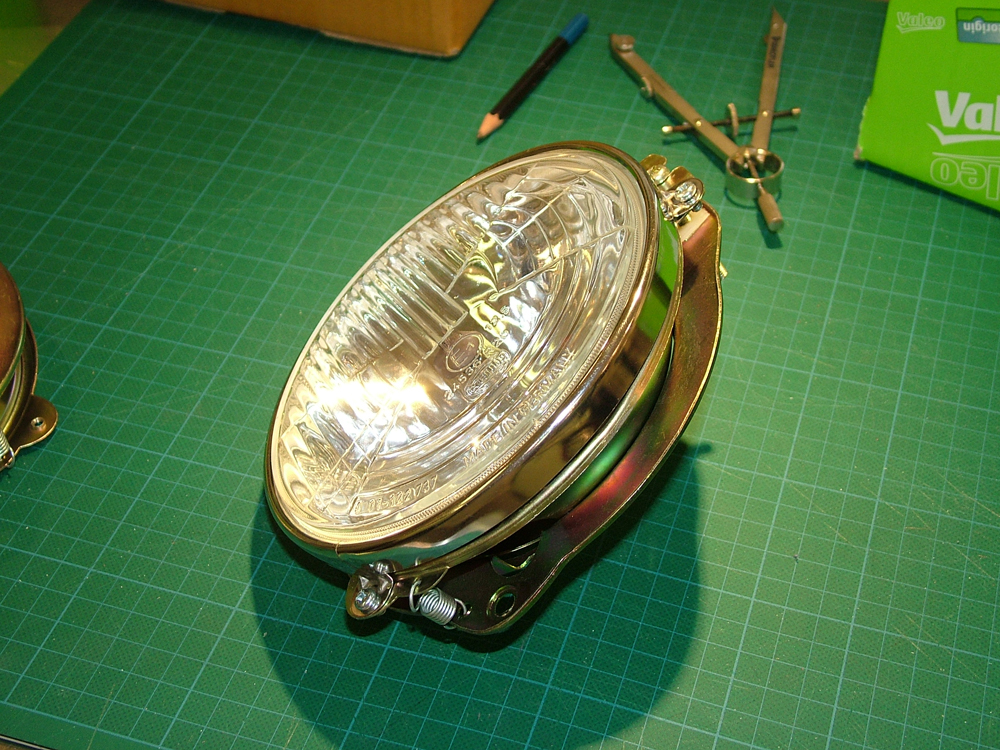
For the driving lights I used Narva light enclosures to hold the Hella 5.75" lights. They allow full adjustment and come with a chrome bezel that looks great.

After fitment it all looks great. Still need some indicators.
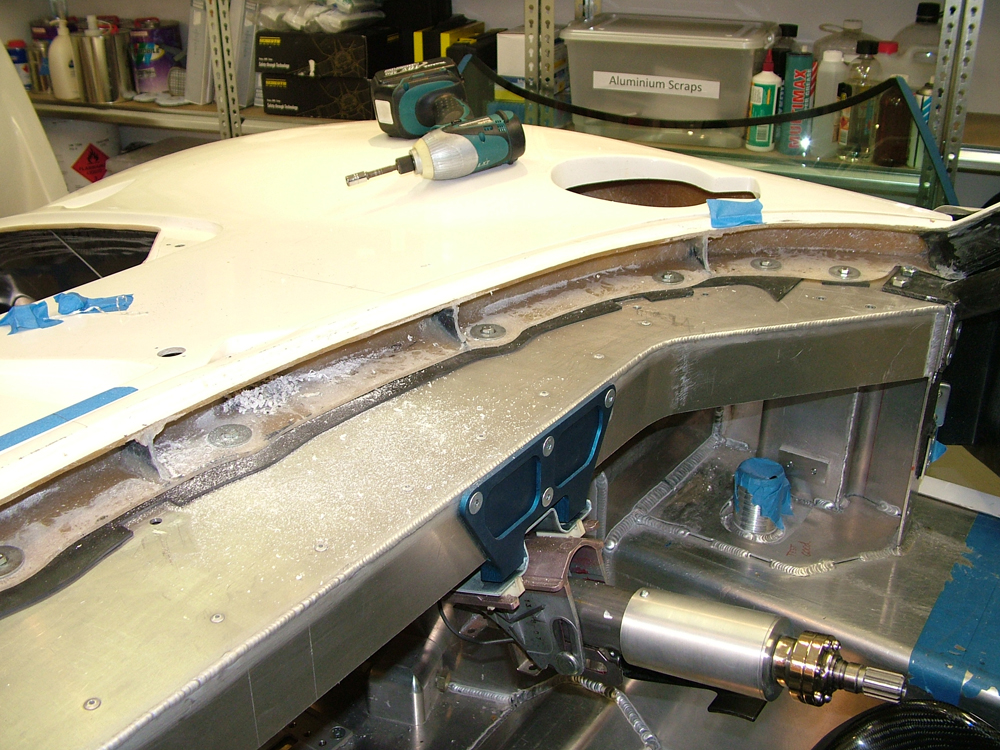
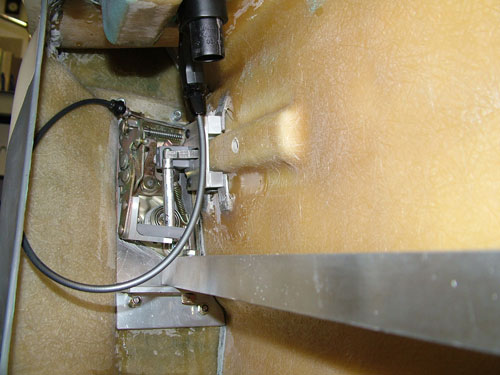
Then I started on the wipers. I really did not like the cable drive wipers. Too much work and too many parts. Used a direct drive geared wiper motor. Has auto park etc, great unit. Made up some brackets and a special adaptor at the end for the wiper arm I'm using and it fitted great.
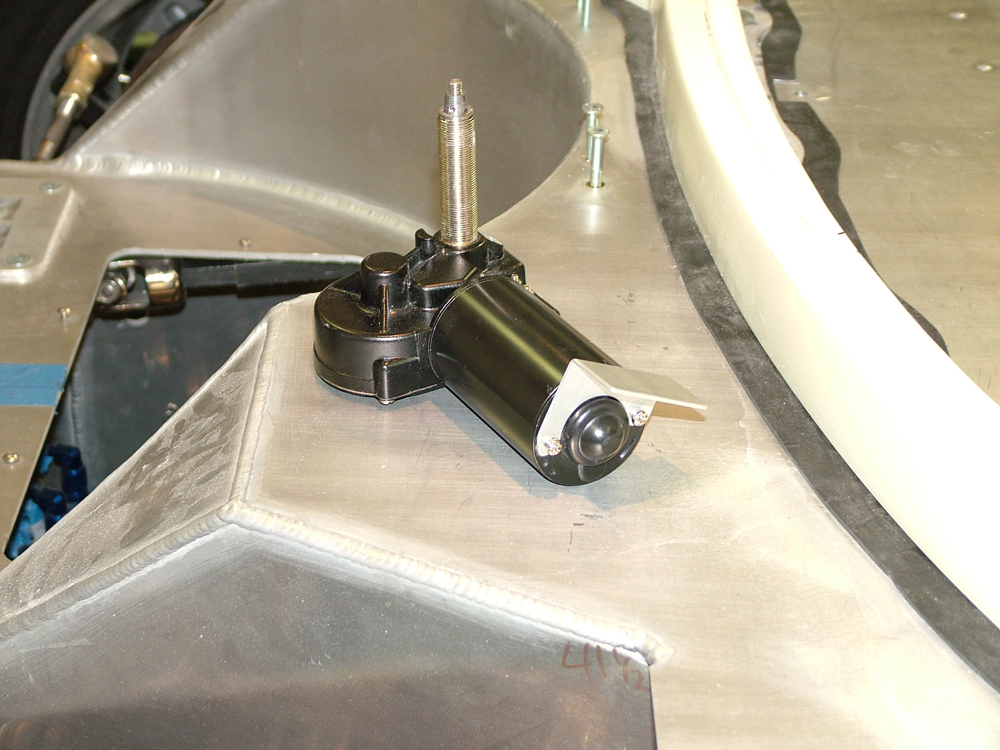
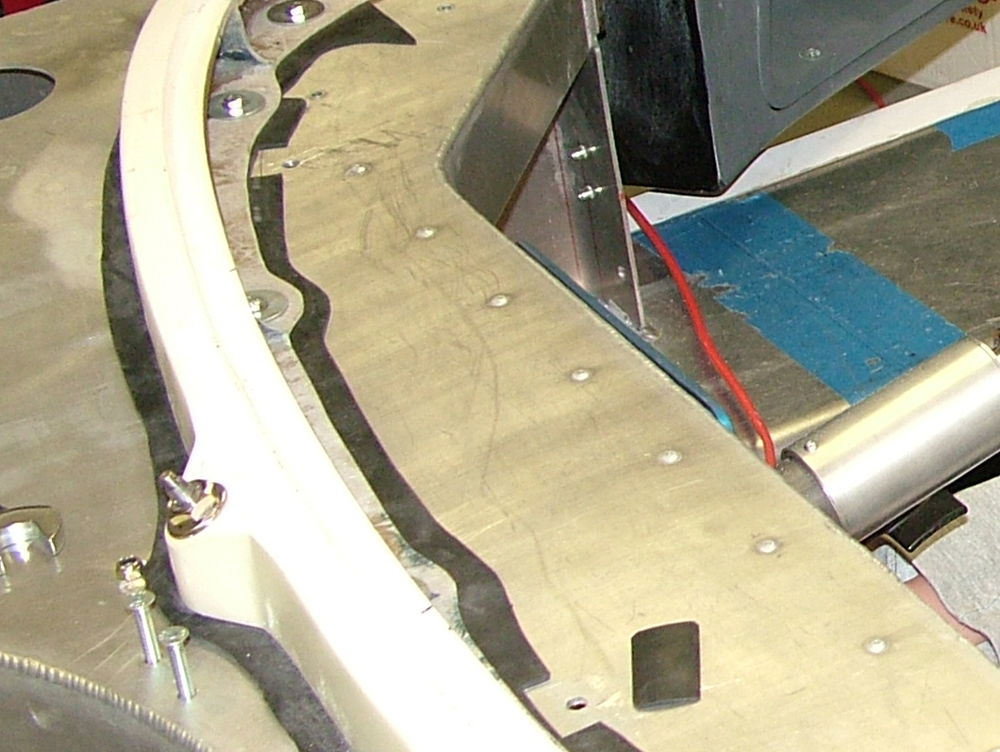
In the image below you can also see my reversal of the spider fitting system. I did not like the screws all around the front of the spider, so I reversed and reinforced the lip under the spider and fasten under the dash. My dash comes out with minimal fasteners so I preferred this. The seal will be trimmed later.
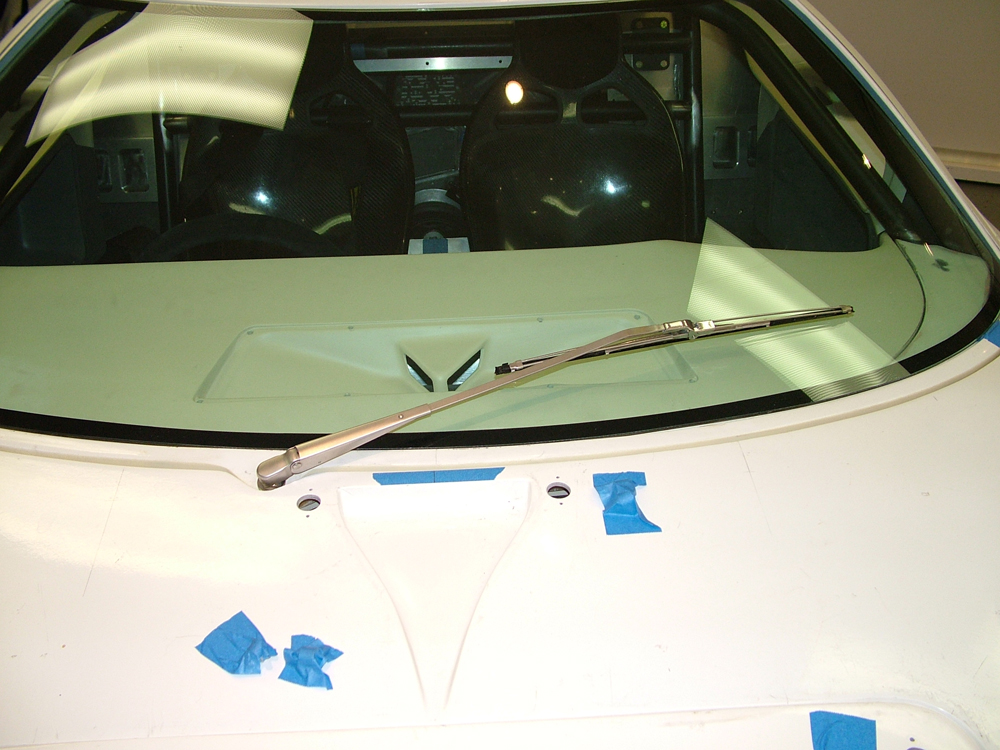
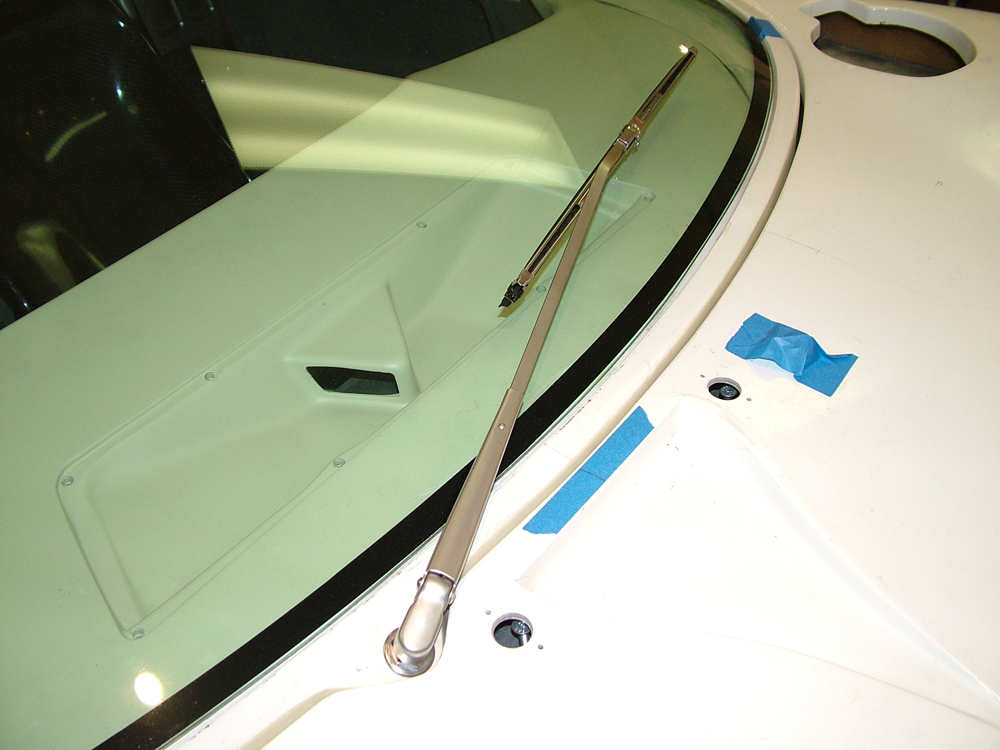
The wiper arm is a NOS 1985 Mercedes 380SL stainless steel arm mated to a Ford GT wiper blade which closely resembles the originals. I think most arms were black so I will most likely powder coat it later.
Update : 1st November, 2011
More Door Work
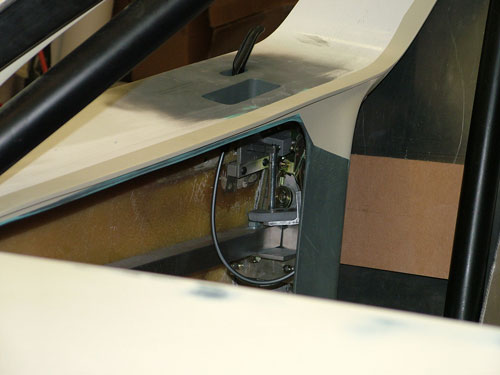
I manufactured some door handle assemblies and fitted those to the doors. These handles can be easily removed from the door by undoing the shoulder bolt fitted.
A small interior handle and recess in the top of the door to pull it closed were also added.
This handle is connected by a cable to the Porsche door lock assembly. As pulling this handle operates the mechanism separately to the outside handle, as should be the case.
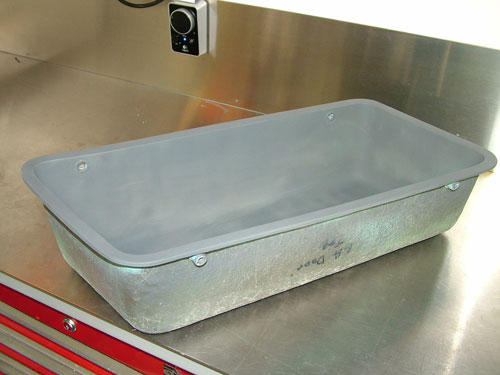
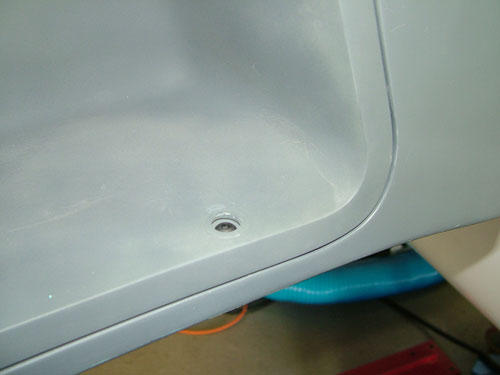
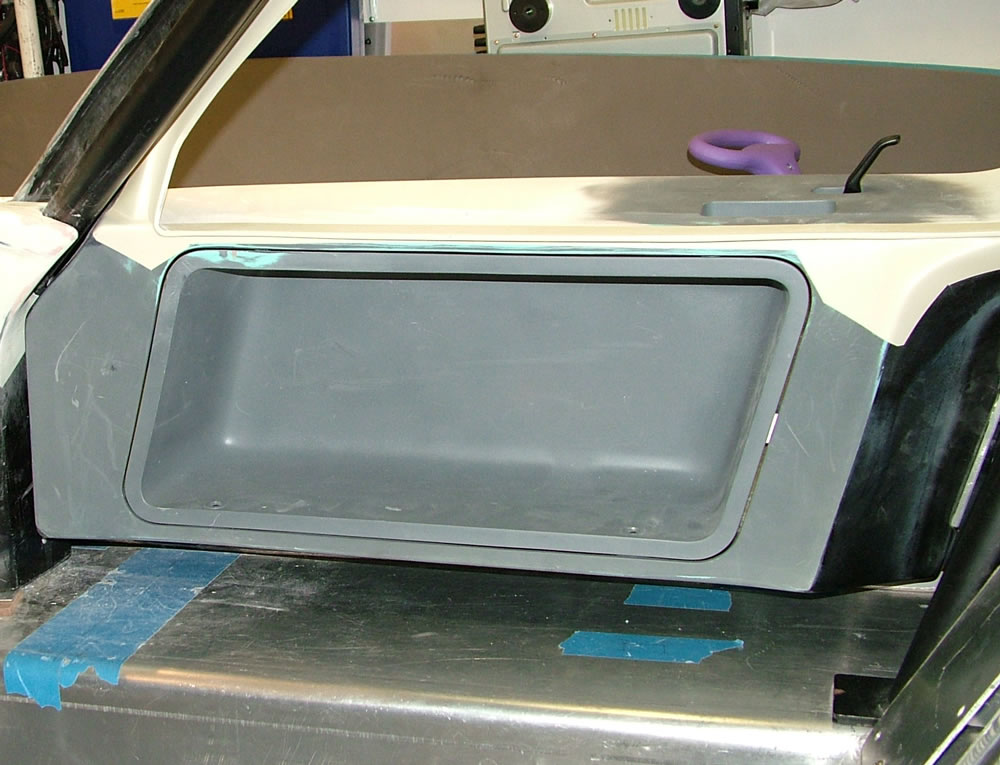
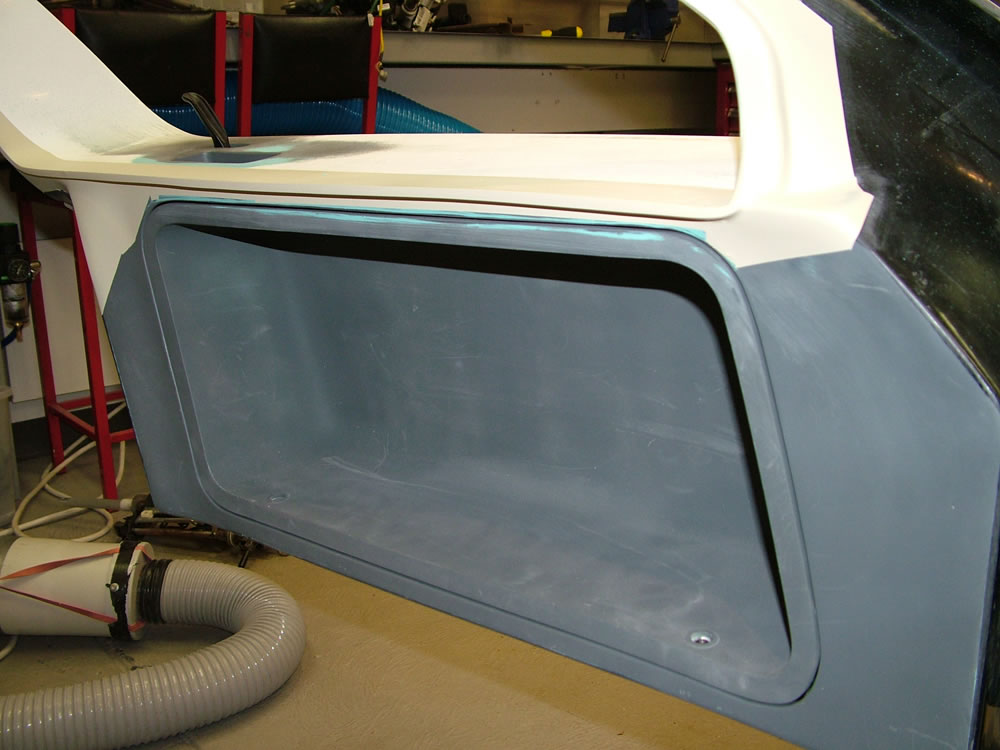
I then looked at door boxes. I really did not like any of the door boxes available so I made my own moulds.
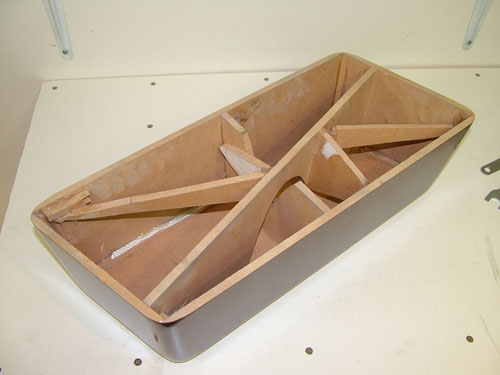
Fibre glass was applied to each of of the molds and removed leaving a perfectly surfaced thin and light box. So that I could get a perfect match to the doors they were glassed in as shown below.
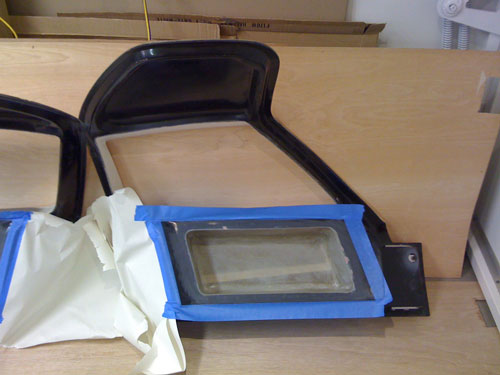
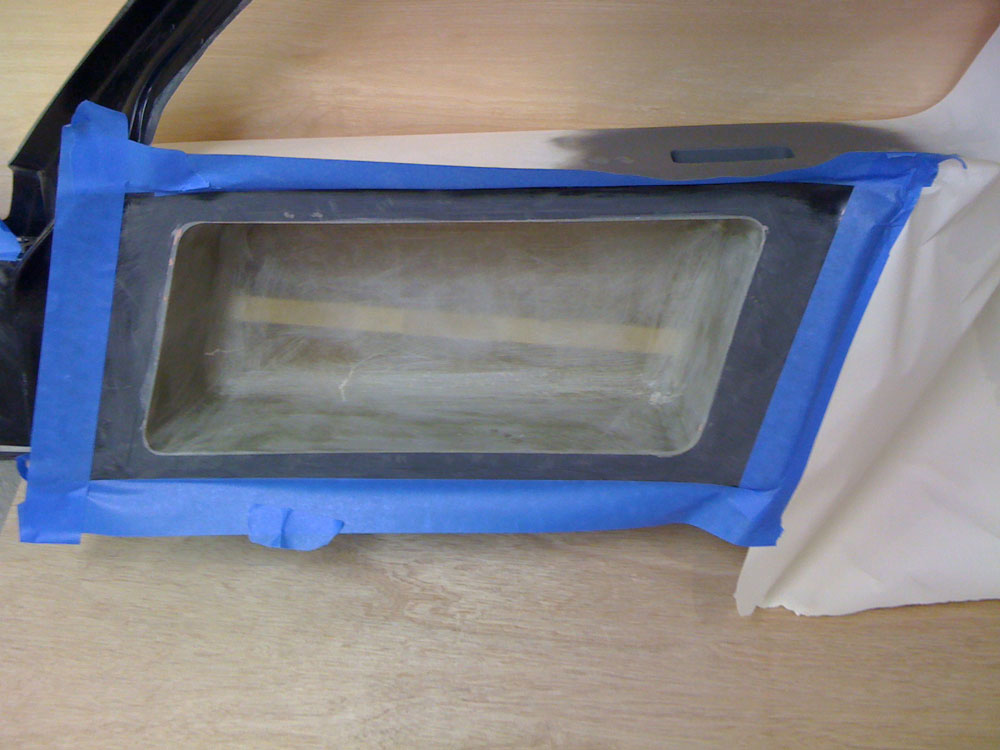
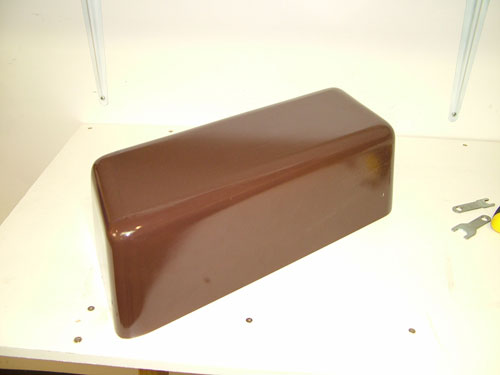
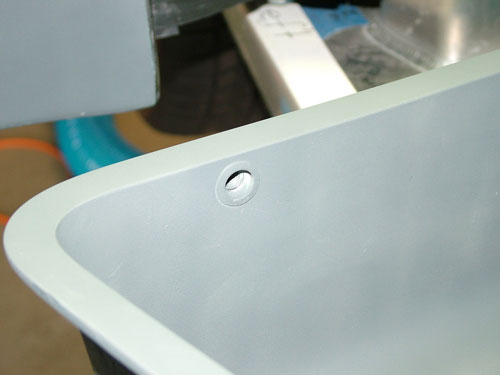
Then the boxes were then carefully cut out of the door to make a flange that matched the contour of the doors perfectly. The result is shown below. Fasteners are on the inside and the box has a perfectly spaced small gap all around. When they are painted black the gap will not be as visible.

Now onto the dashboard (see interior)!
Update : 31st May, 2010