Rear Brake Cooling
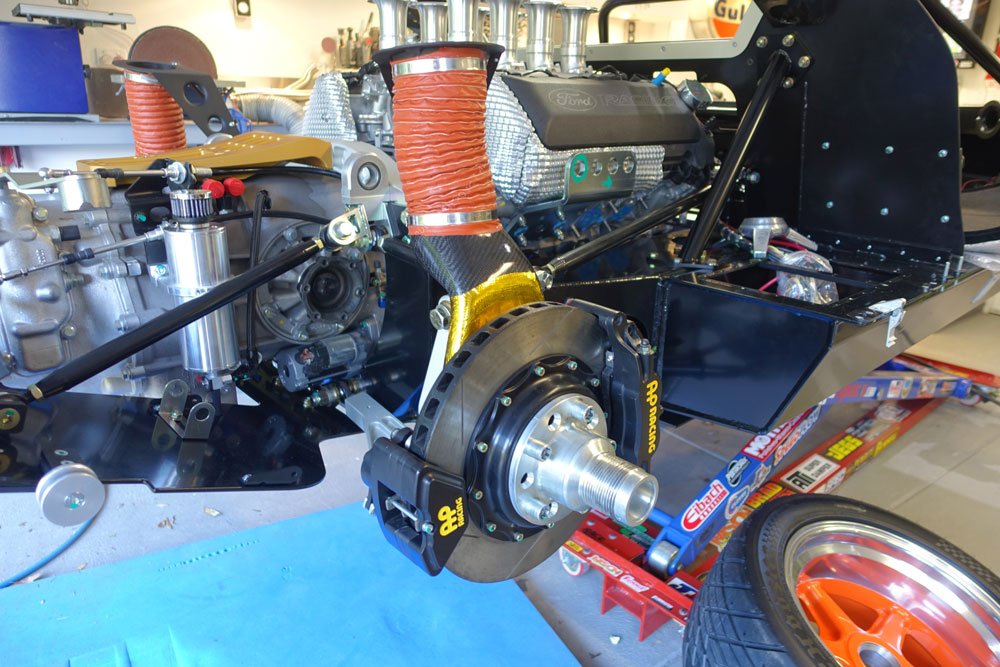
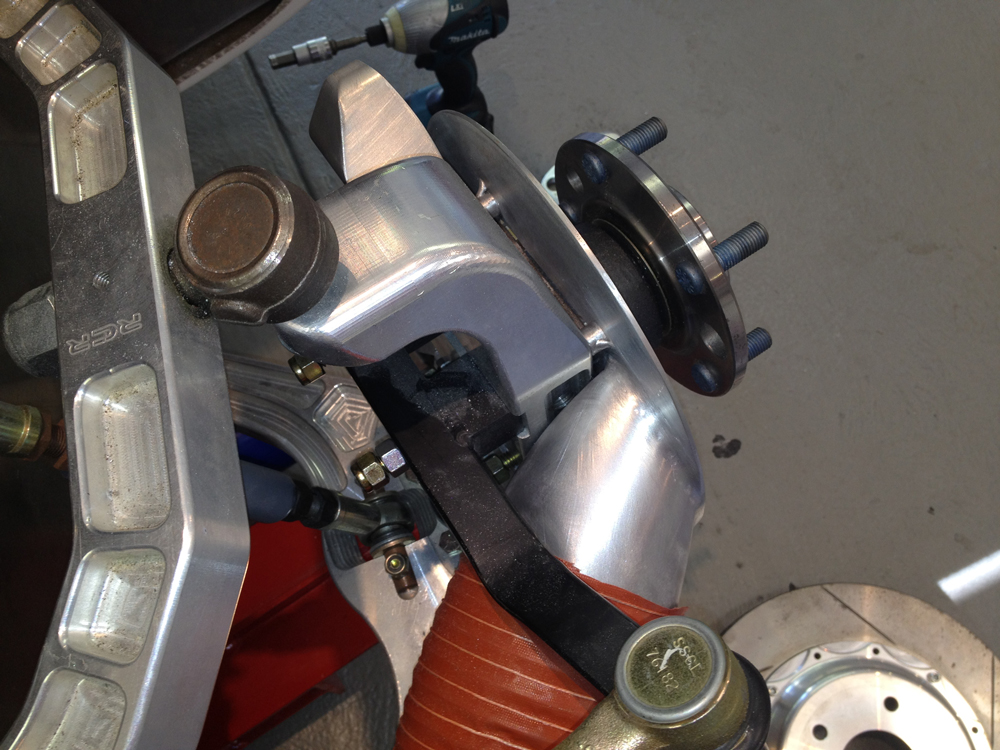
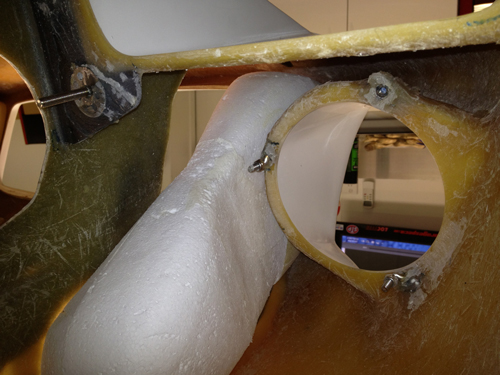
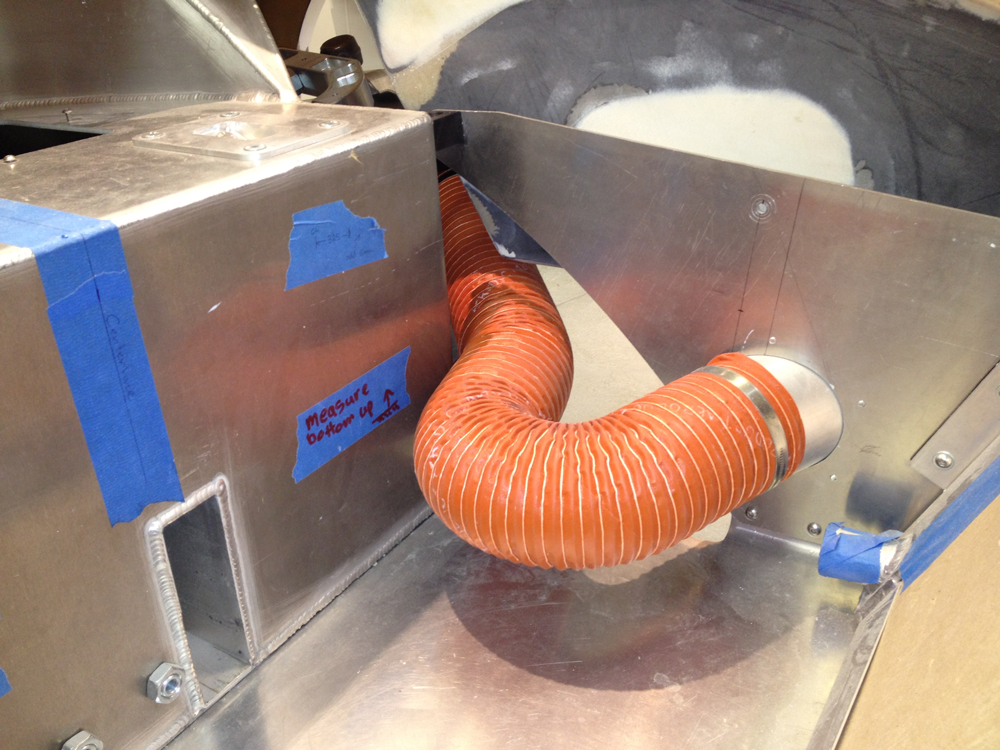
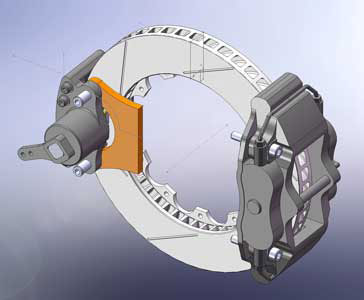
I have done a bit of work on the rear brake cooling. The duct I made fed the air into the center of the rotor but gaps could let it leak out as can be seen below.
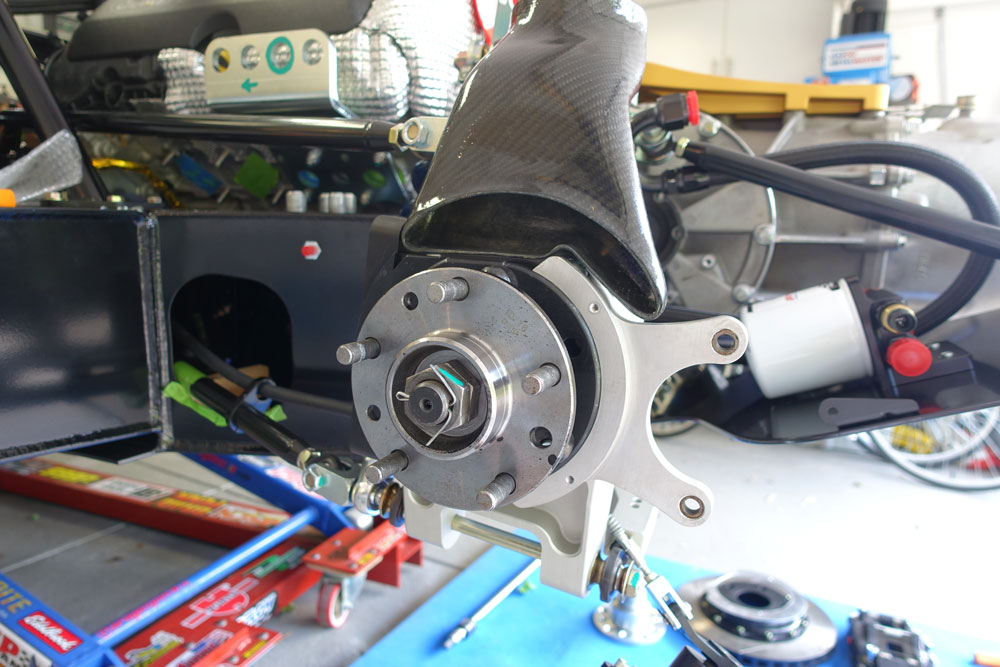
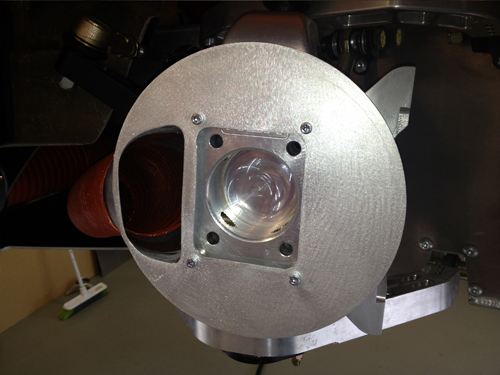
So an alloy plate was constructed to seal off around the inner edge of the rotor to a clearance of approve 1mm.
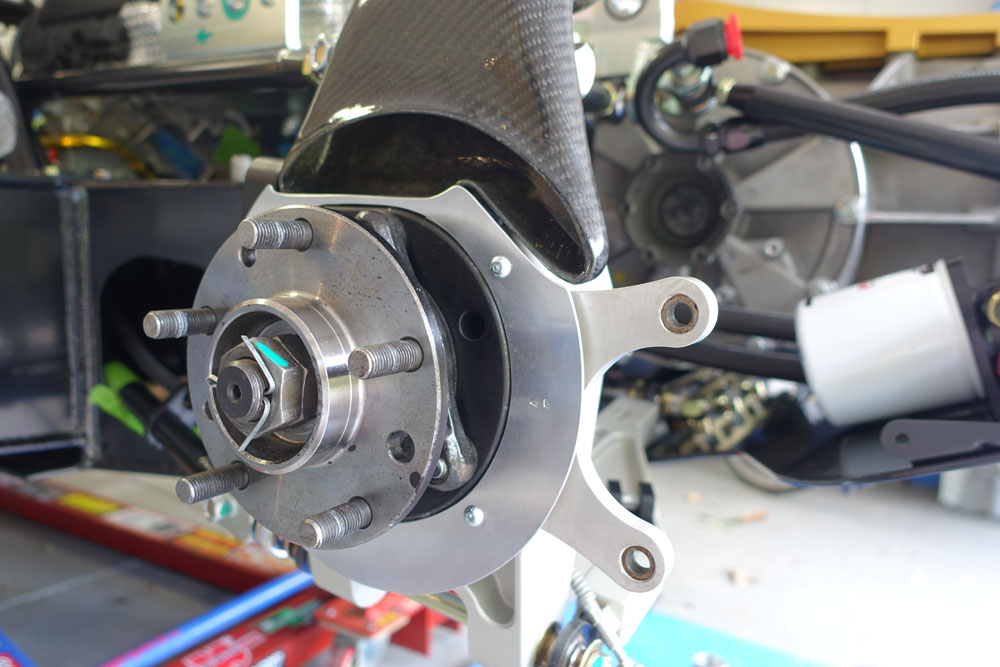
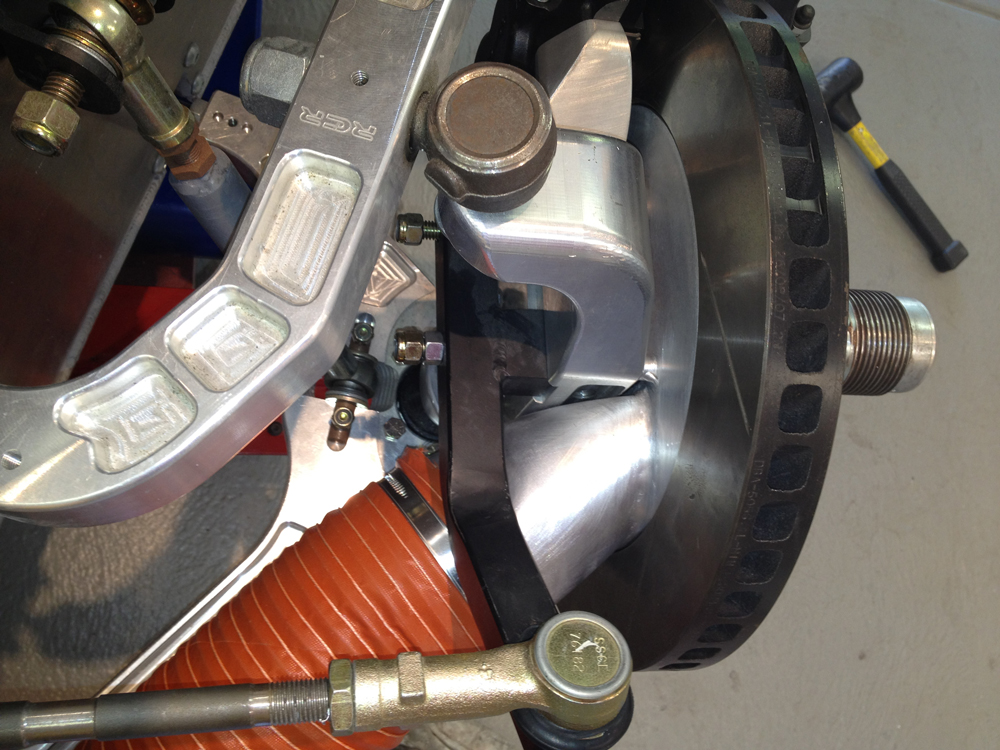
Then the entire assembly could be completed. I added some heat reflecting tape to try and save the carbon duct. I hope it does protect it from the radiant heat of the rotor. It may not but we will see how it goes.
Update : 2nd July, 2008
Brake Cooling Ducts
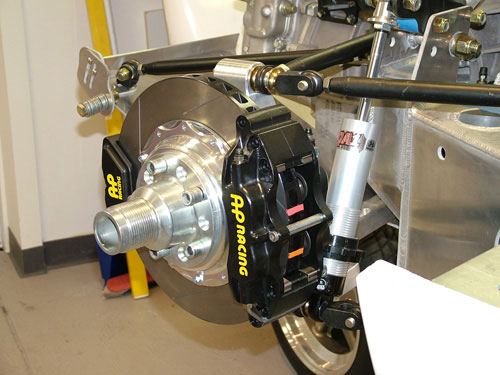
After seeing some great brake setups on a Roaring Forties GT40 I felt I should cool my front brakes as well. Looking at empty front ducts would annoy me so there was that reason too. First step was to make an alloy plate to get the air into the centre of the rotor.
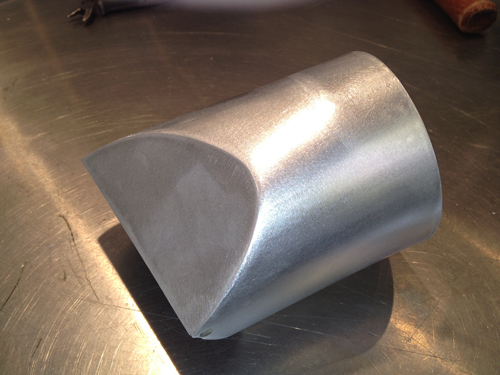
A bit more alloy bashing and welding and it was looking OK. Getting the alloy tube to transition and hold shape at the hose end was tricky. I knew it had to be secure to withstand the load suspension movements may place on it.
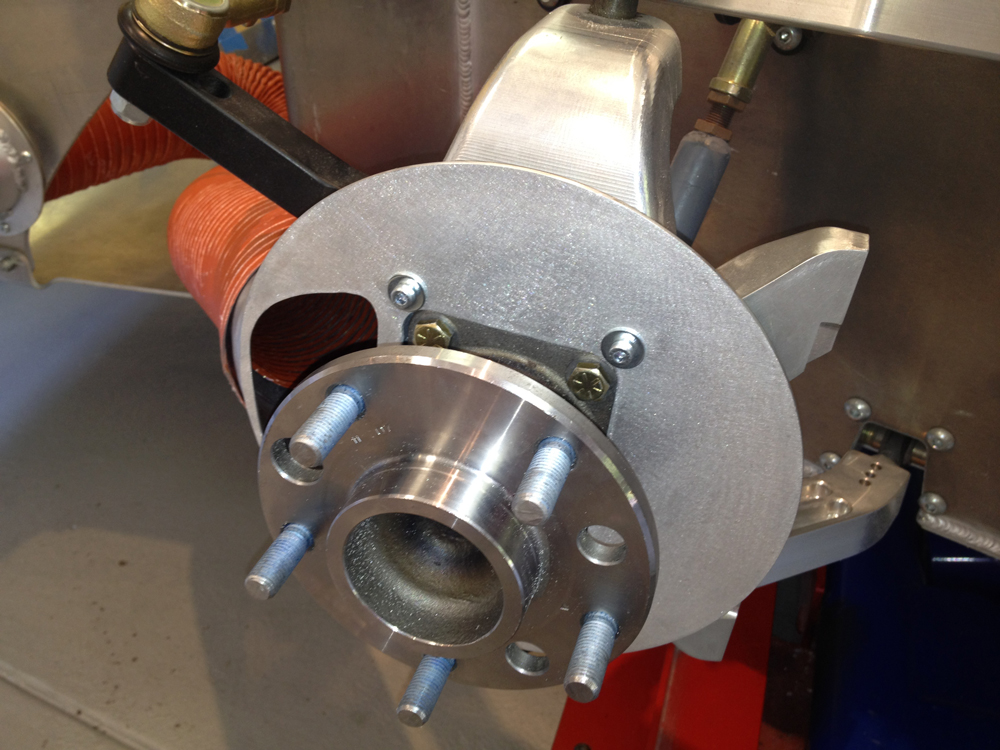
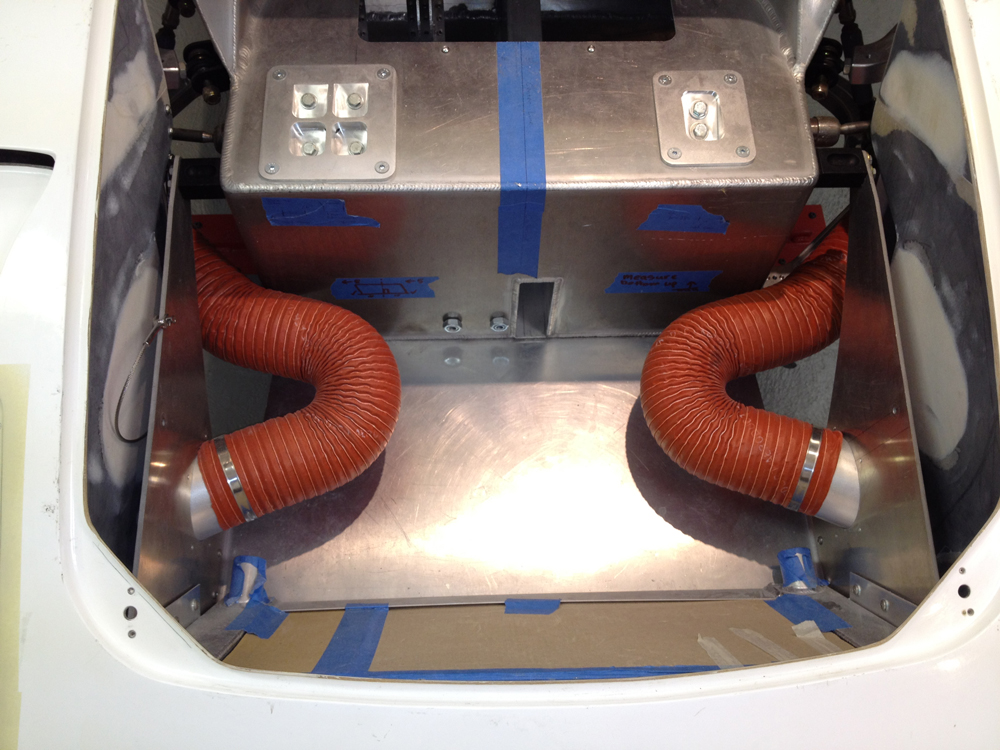
There is a close clearance to the rotor so the air is fed well into the rotor and will exit out of the cooling vanes. Next job was to get the air through the front of the chassis plate. I made another alloy to be and bolted it into the chassis.
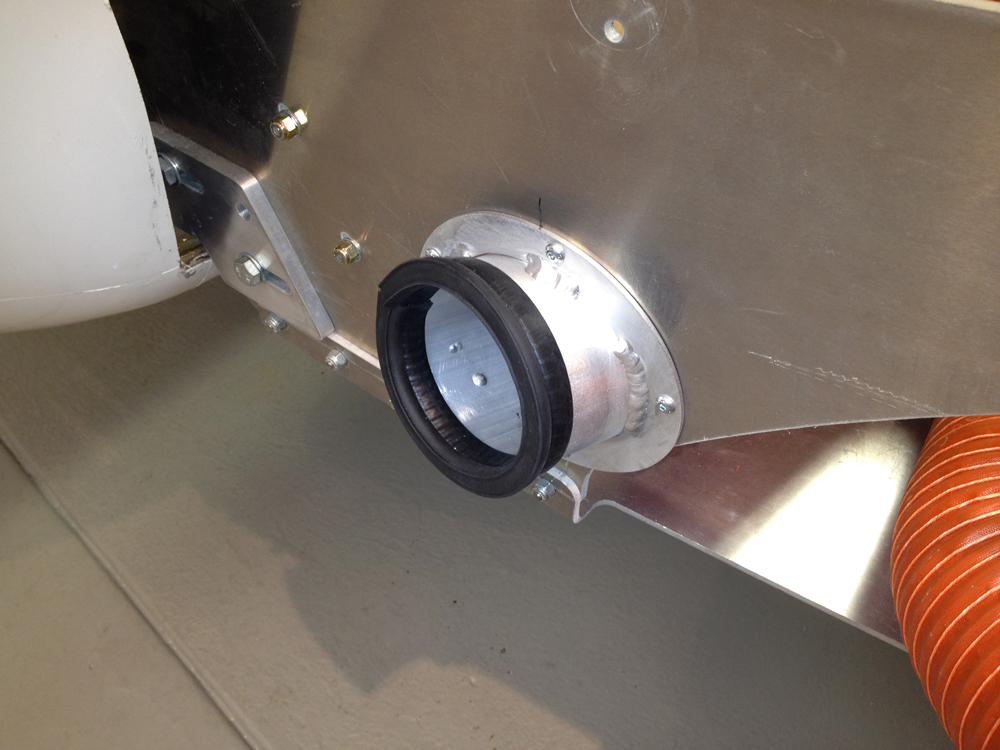
The seal is a temp one, it will be cut properly and glued later. As the clip closes the duct in the body will seal to this as it has a taper cut.
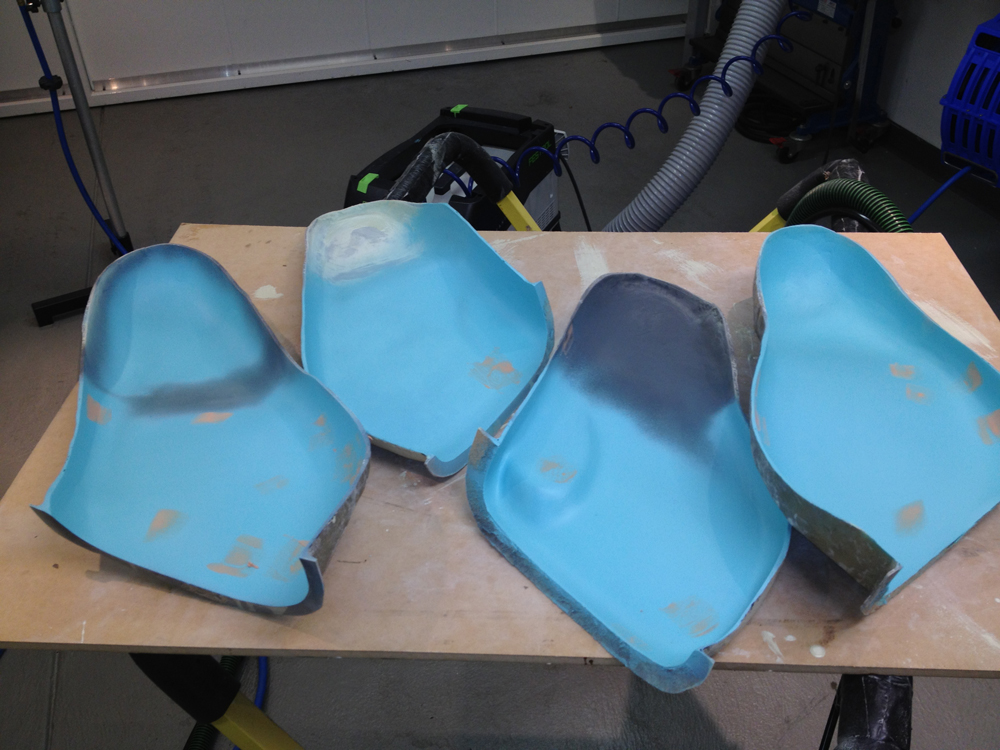
Next job was the fibre glass duct. It needs to be a complex shape to get to the position I want it to smoothly. I also did not want to look in the front of the duct from outside the car and see fibre glass texture so I made a foam pattern that fits inside the body.
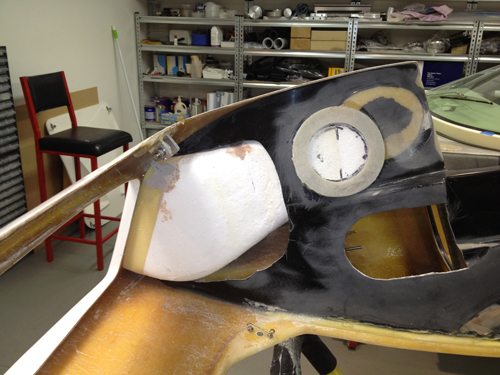
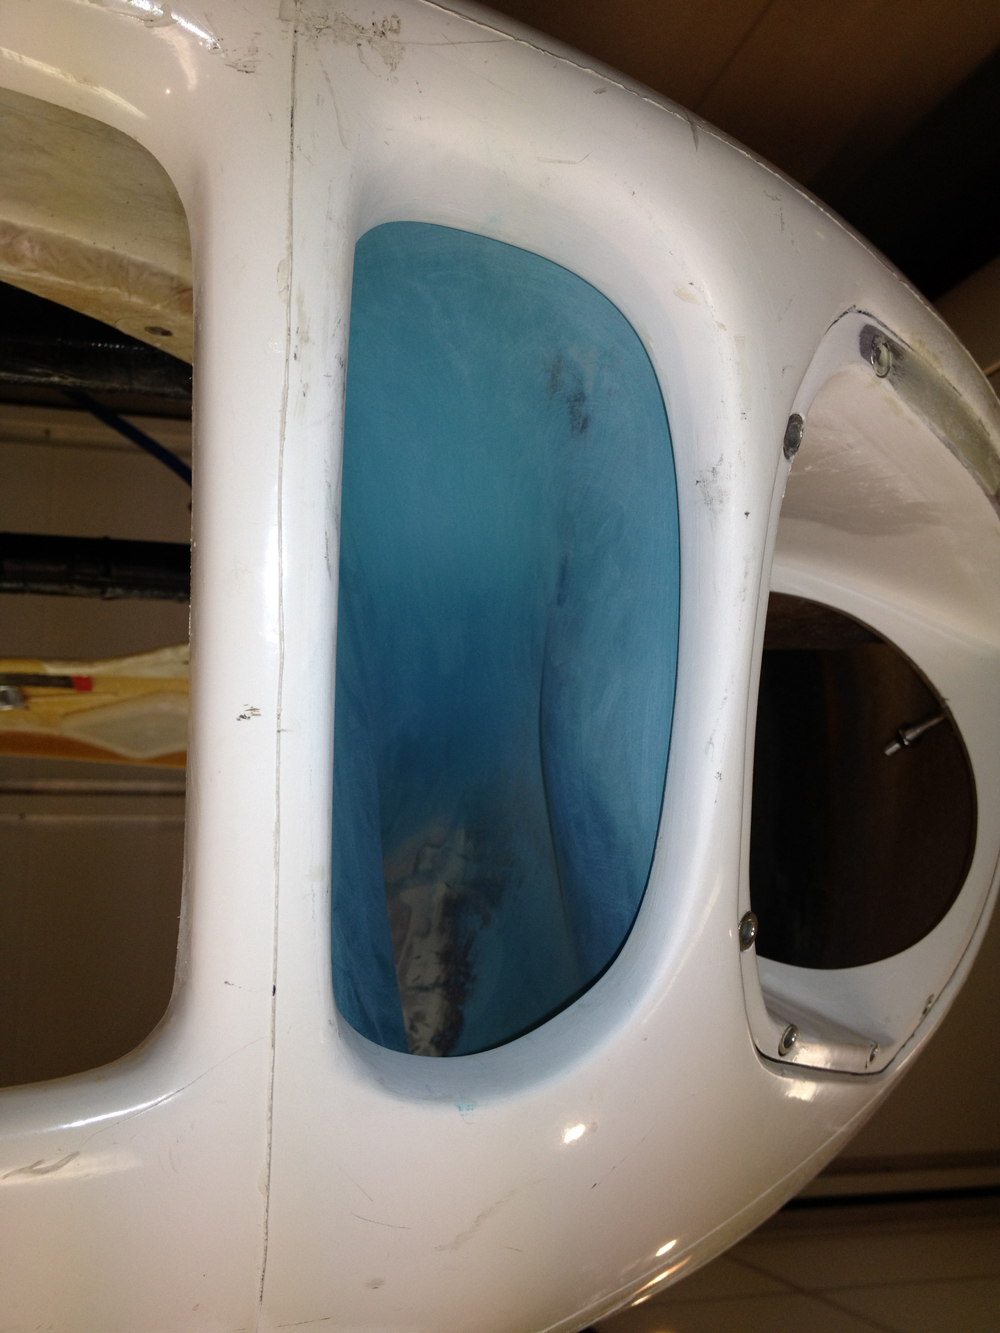
I covered the foam in tape and mould release. Then covered it in fibre glass, split it, finished the inside and rejoined them. Now when you look in the front of the vehicle you will see a perfect smooth duct up into the body.
All in all it came out pretty good. Next job is to fix the ducts inside the body.
Update : 12 February, 2012
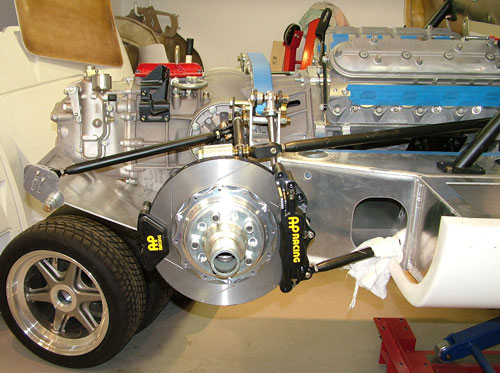
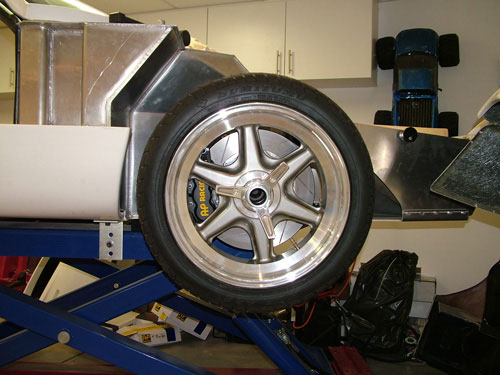
AP Racing Brakes.
Finally turned the virtual parts into reality. Quite a nervous time, looked good on CAD but did I make a stuff up? Very happy to say no. All parts fit perfectly. Found some great machinists to make the parts and they are first quality. If you need any work done I can recommend Zimmer Engineering (see links page).
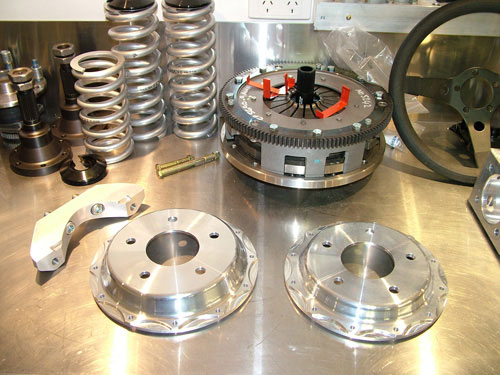
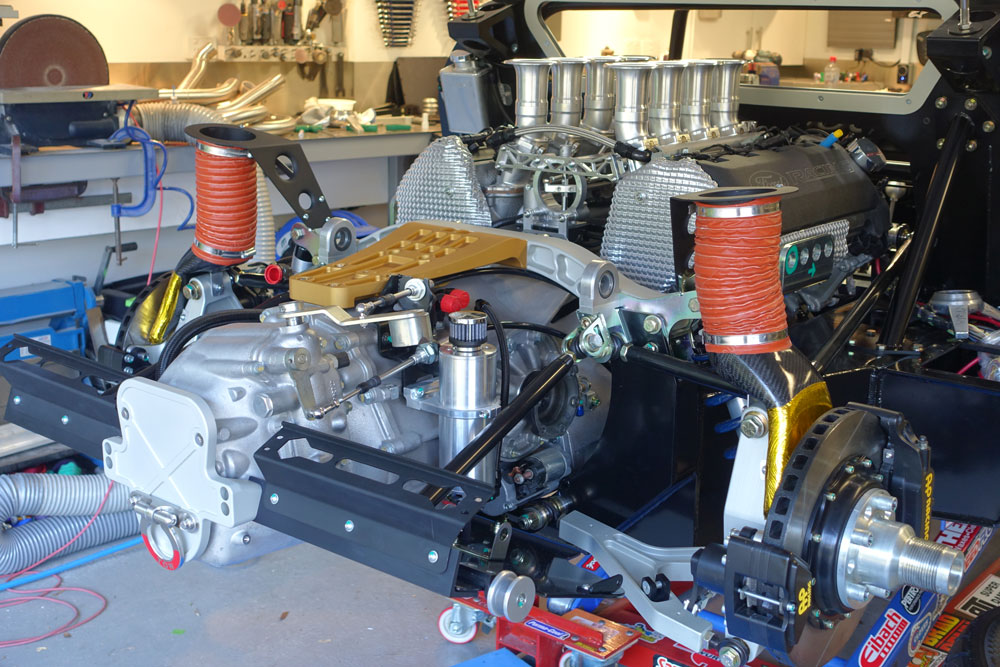
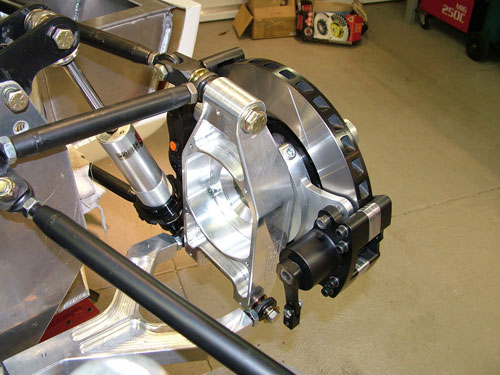
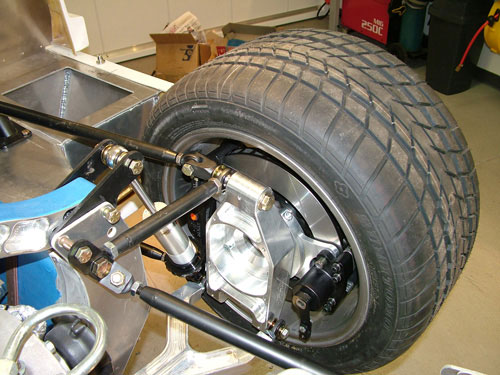
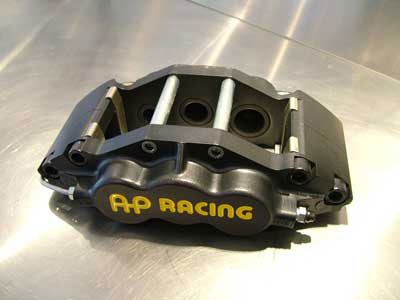
Rear handbrake and caliper turned out well. Rear calipers are AP Racing 4 piston CP5200-808-9S4 clamping a 328mm (12.9") diameter 28mm thick rotor (DBA 5046.1). Happy with the logo milled into the handbrake caliper to match the main brake. I had to make the rear brake leading as it was the only way to fit the handbrake I have used.
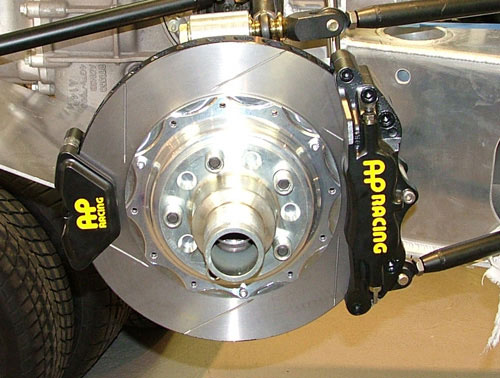
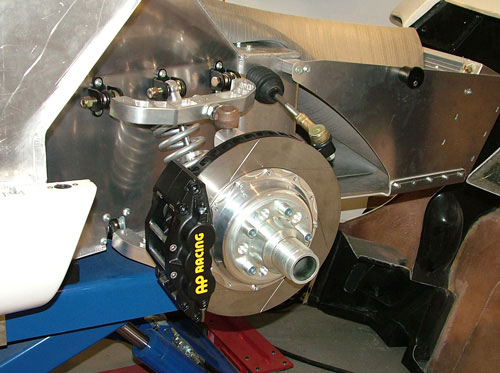
The front setup also turned out very well. Front calipers are AP Racing 6 piston CP5555-808-9S4 clamping a 343mm (13.5") diameter 32mm thick rotor (DBA 5055.1). They really fill out the 17" wheels properly and should provide good stopping power. The installation is pretty tight although if you were keen you could possibly fit a 355mm rotor, but it would be VERY close to the rim.
All in all I'm happy with above. Lucky I have changed from the Willwood brakes as my engineer asked straight away if they have dust seals! Had to get docs from AP to convince him that they have internal dust seals.
Update : 1st September, 2008
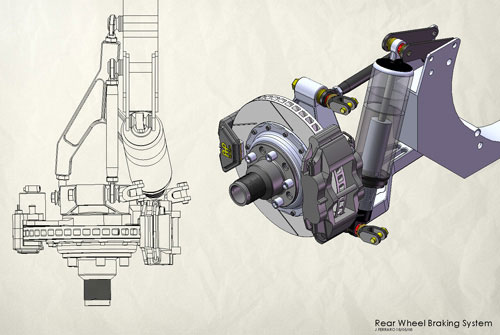
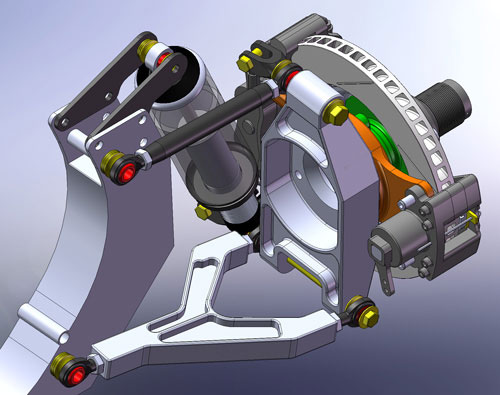
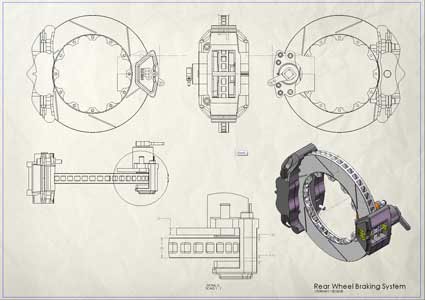
Rear Brakes.
Finally finished the design of the rear braking system. Now the easy part of getting the parts machined up. Clearances with this large braking system and the handbrake caliper required me to adopt a leading brake system in the rear. I must say though this setup is not for the faint hearted, costs of the calipers, rotors and custom alloy brackets is costing way more than the standard setup, but its been fun so far!
Update : 2nd July, 2008
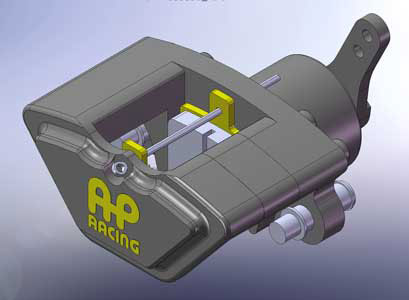
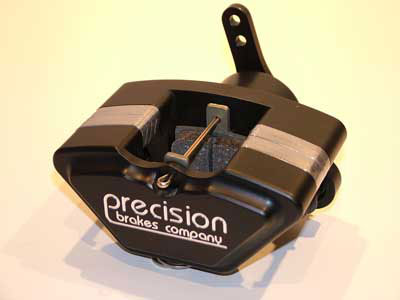
Rear Handbrake Caliper.
I have purchased the Precision Brake handbrake calipers. These will also require custom mountings to the RCR rear uprights. The calipers are quite a good price but the logo does not suit the AP brakes. I have no problem removing the logo as personally the support given by Precision Brakes has been terrible. No replies to emails or calls! Getting the logo into CAD was easy, I will now simply have it NC machined into the caliper and I will paint it yellow to match the brake calipers.
Next job is to design the brackets for the rear brakes and the handbrake calipers. Need to wait for the car to turn up to finish measuring the rear upright.
Update : 17th May, 2008
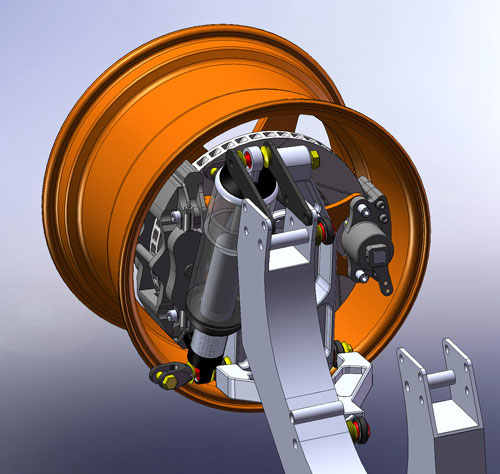
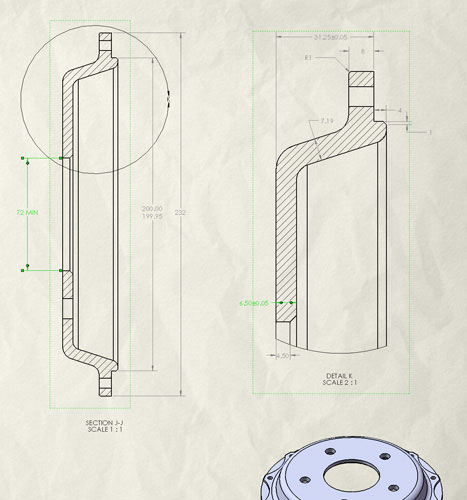
Designed the rotor hats.
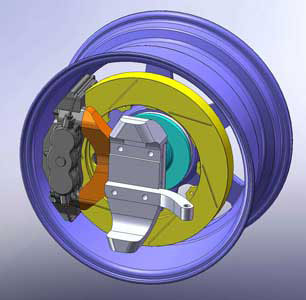
As can be seen below the front rotor hats (in yellow) have been designed. I will be looking at doing final checks when the car arrives before releasing these to be NC machined. I have all the calipers and rotors. Will also be working on the handbrake calipers soon.

Update : 7th May, 2008
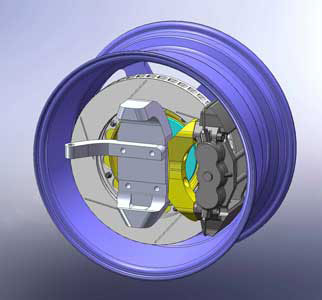
Early CAD design to accommodate the AP racing brakes
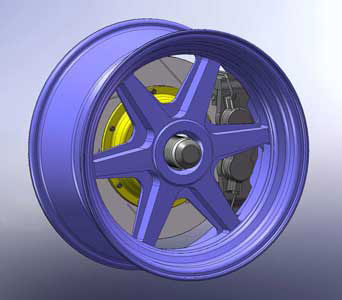
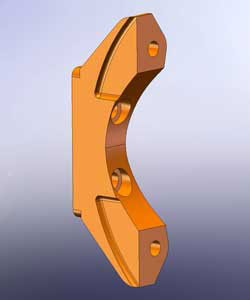
Shown below are the current CAD designs to accommodate the larger AP racing brakes. The RCR kit supplies smaller brakes to fit into 15" rims. With my car specified with the 17" rims I decided to upgrade them. Shown below are some of the front CAD work I have done to develop the caliper brackets.
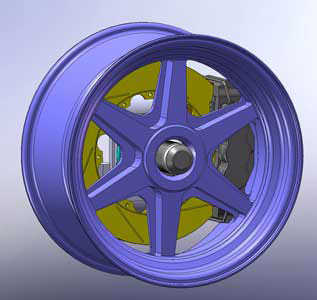

Next step is to design the rotor hat and then move on to the front.
Update : 3rd May, 2008